
MX5 NC Cluster Gauge Kit V2
Original price was: 399,99 $.359,99 $Current price is: 359,99 $.
Digital gauge set for the Mazda MX5 NC – adds aftermarket performance with OEM-like appearance.
Here is the same kit, made to fit all years of NAs and NBs!
Description
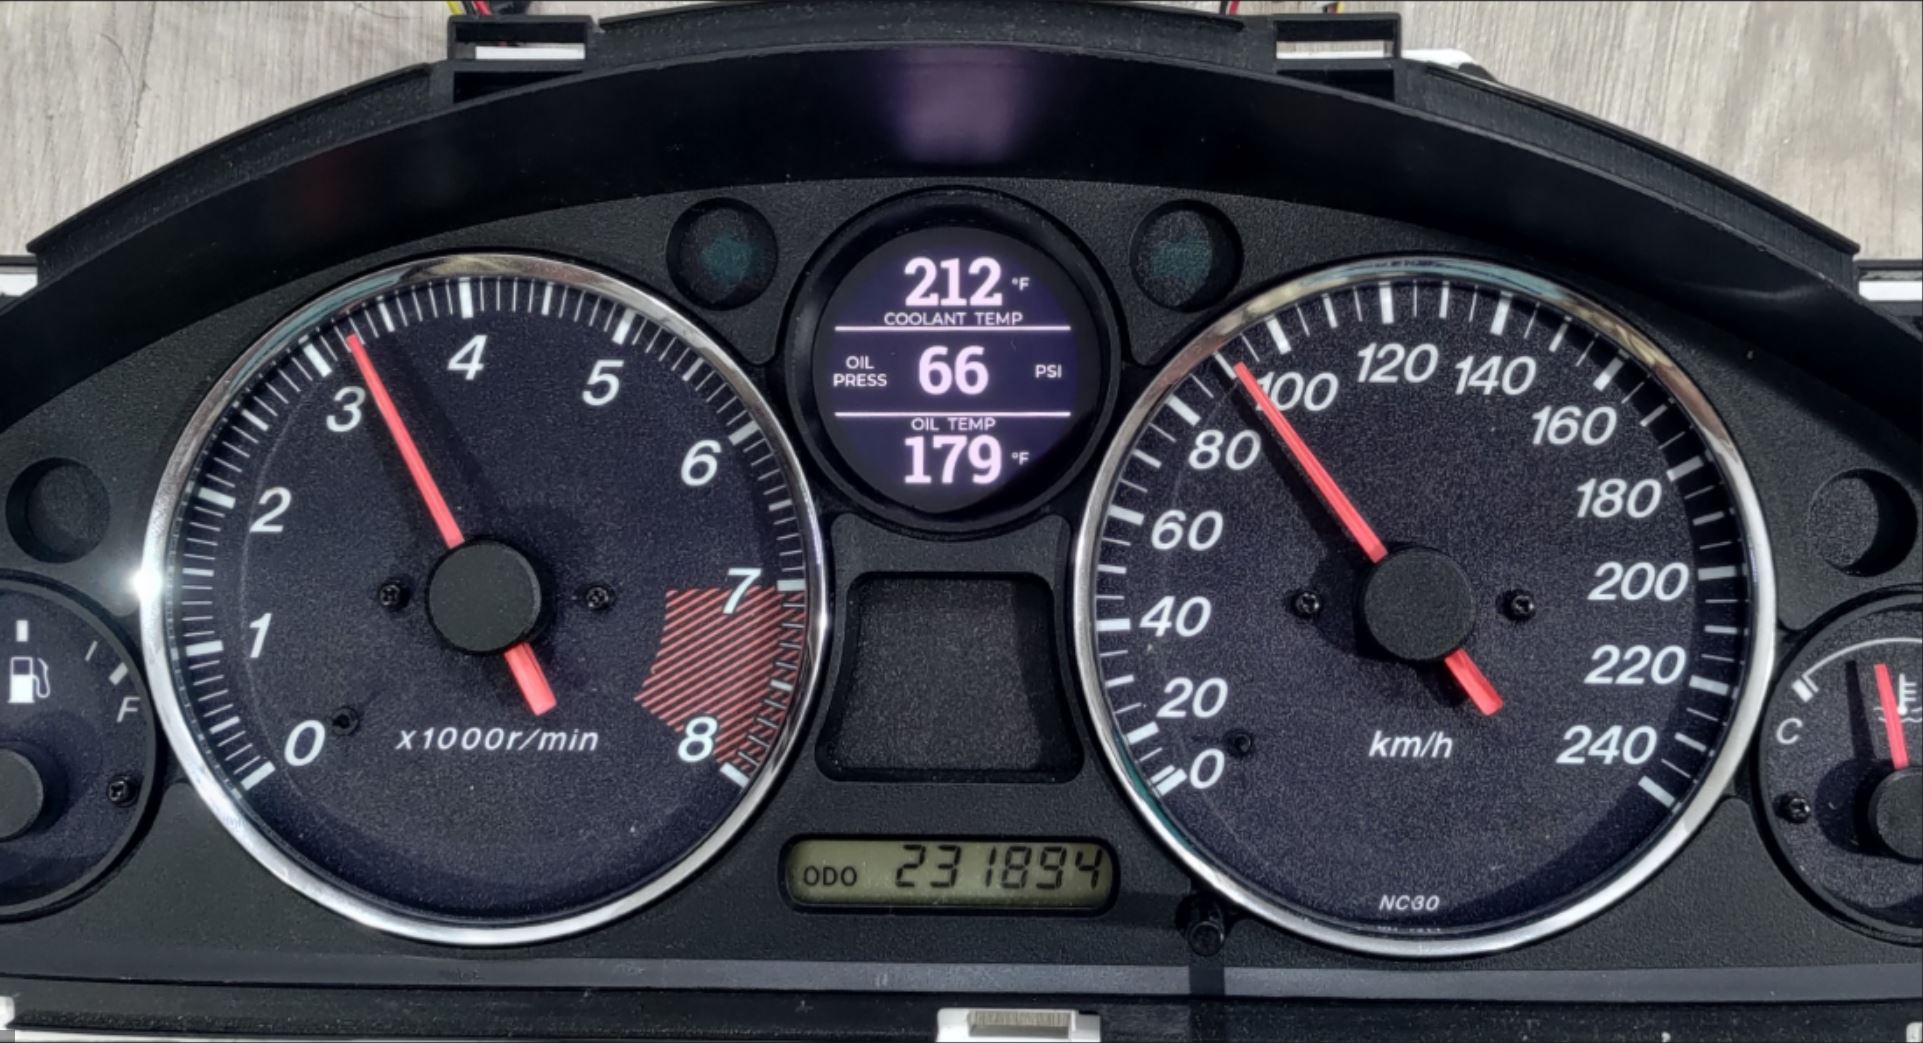
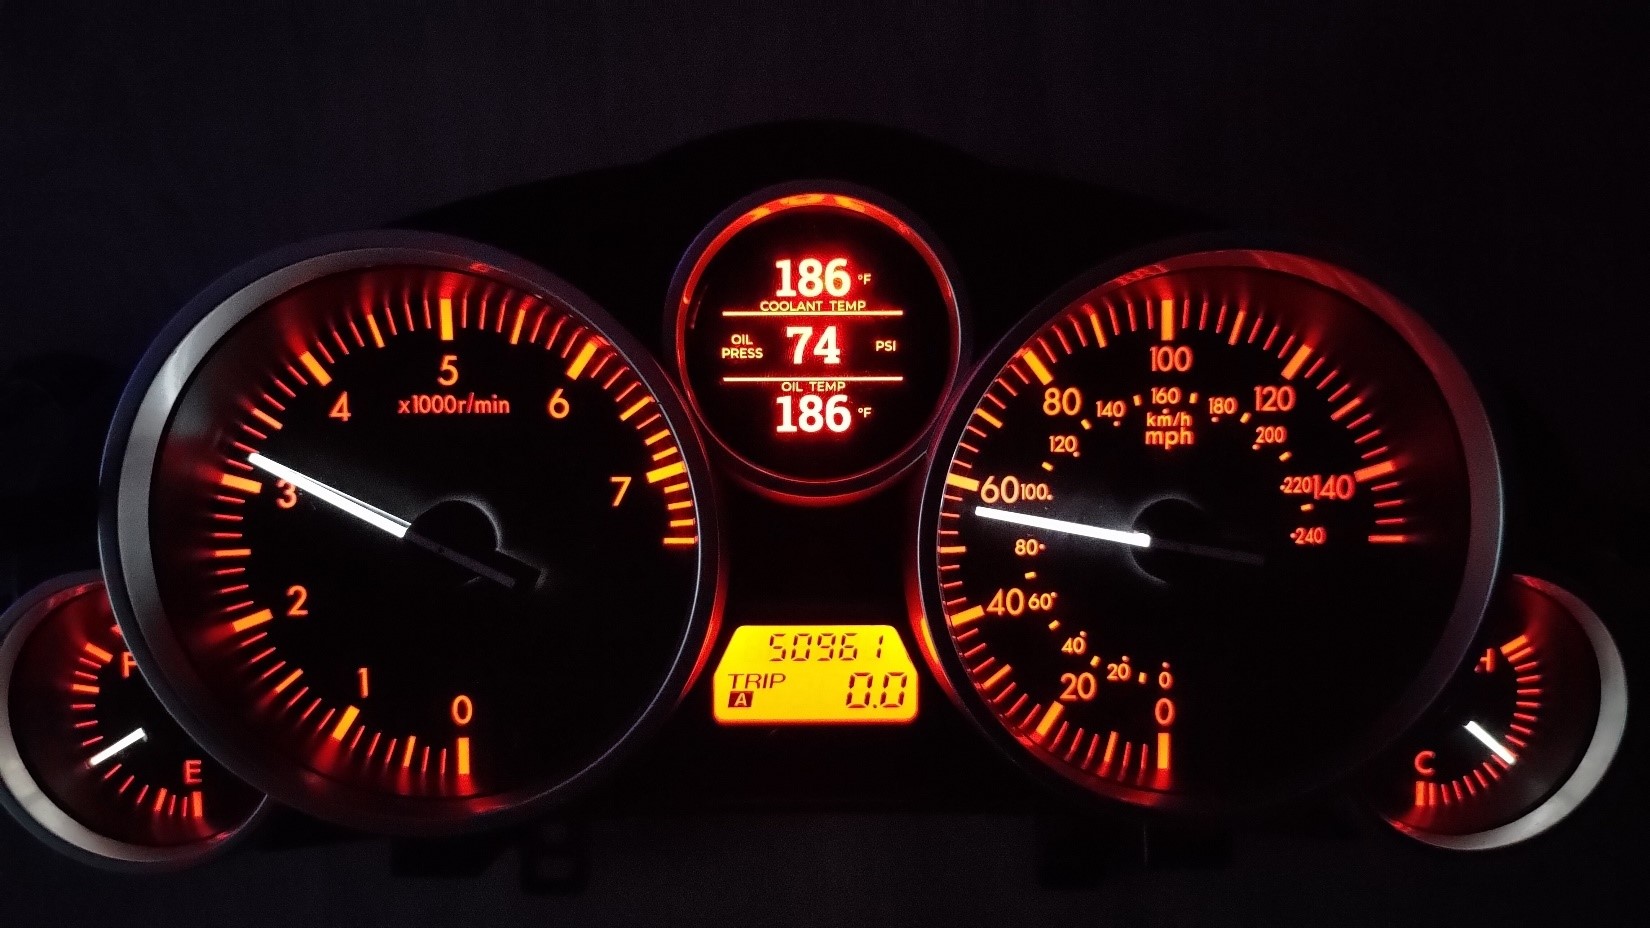
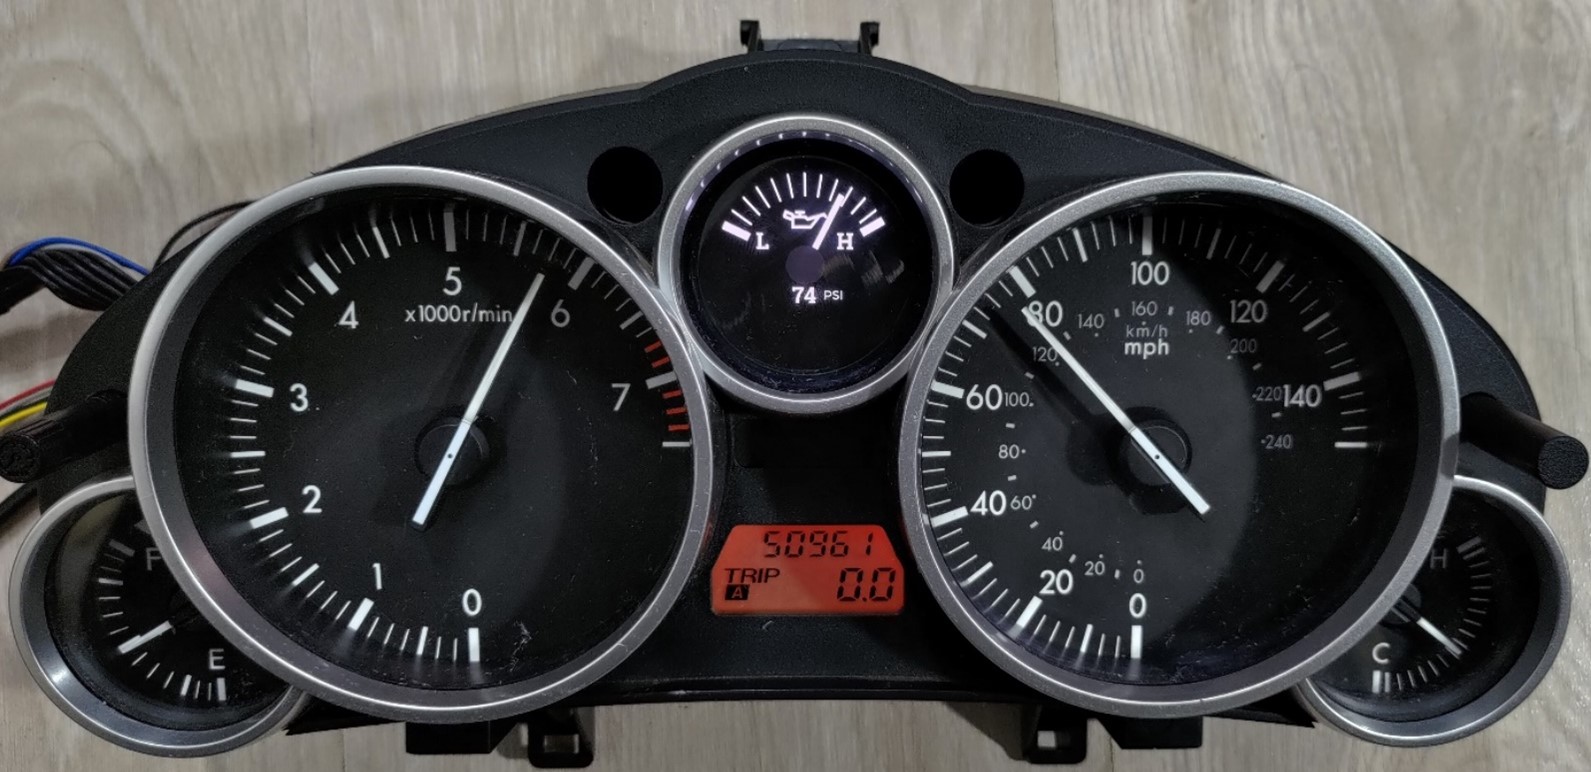
This is a custom made digital multifunctional gauge set for the 3rd generation Miata, of all engines(even the 2.5L swaps!) and gearbox variants. It adds aftermarket performance whilst keeping OEM looks and integration into the factory instrument cluster – because that’s what “cluster” means – all the important things in one place.
To get a complete picture of all the features and what the installation requires, find the install manual HERE – CLICK ME!
The best part of this kit is that it retains the OEM look while offering aftermarket features. There is no need for ugly gauge pods sticking out the center of your dashboard – when those inside your instrument cluster already exist and just need a push in the right direction.
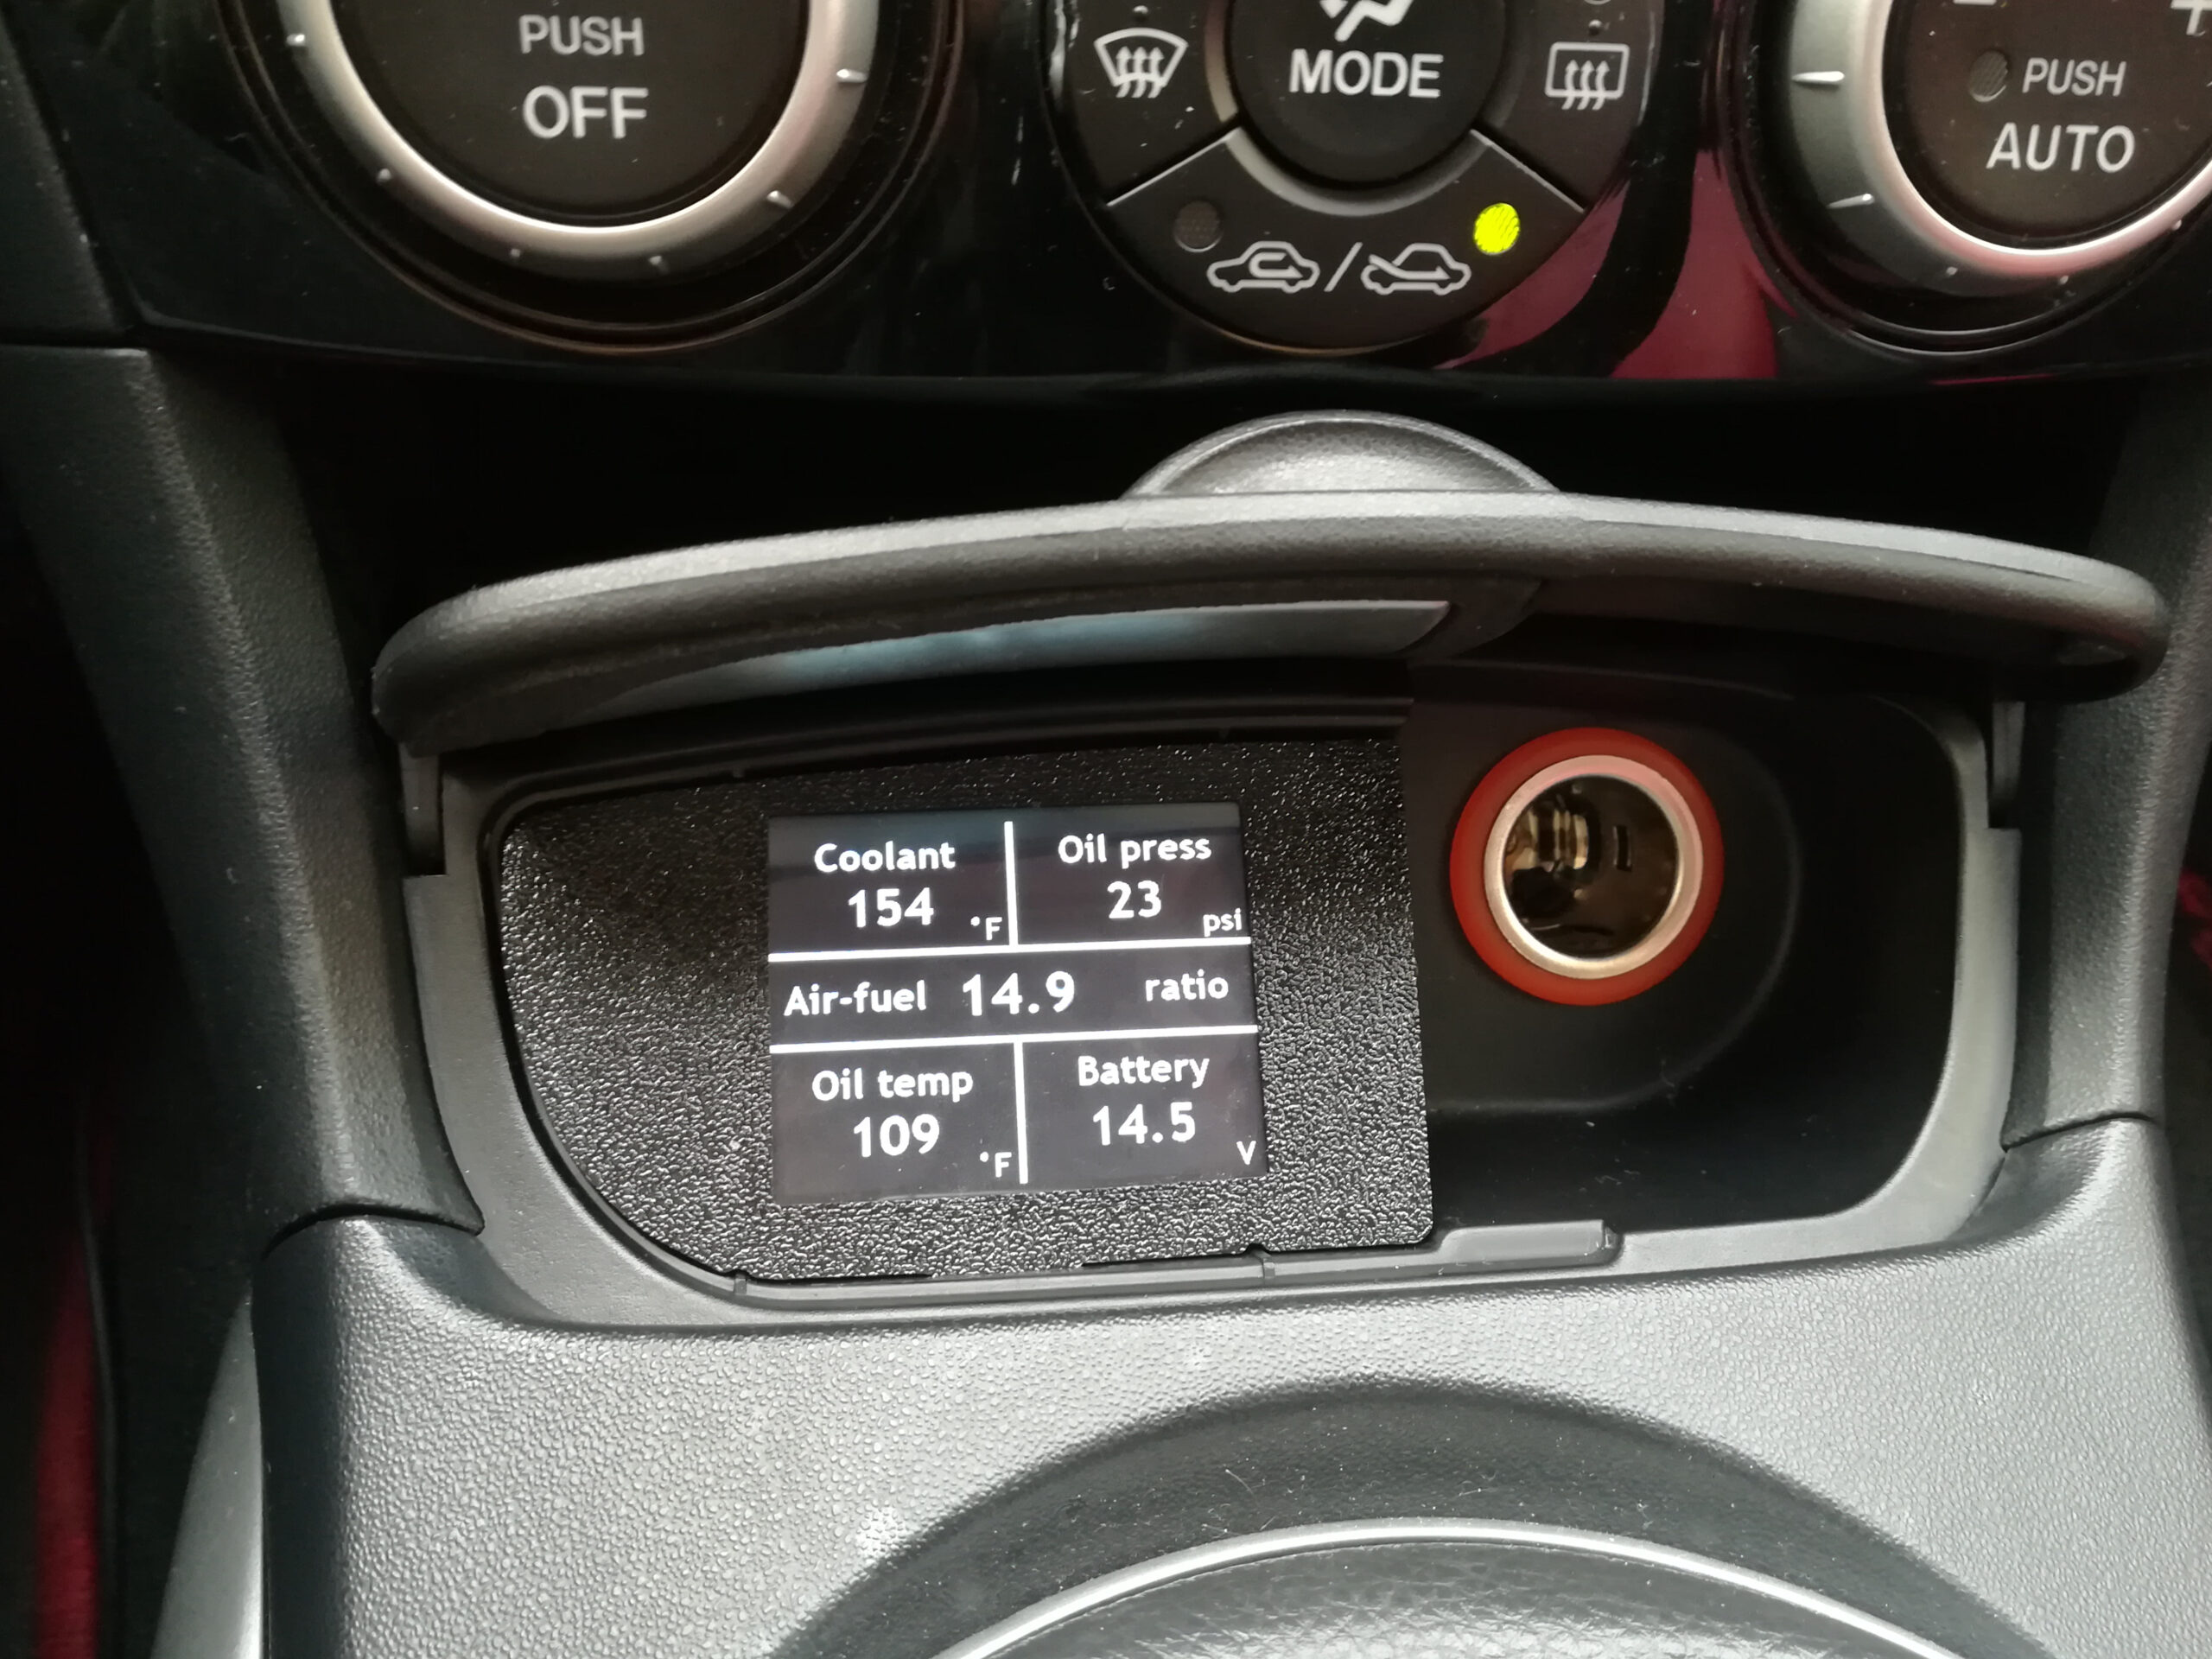
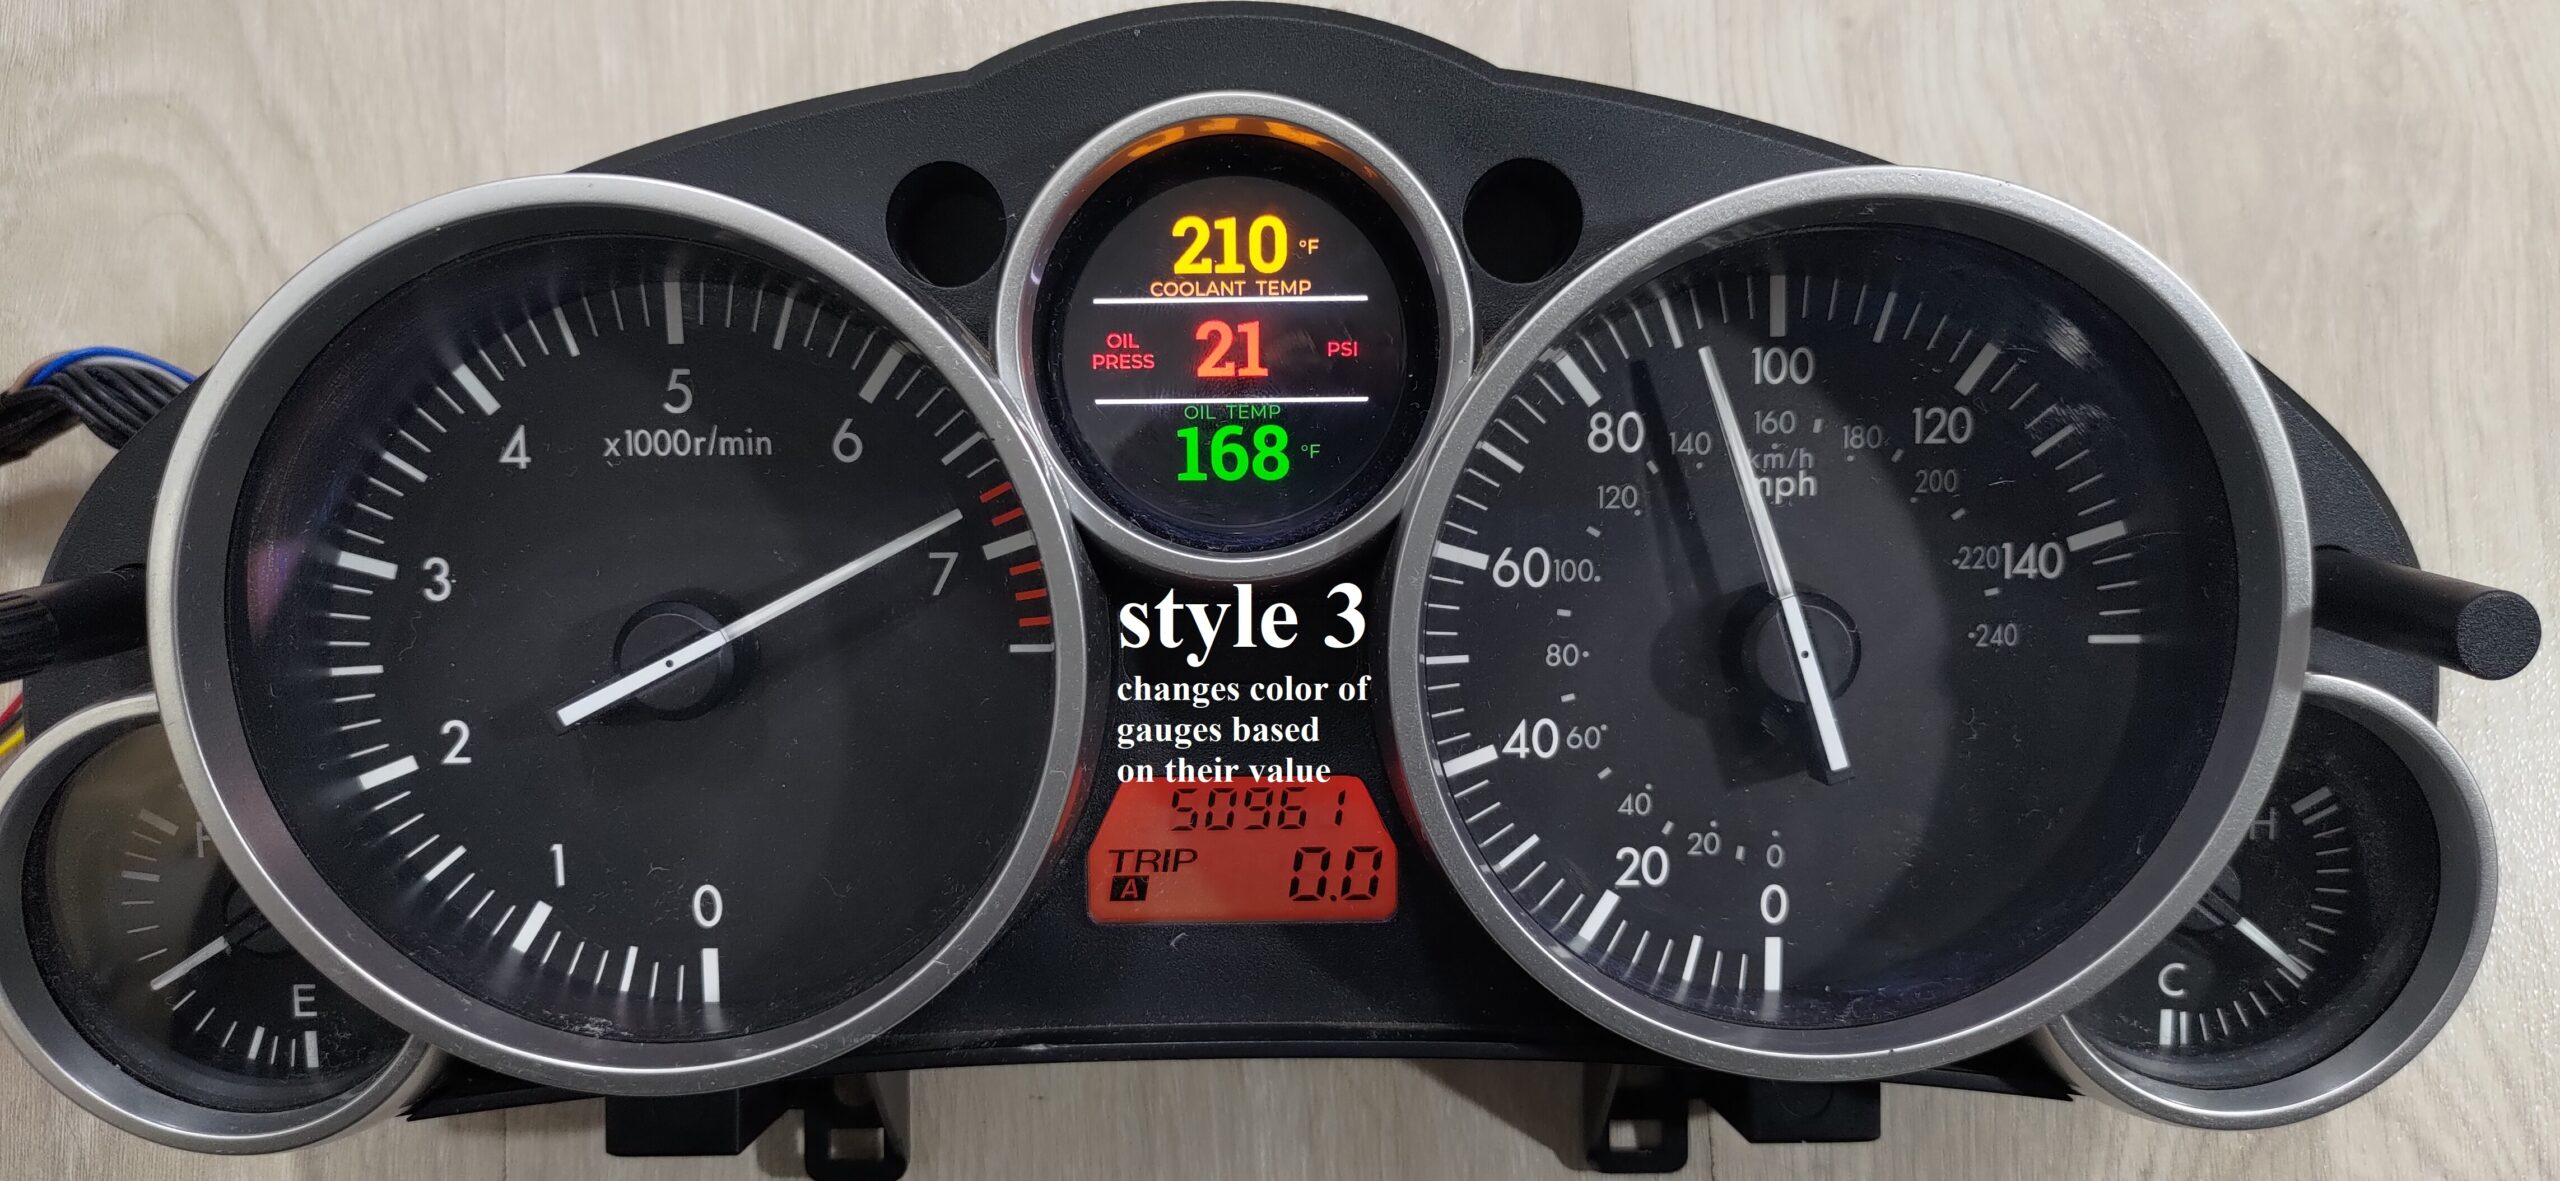
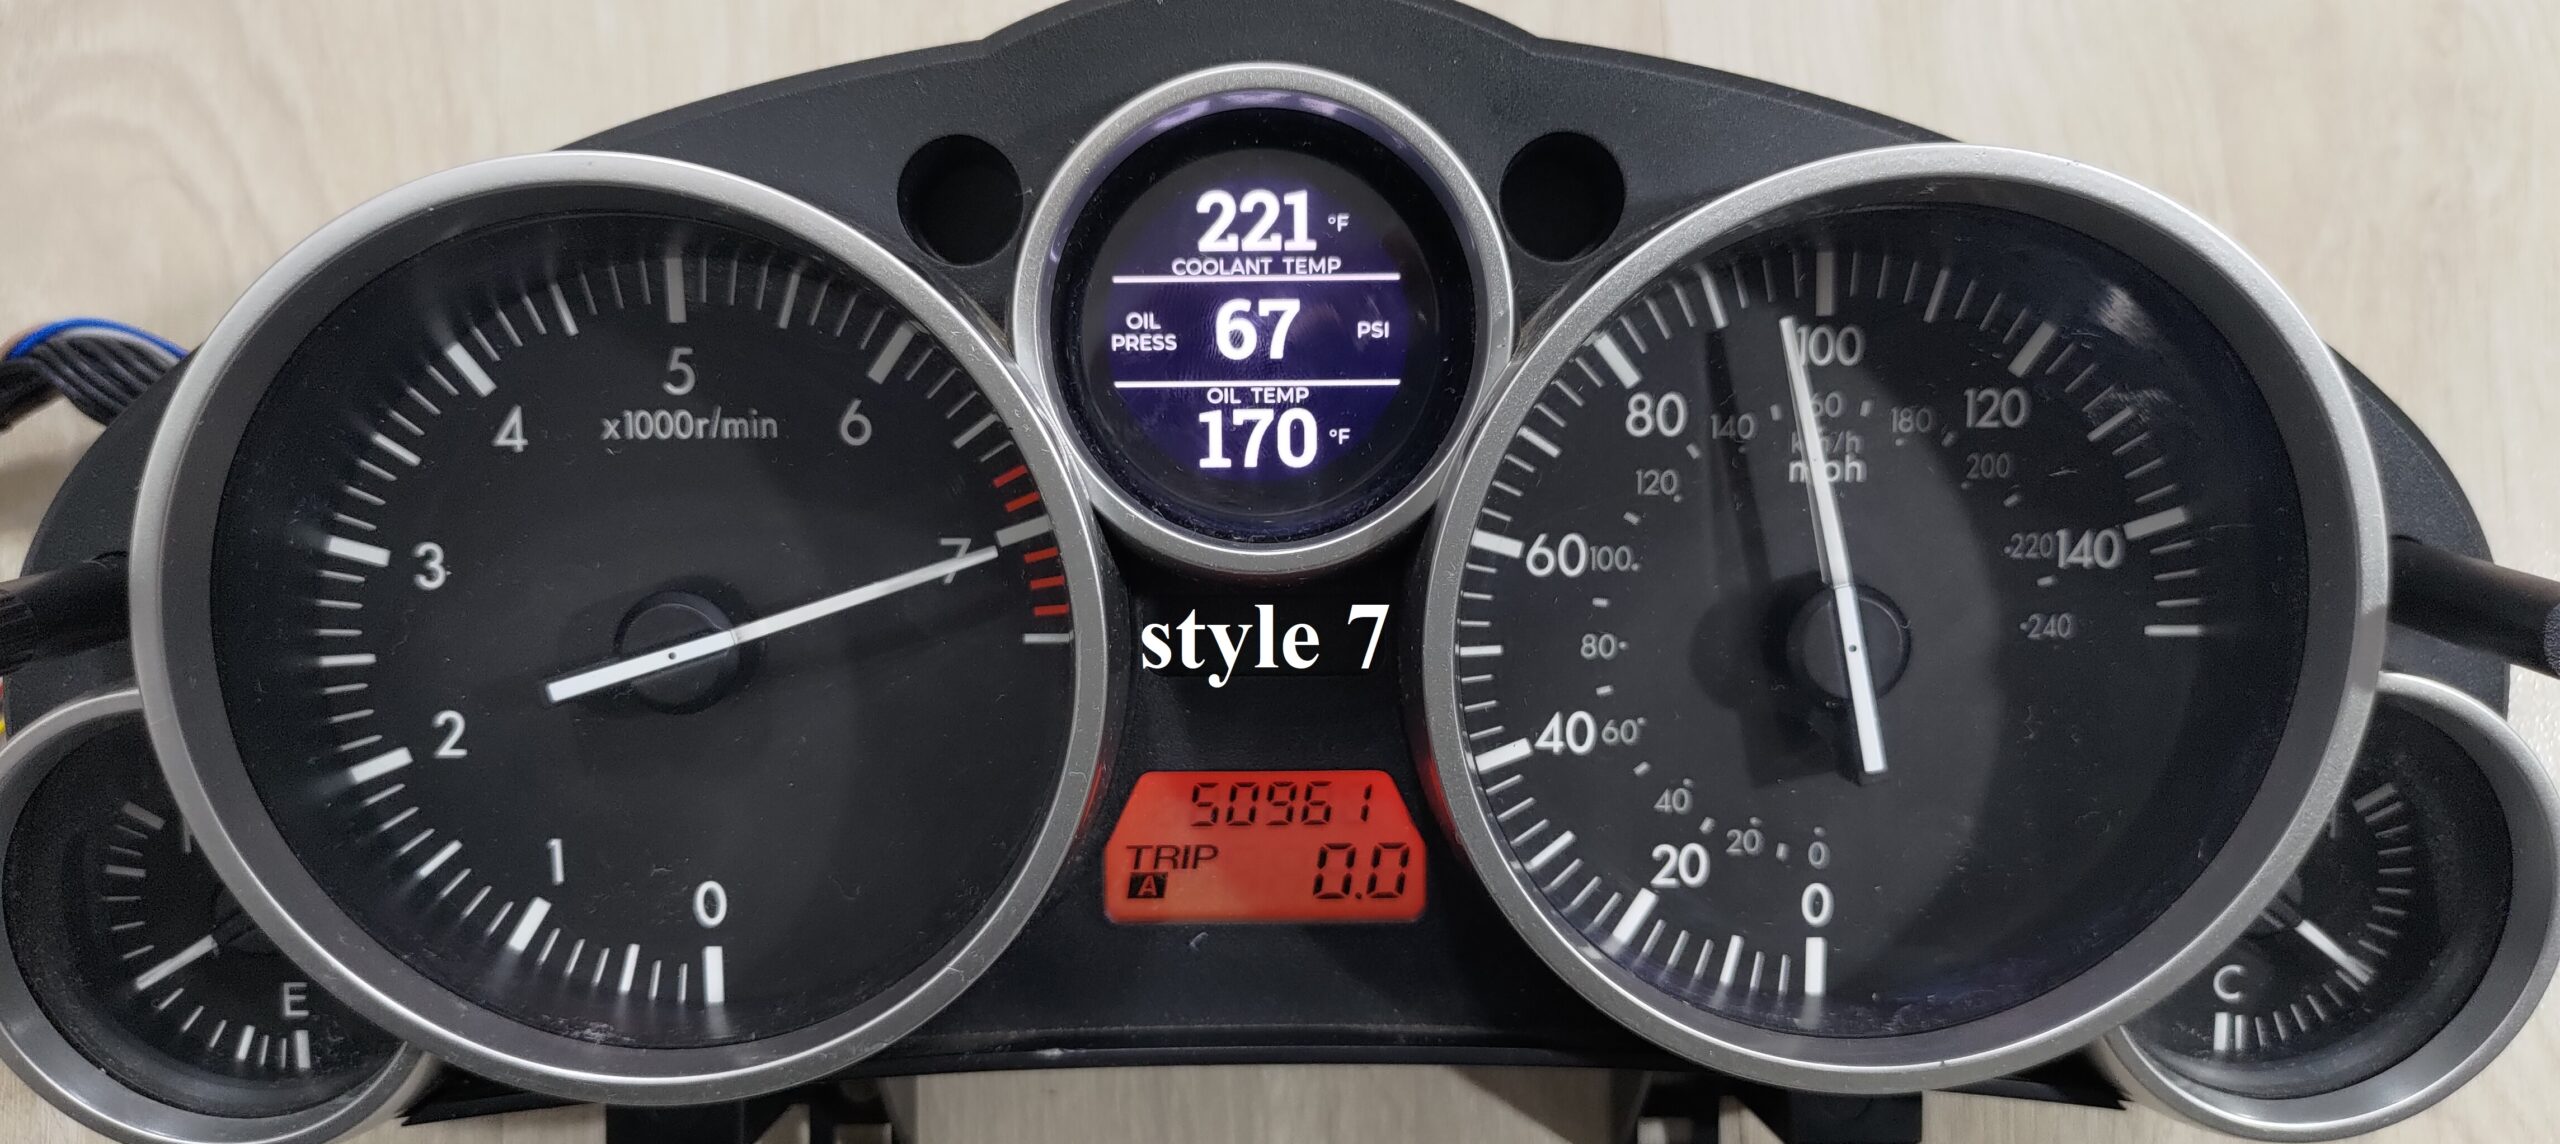
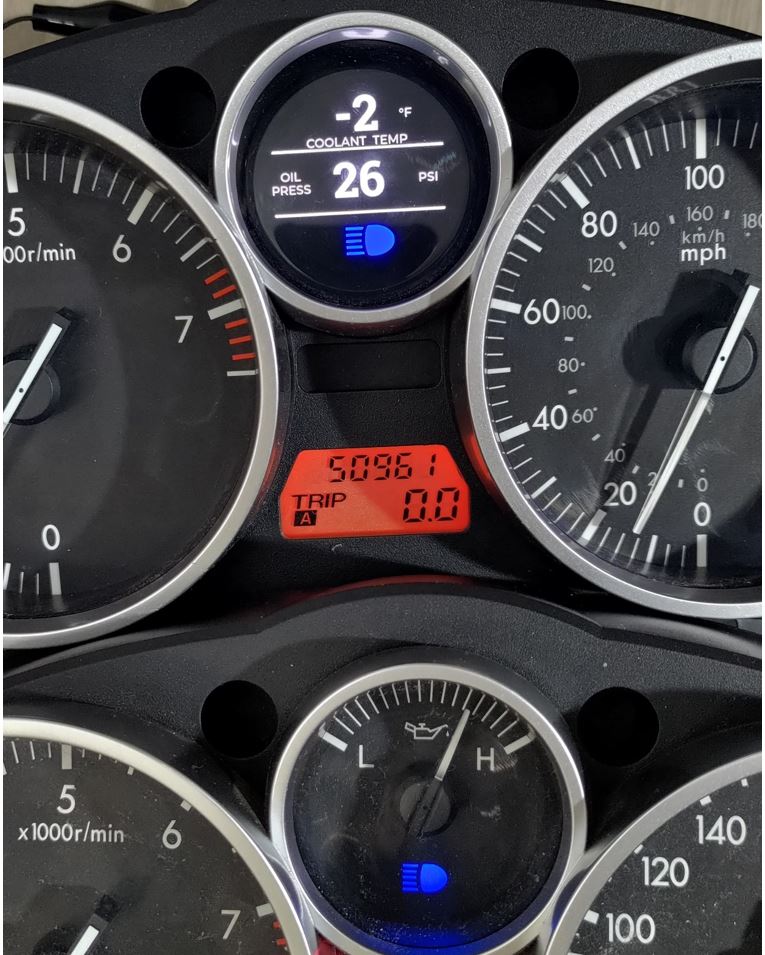
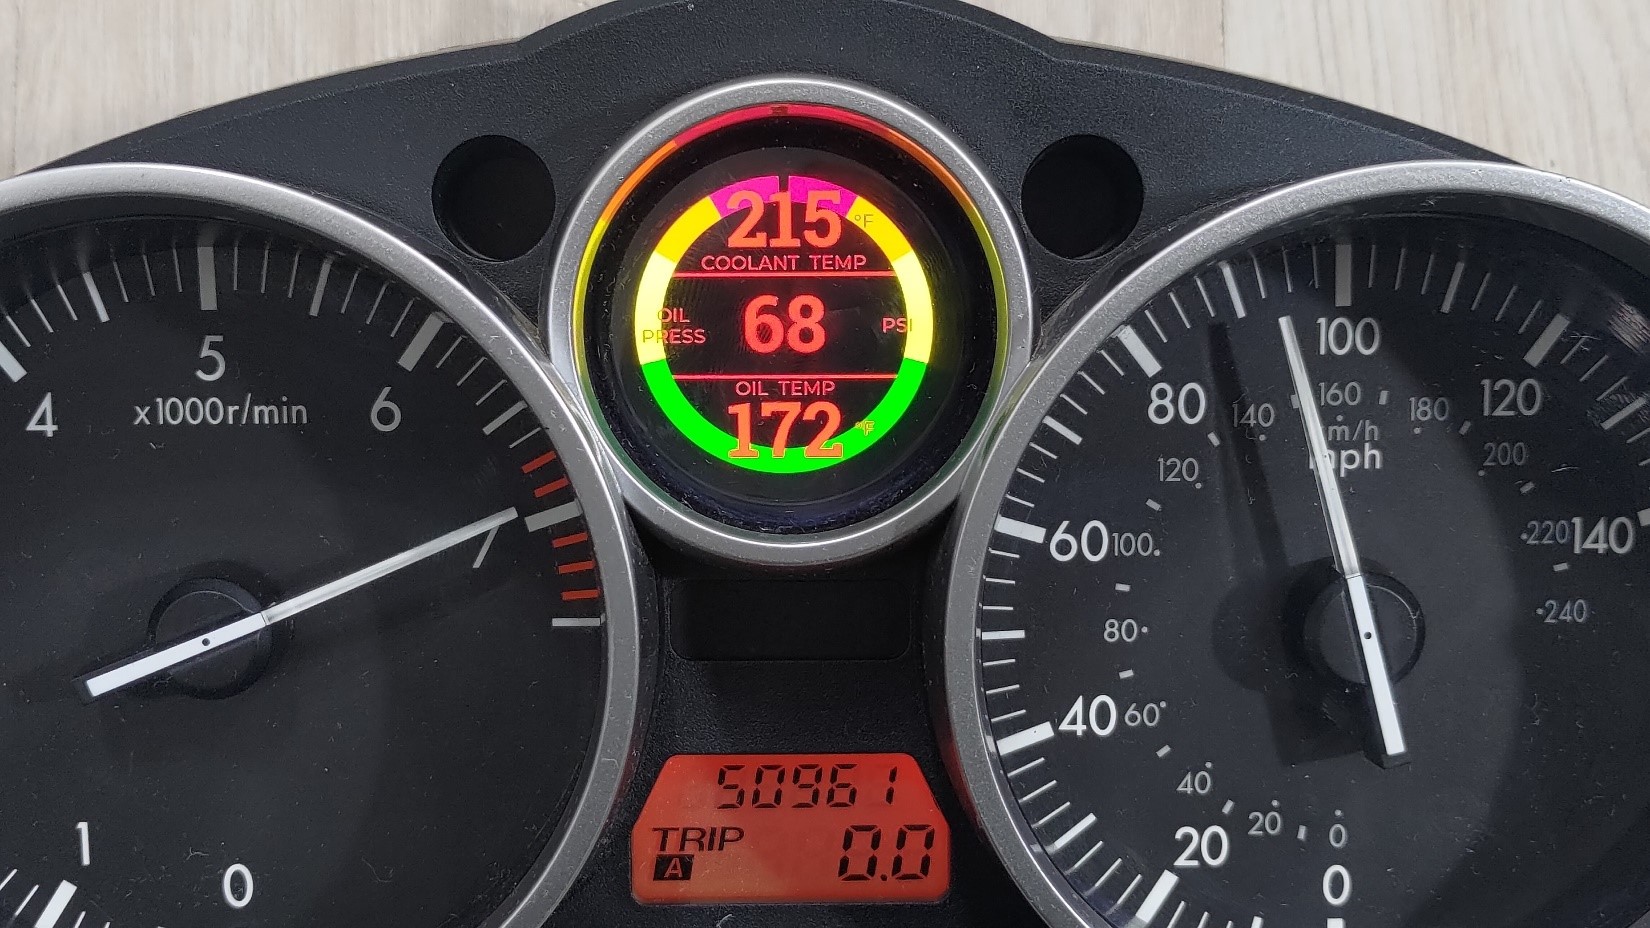
The screen will show you:
- coolant temperature(in degF or degC)
- oil pressure(in psi or bar )
- oil temp(in degF or degC)
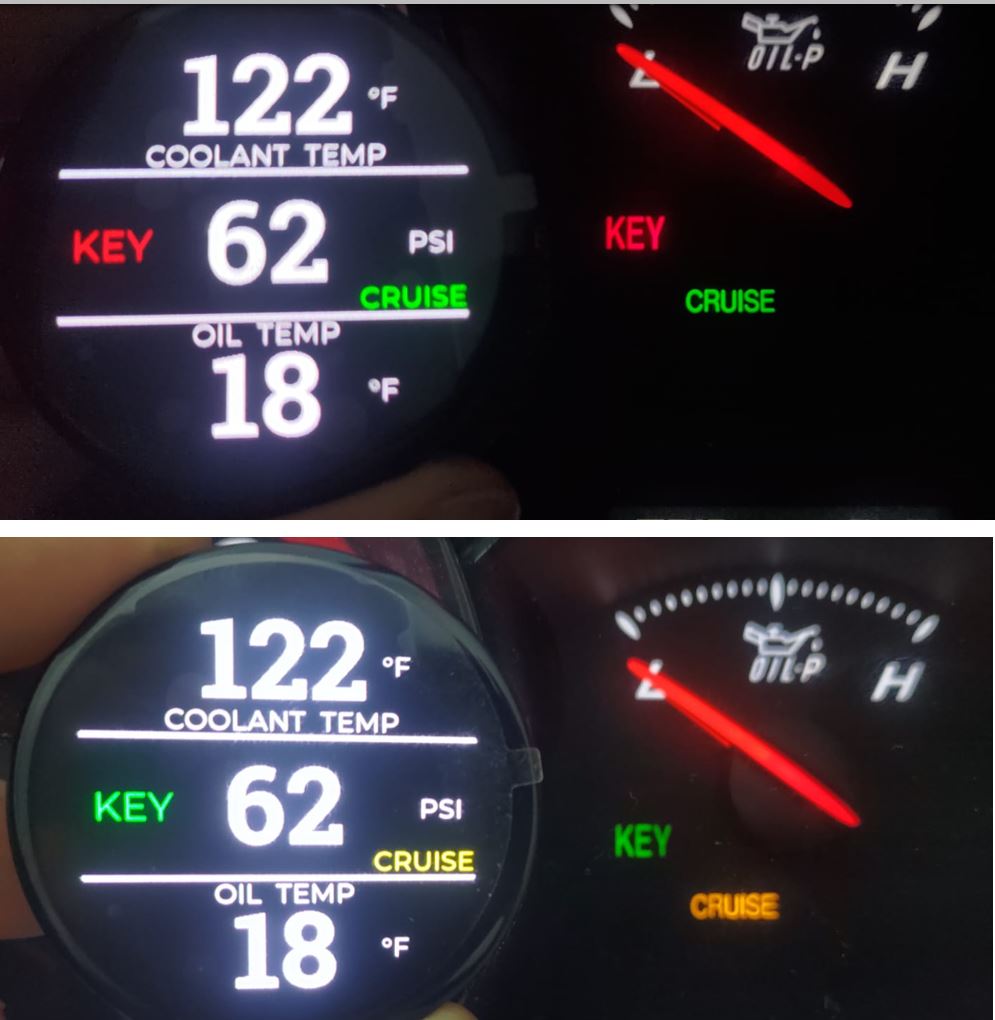
- optionally(by customization keyboard) a reenactment of the factory oil pressure gauge – but this one is real and shows true oil pressure.
- optionally, ignition knock retard, air fuel ratio, boost pressure, mass air flow, short/long term fuel trims, true engine and vehicle speed.
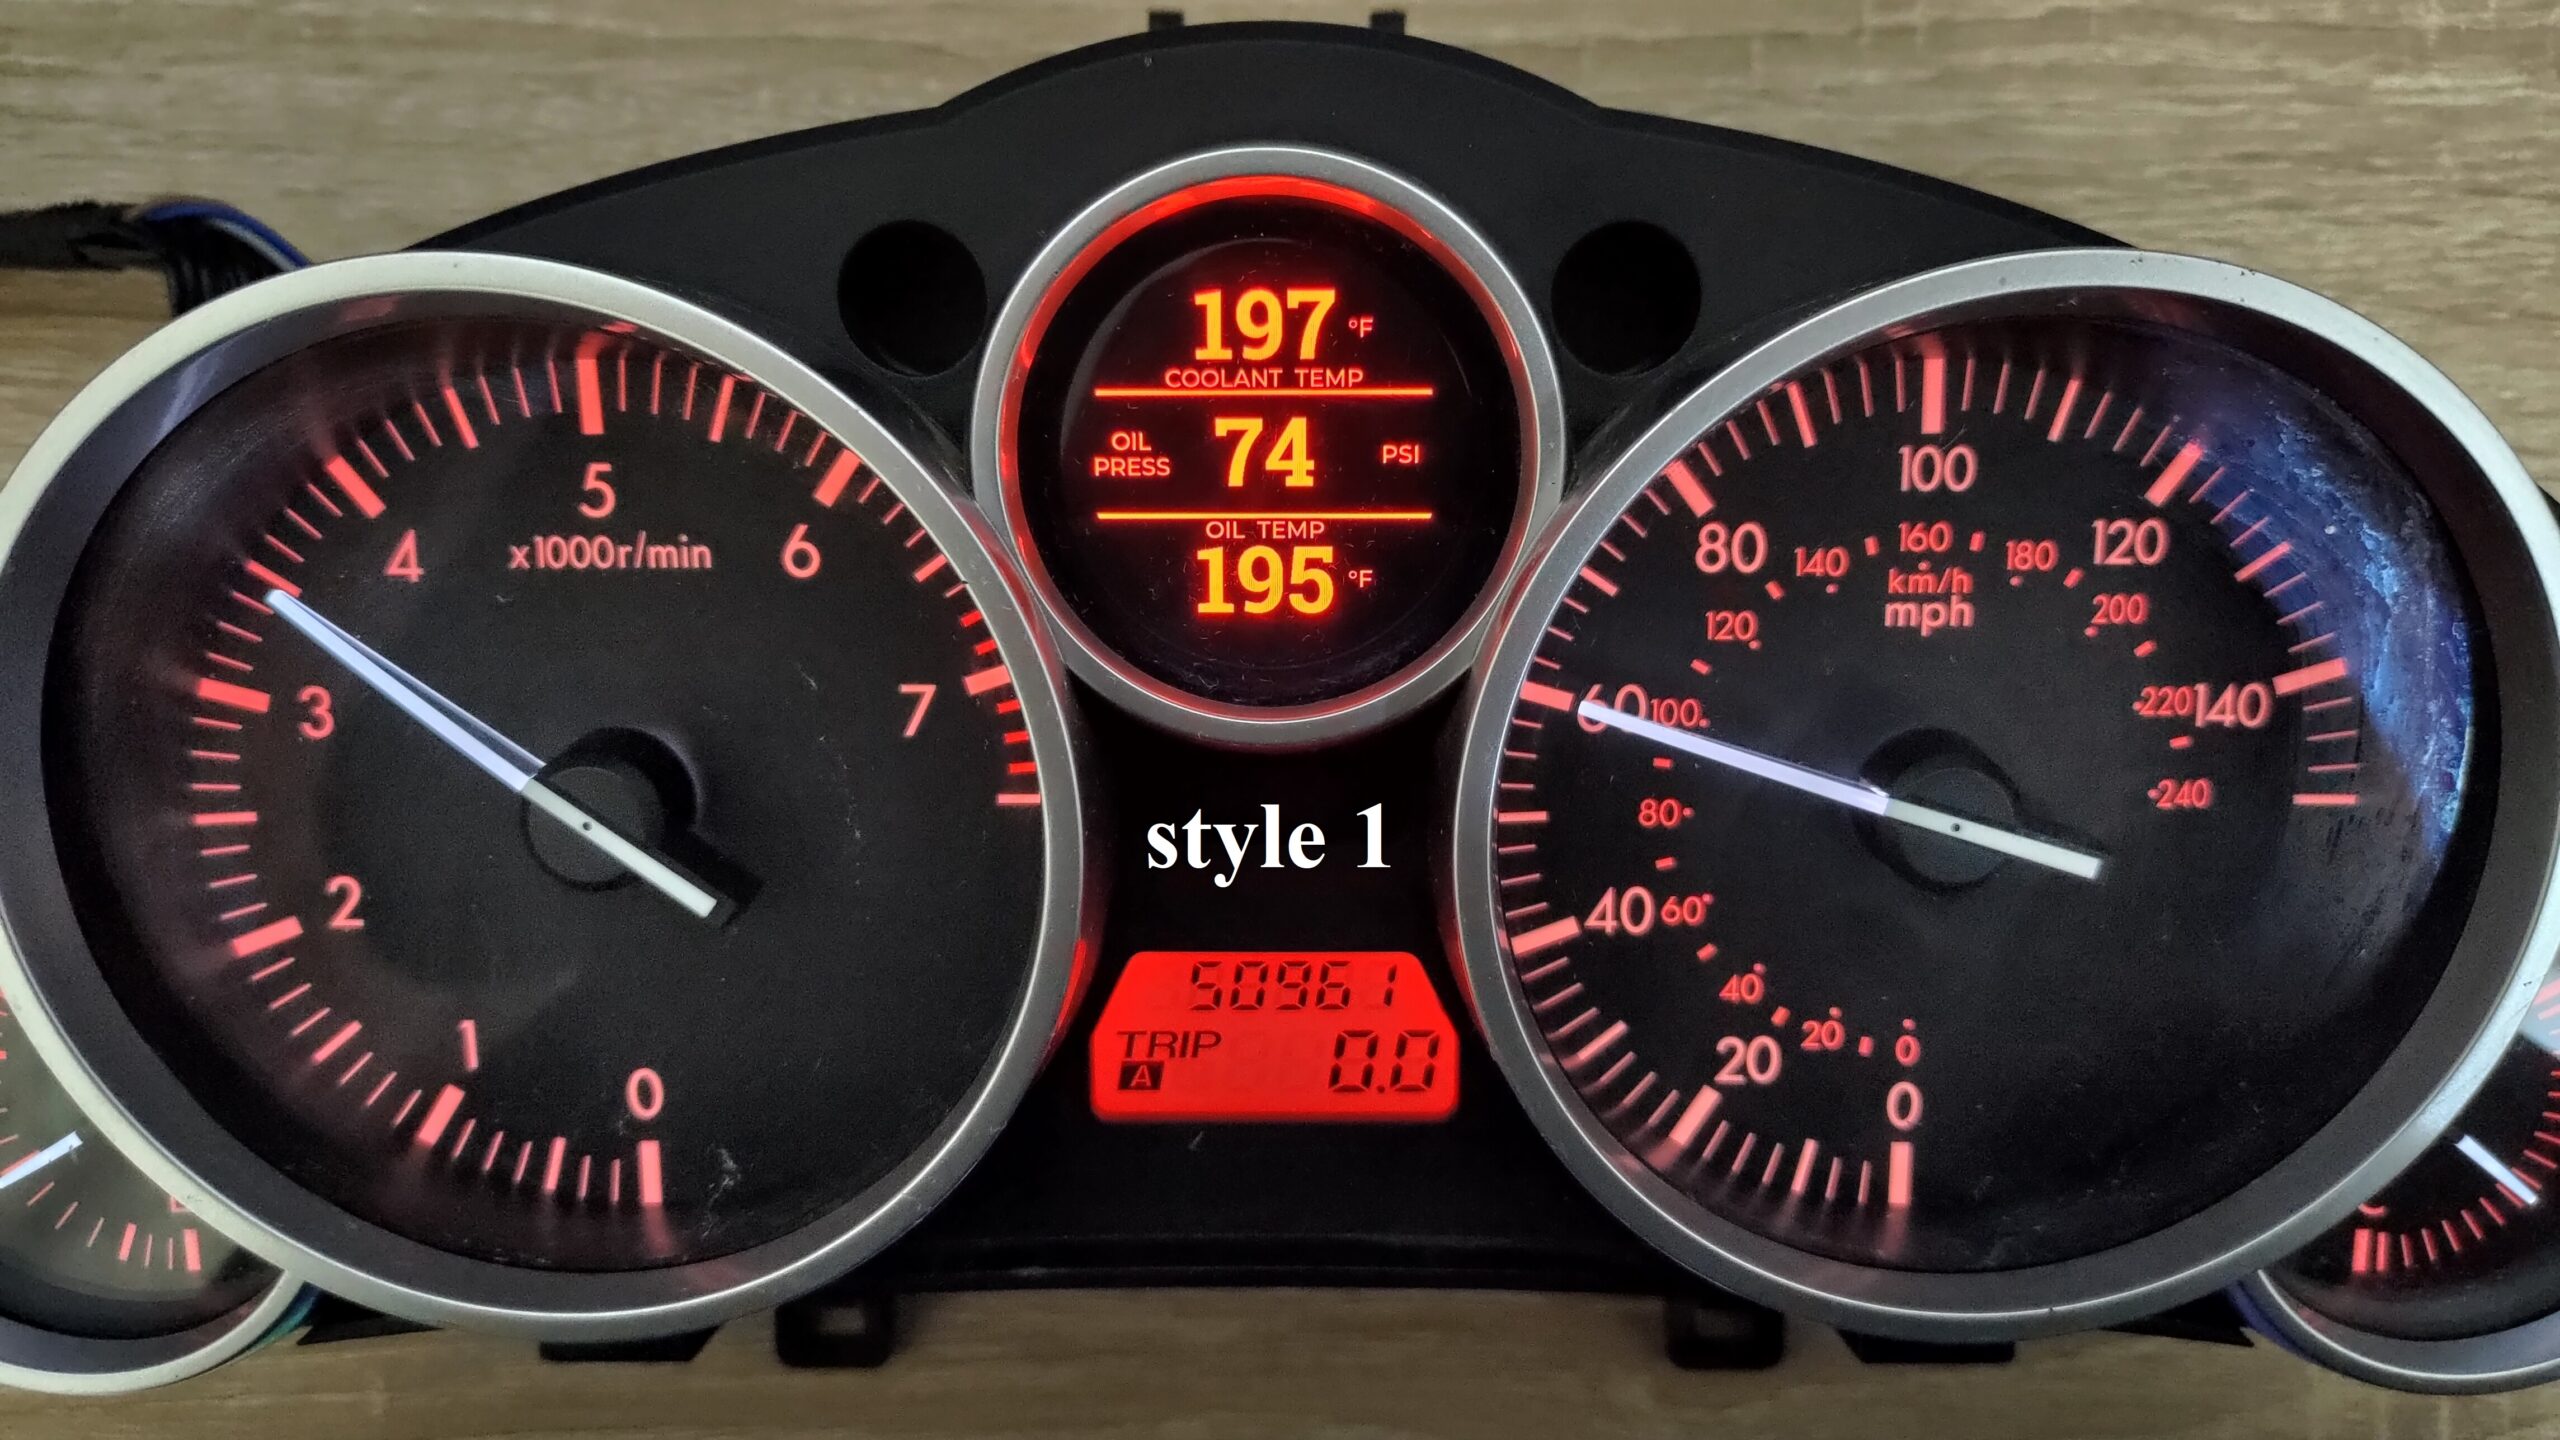
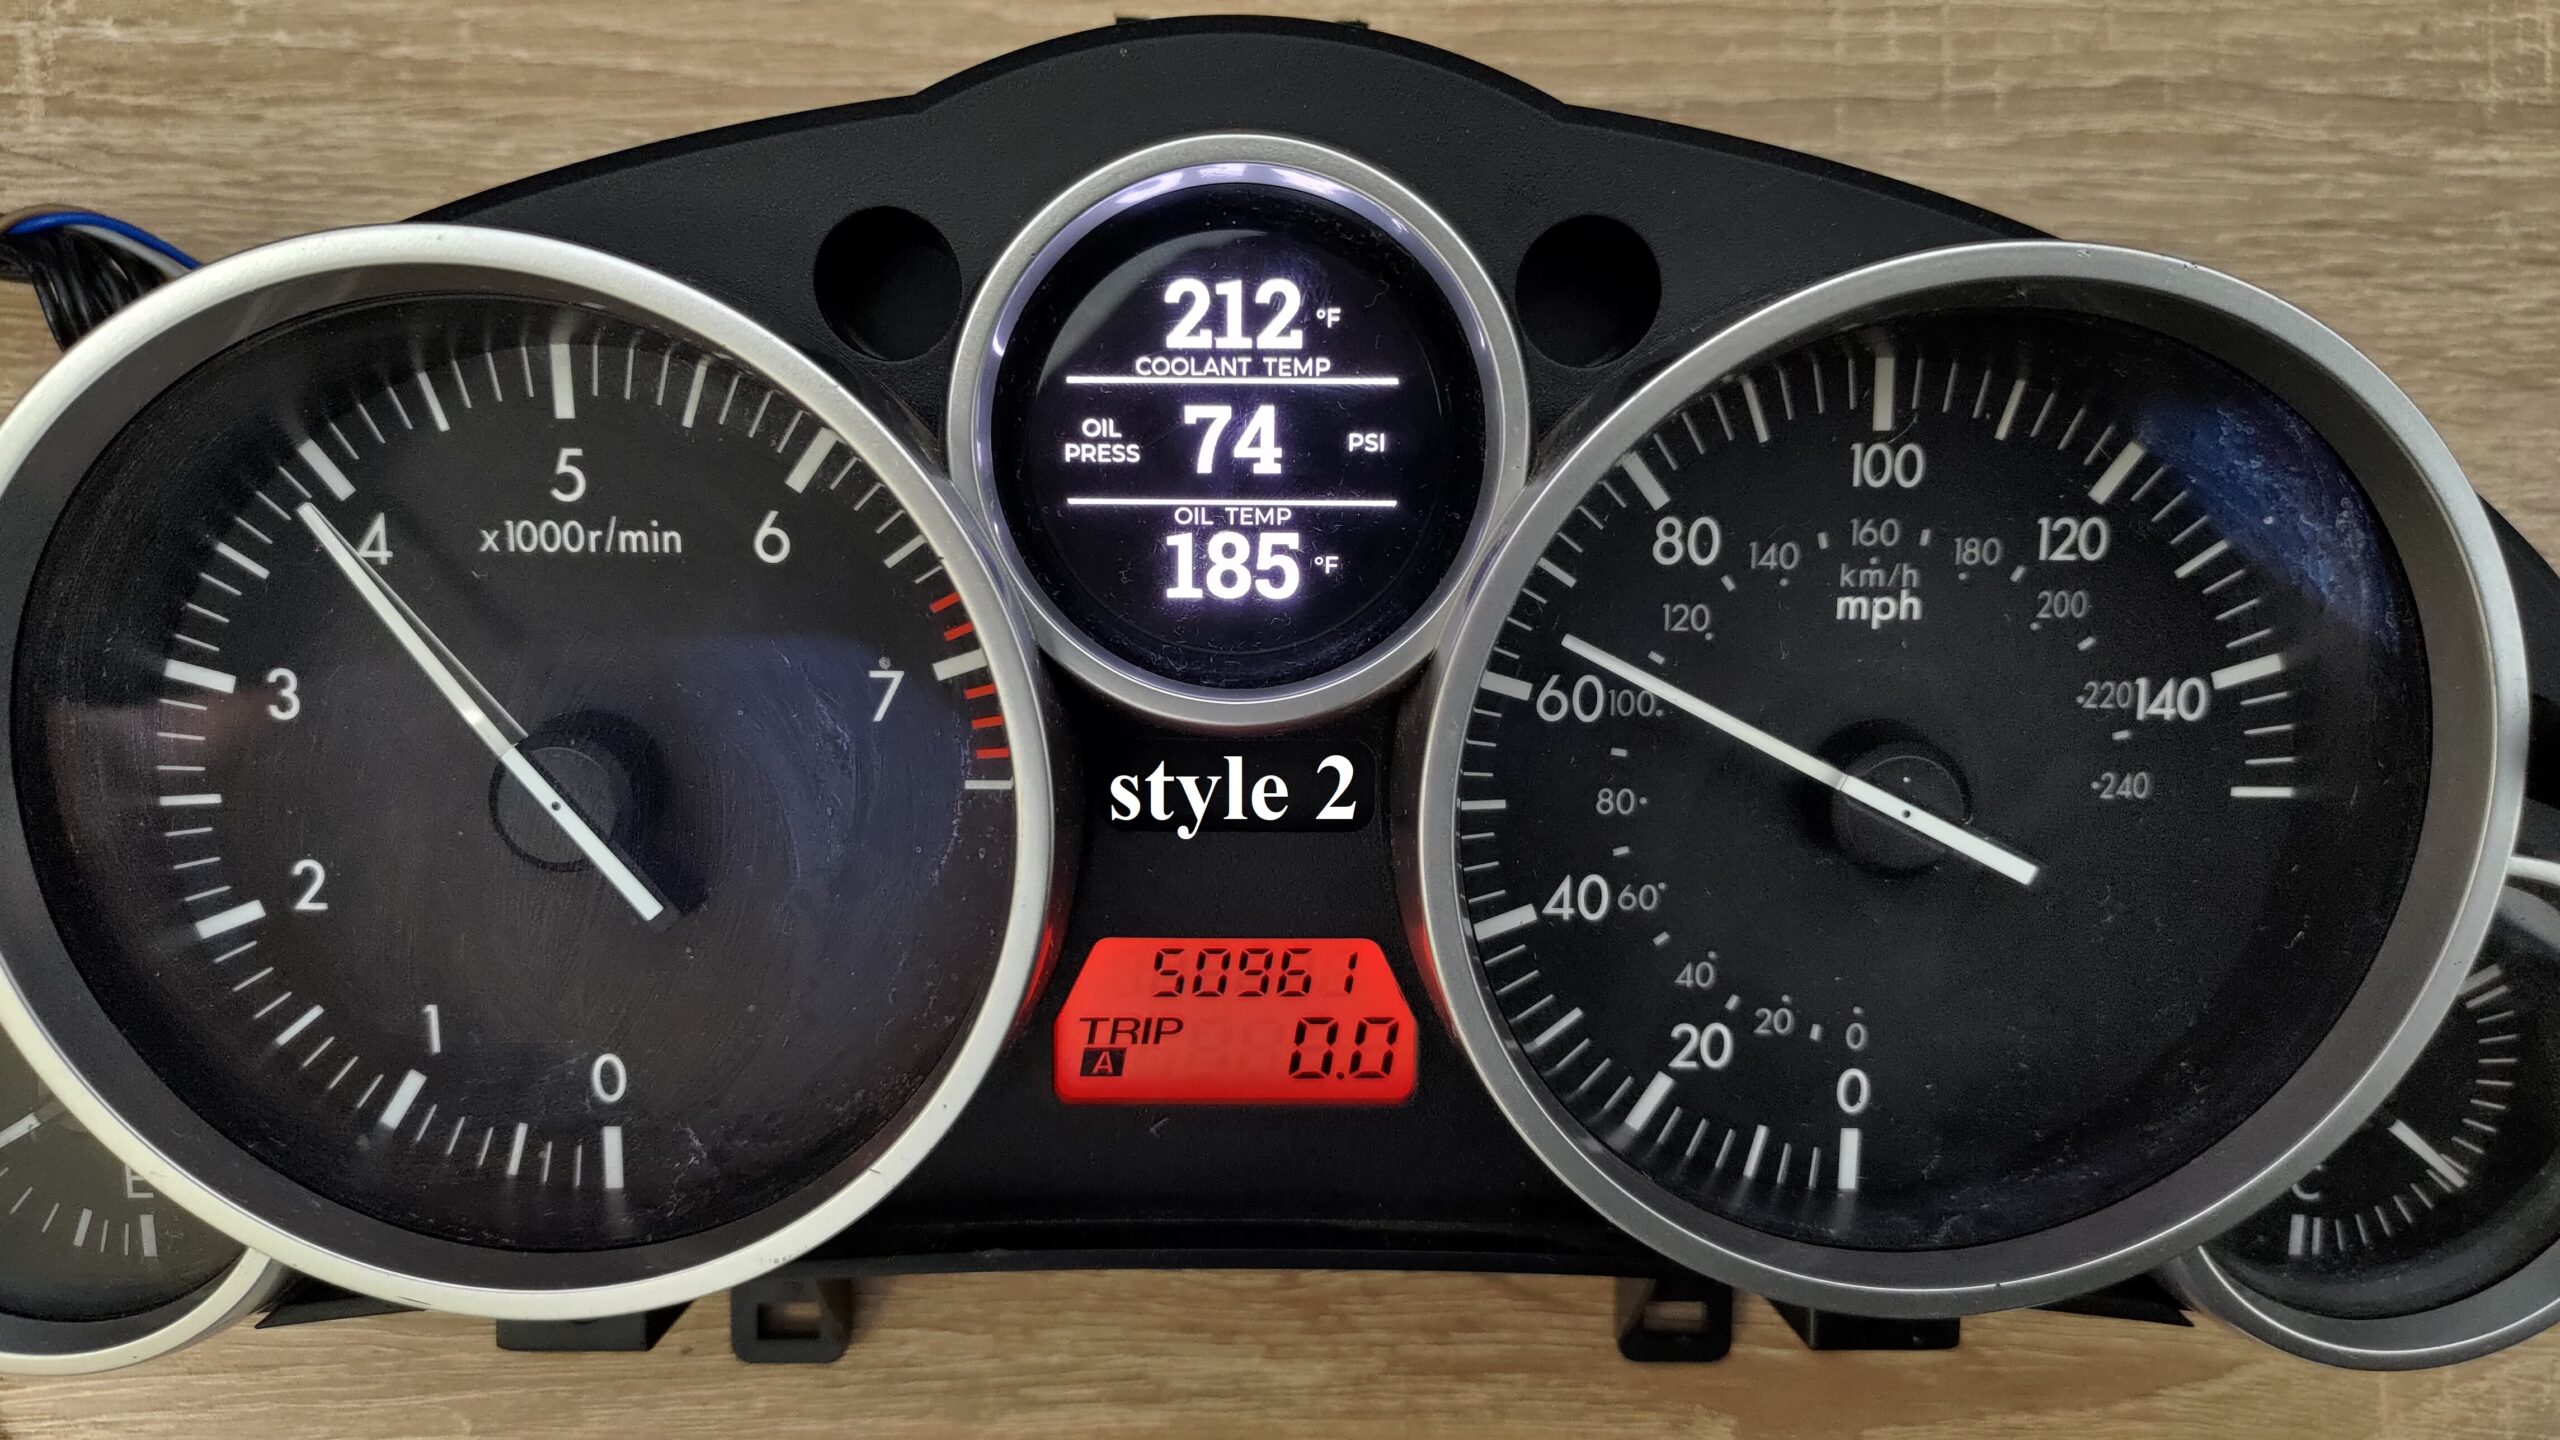
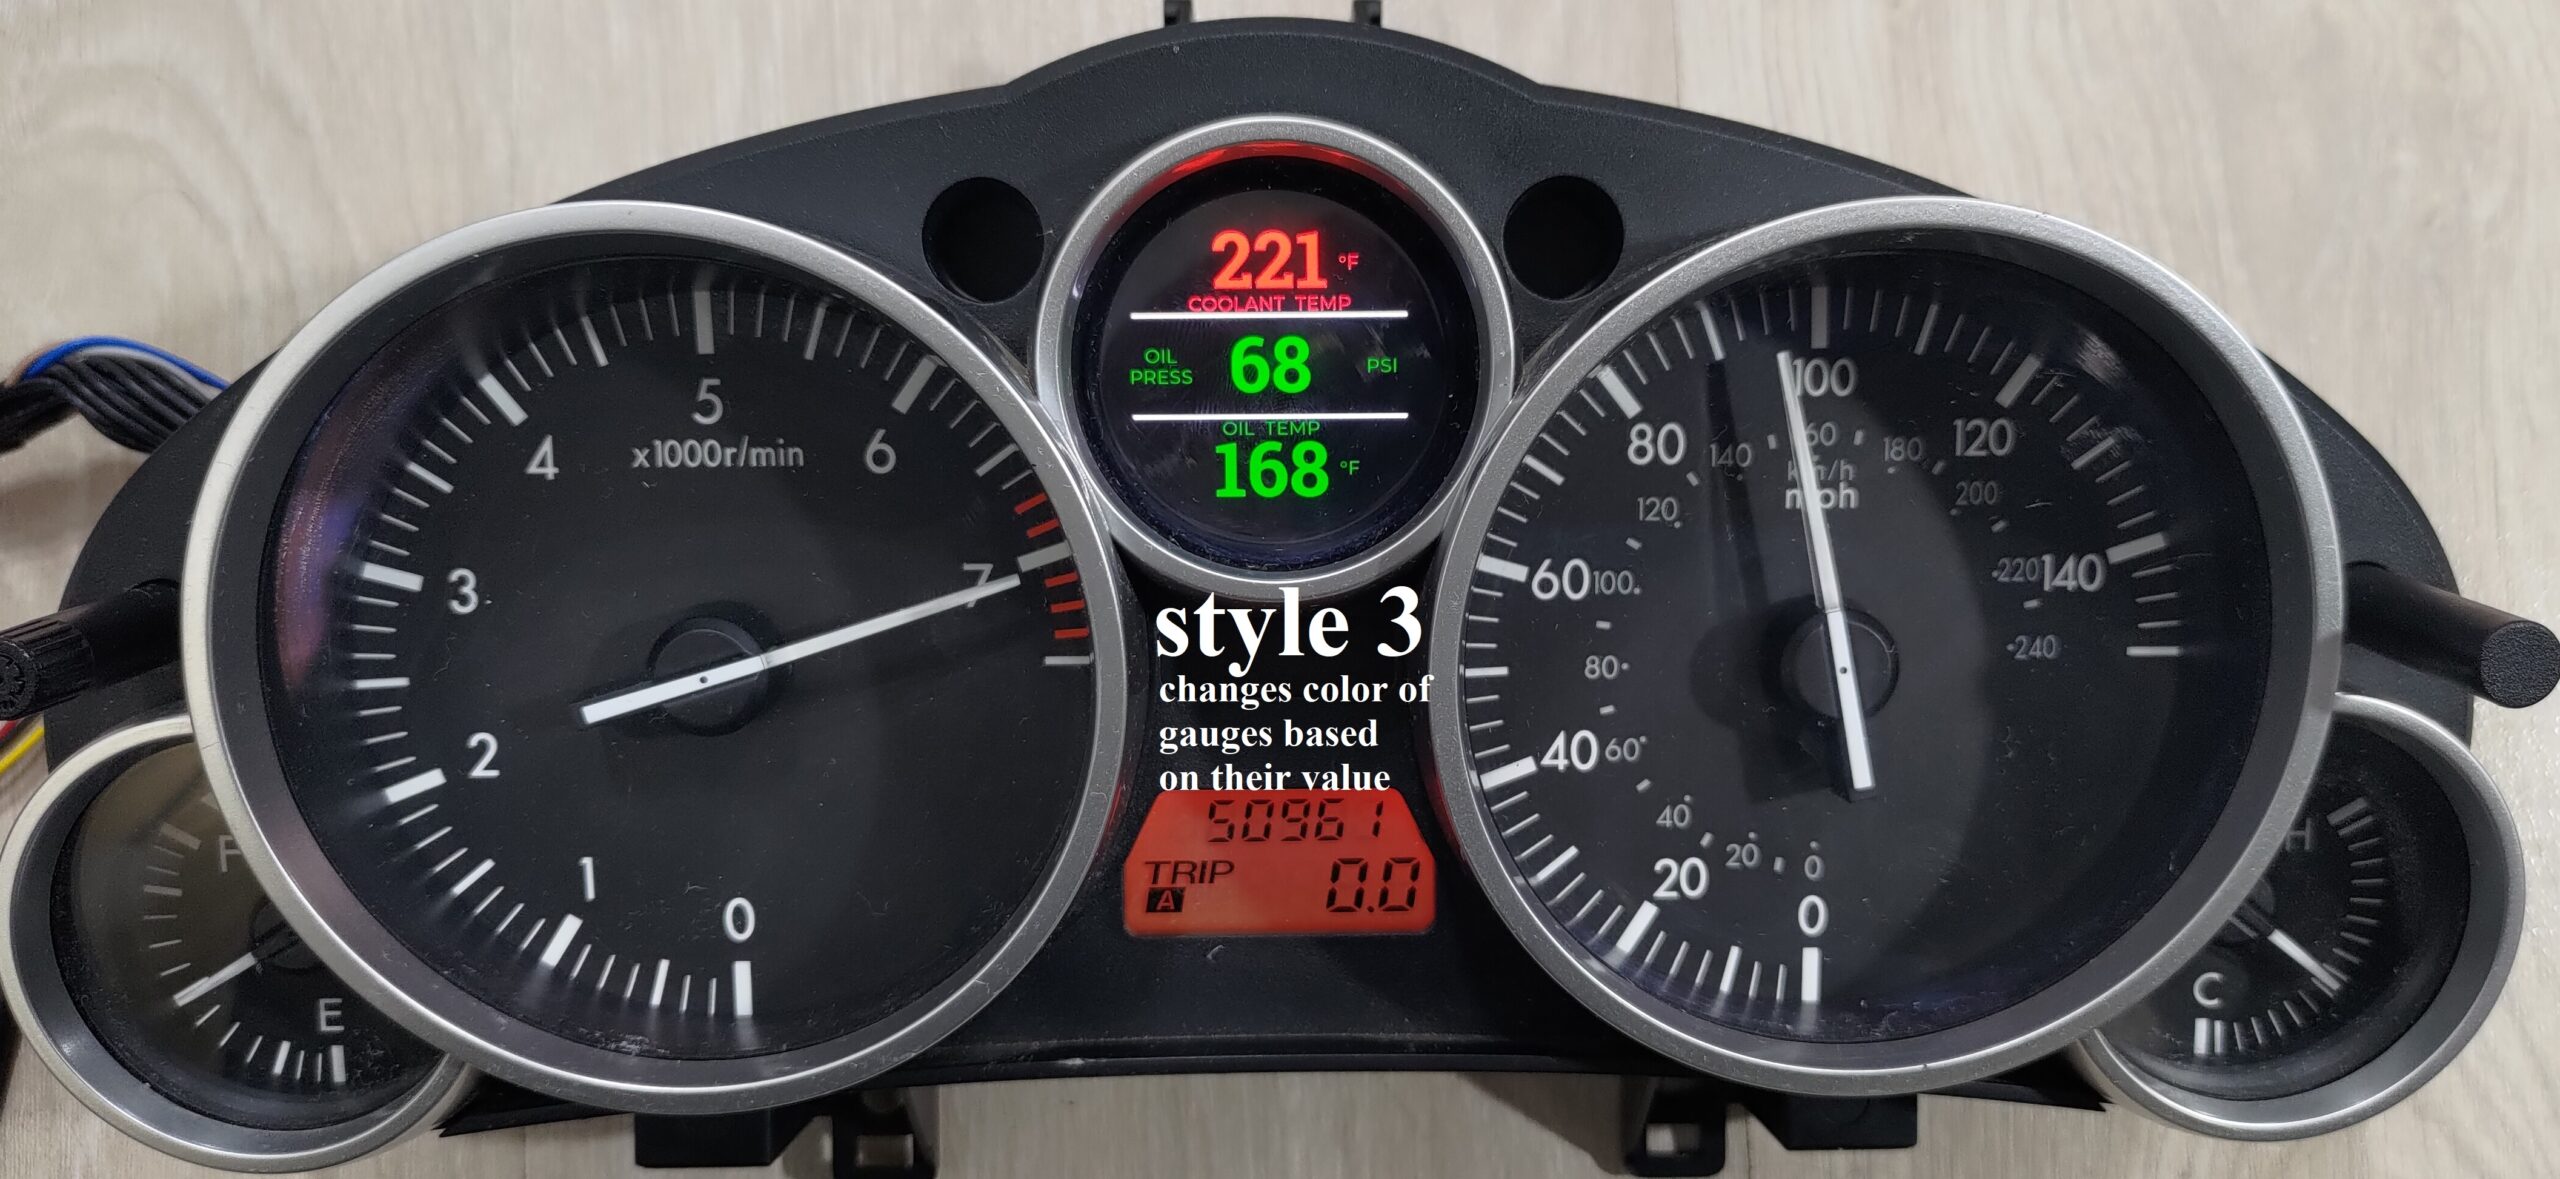
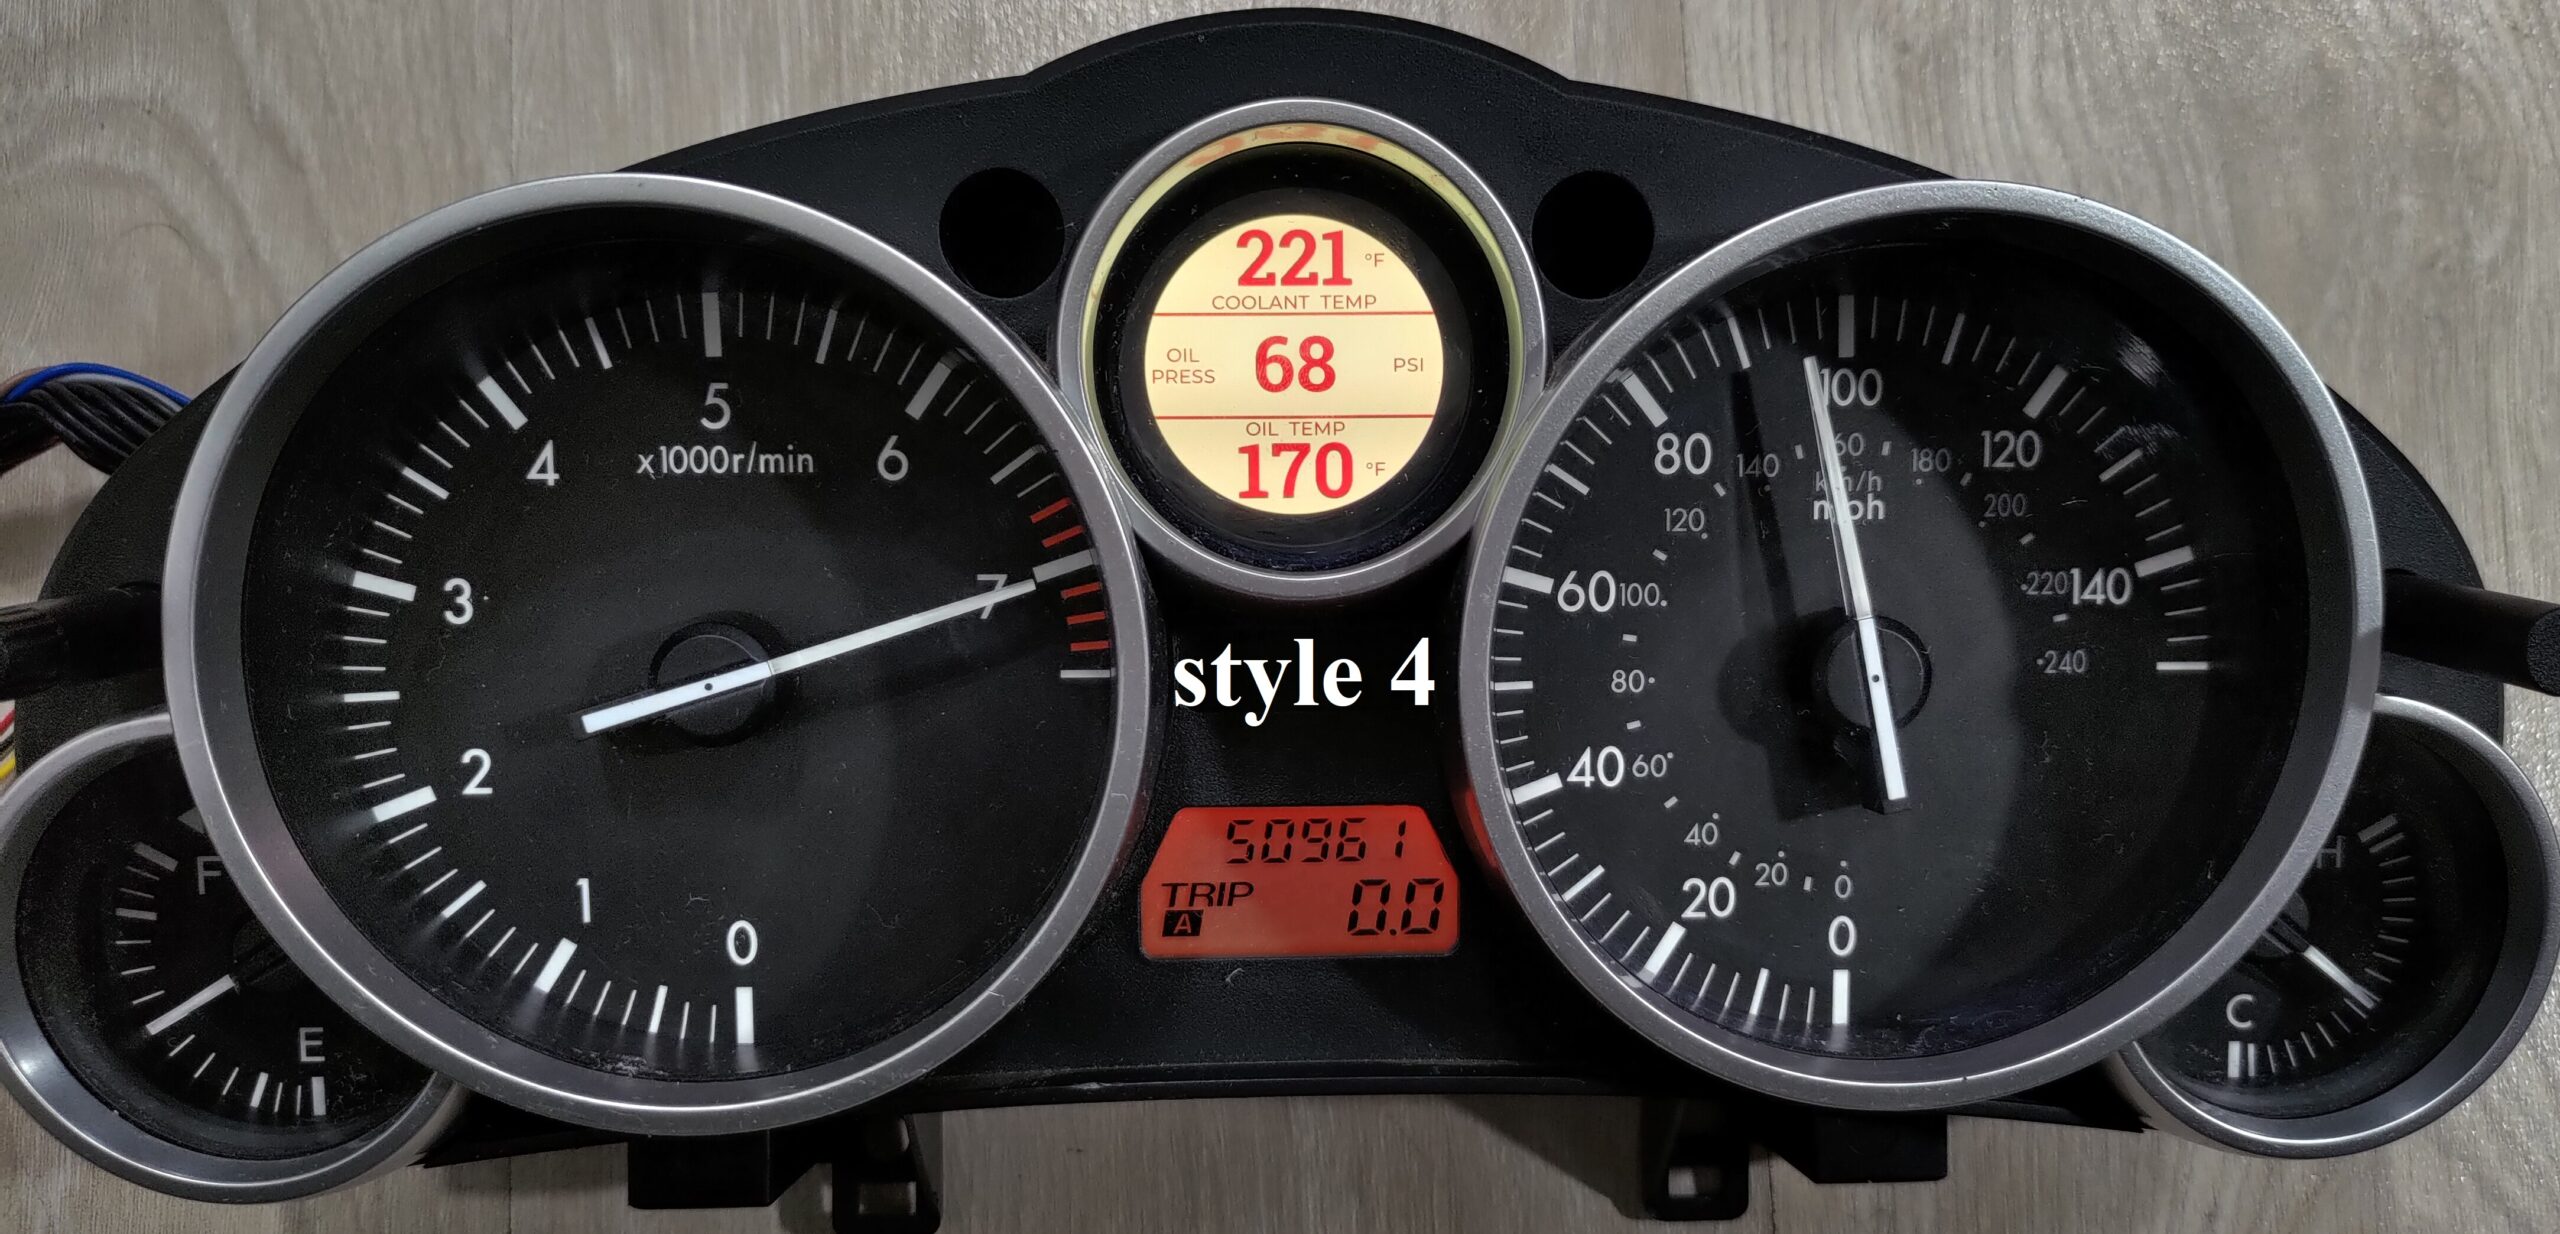
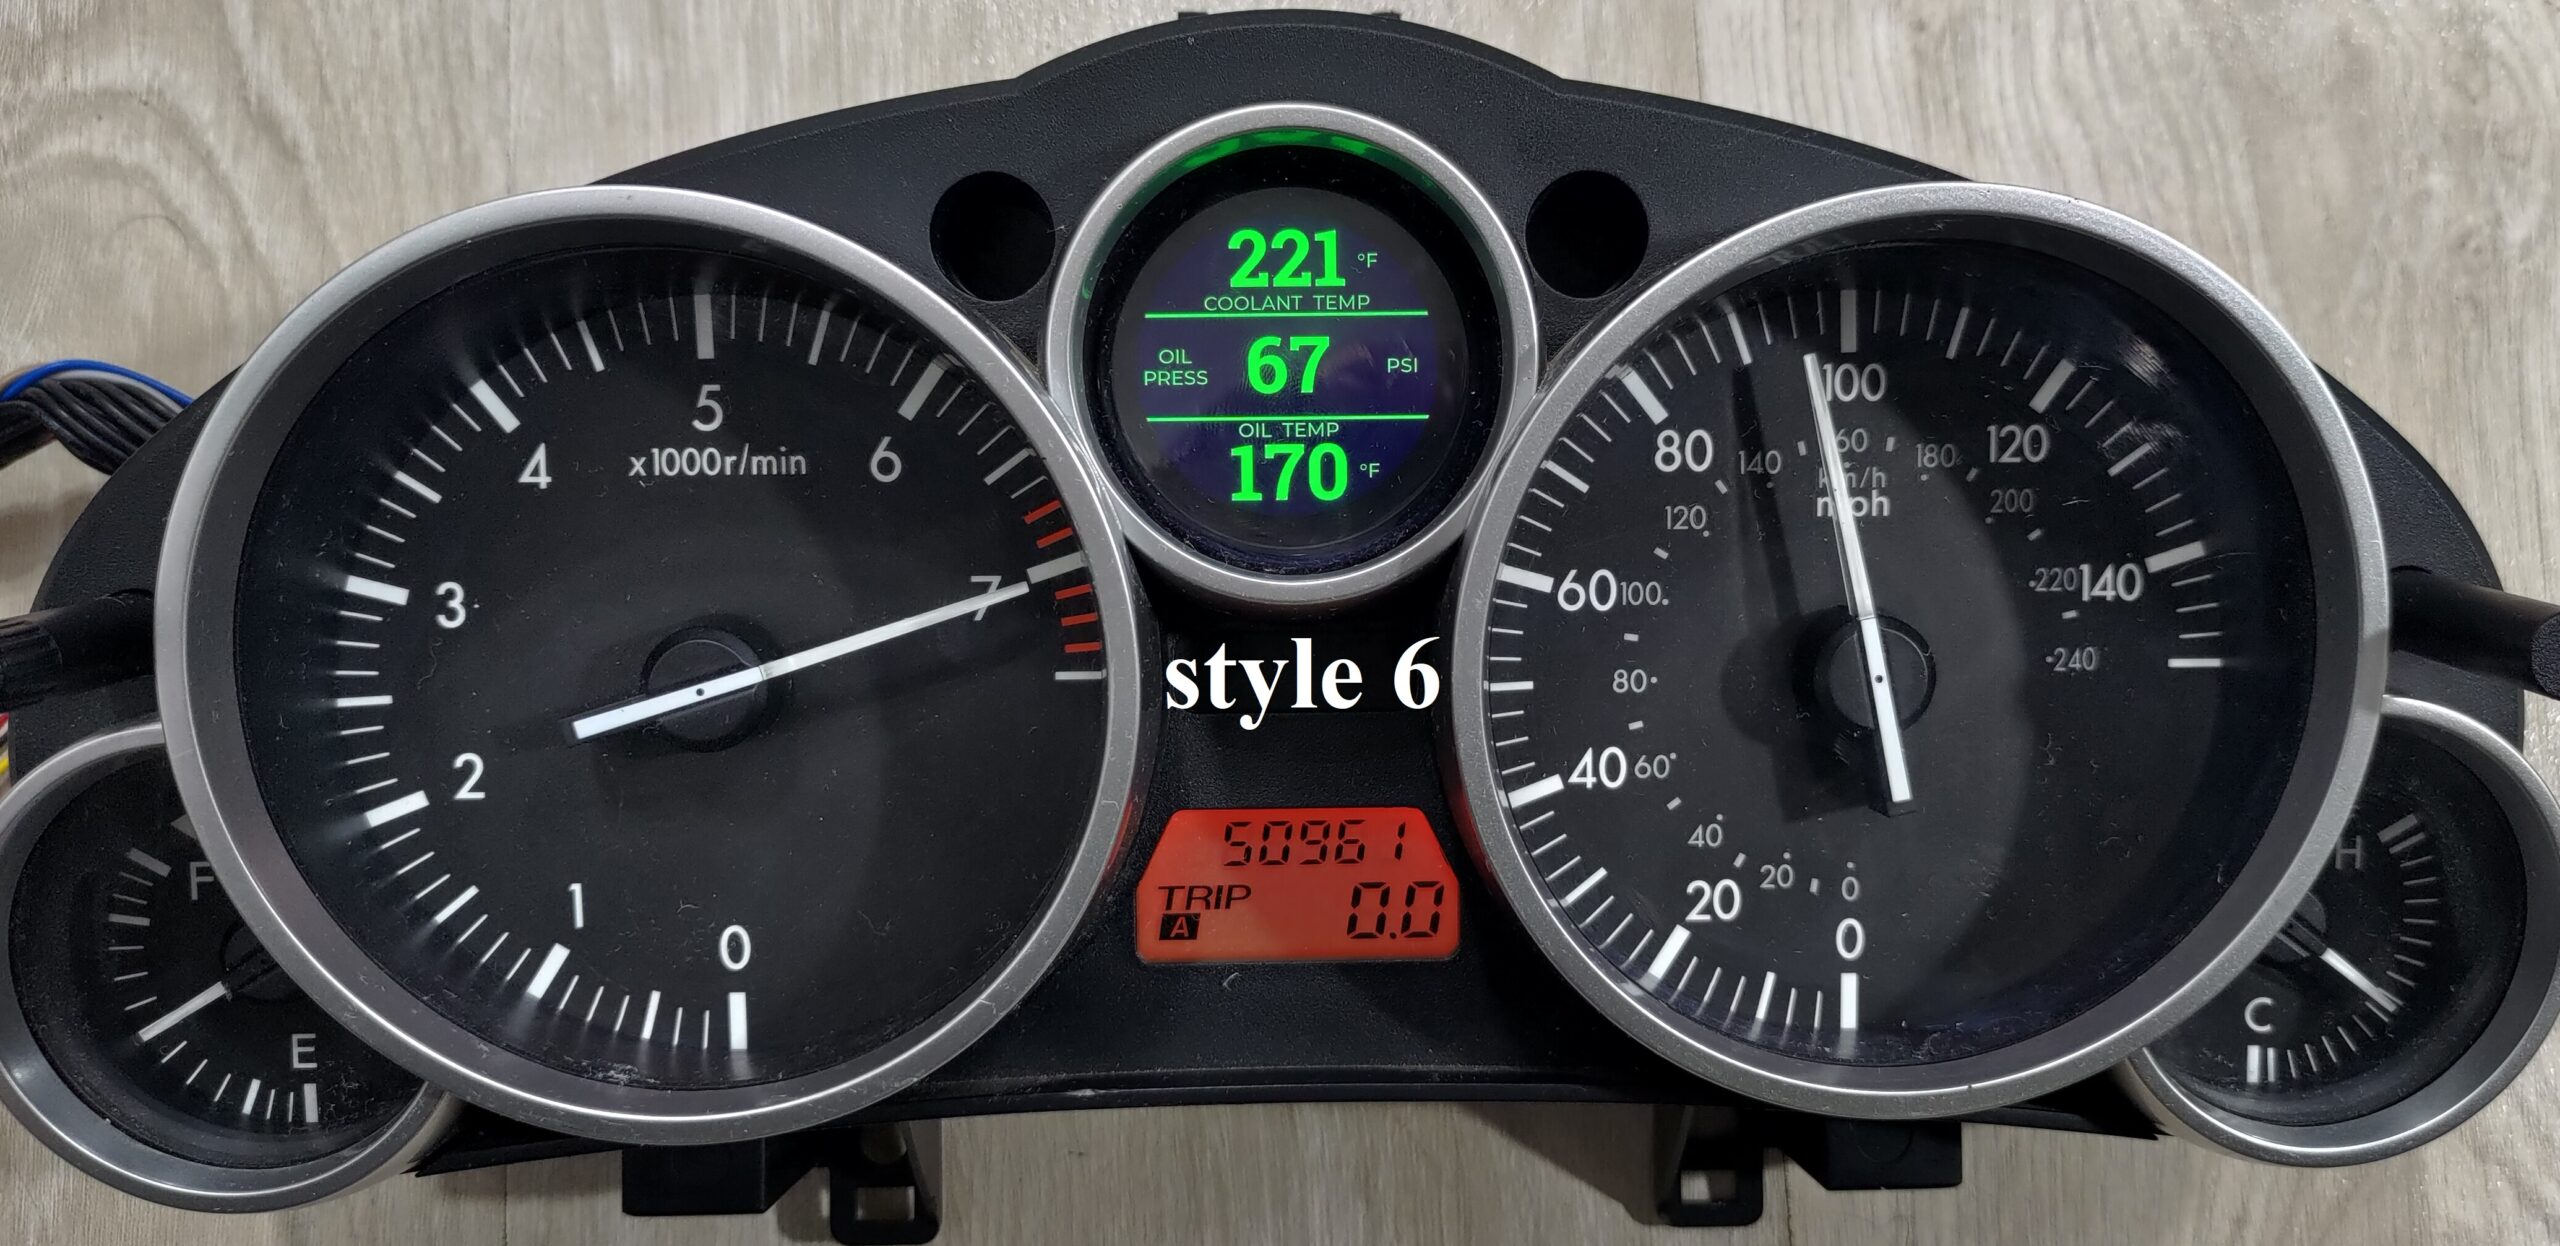
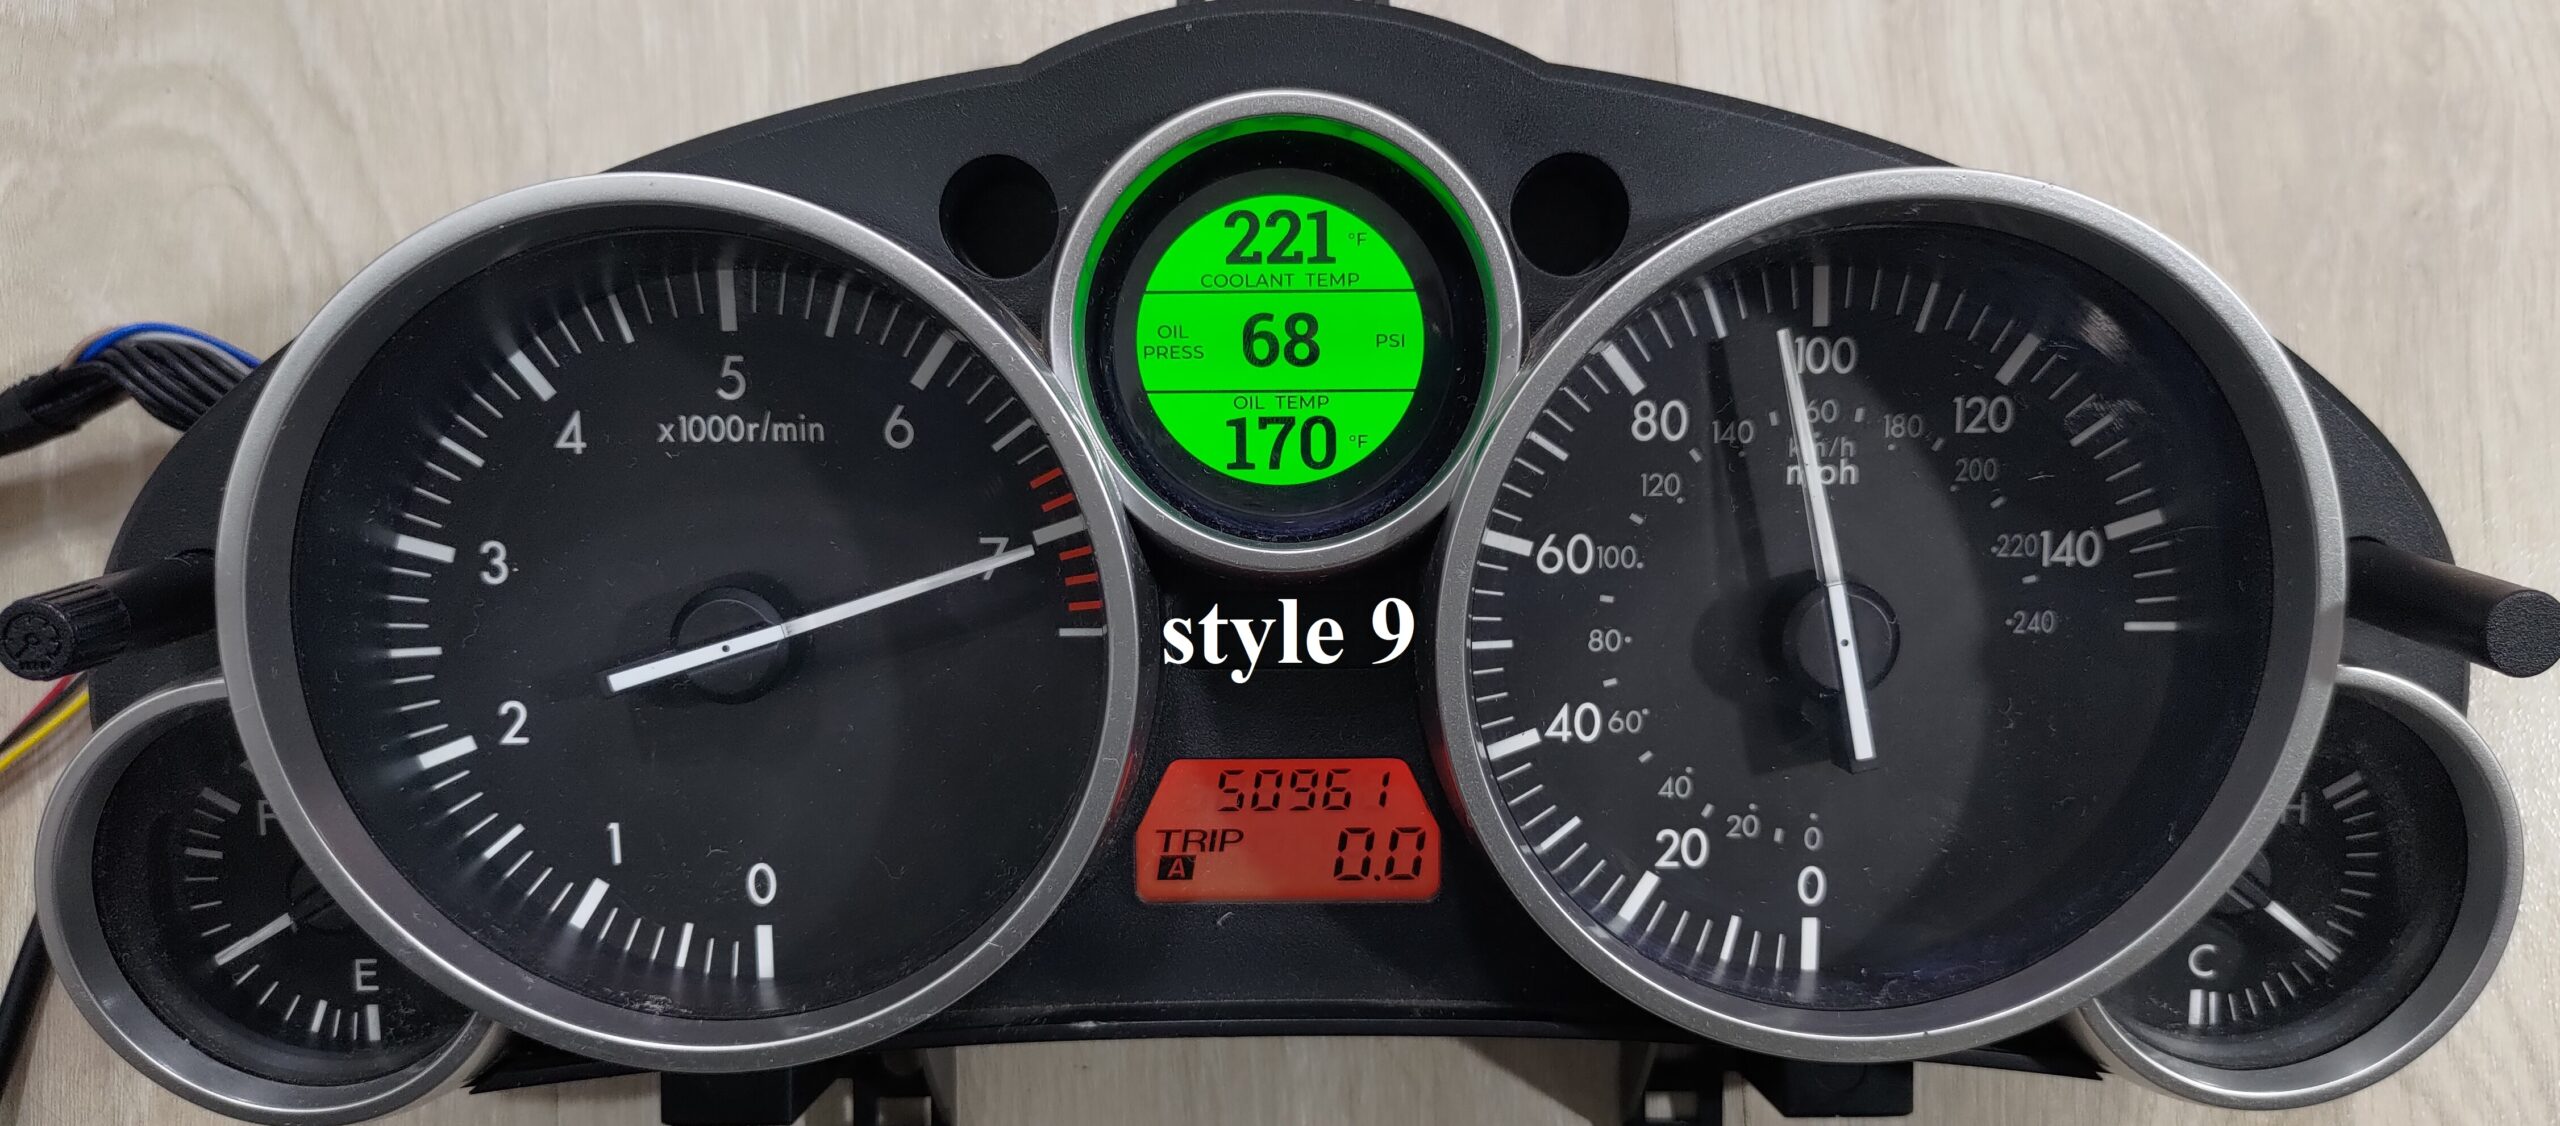
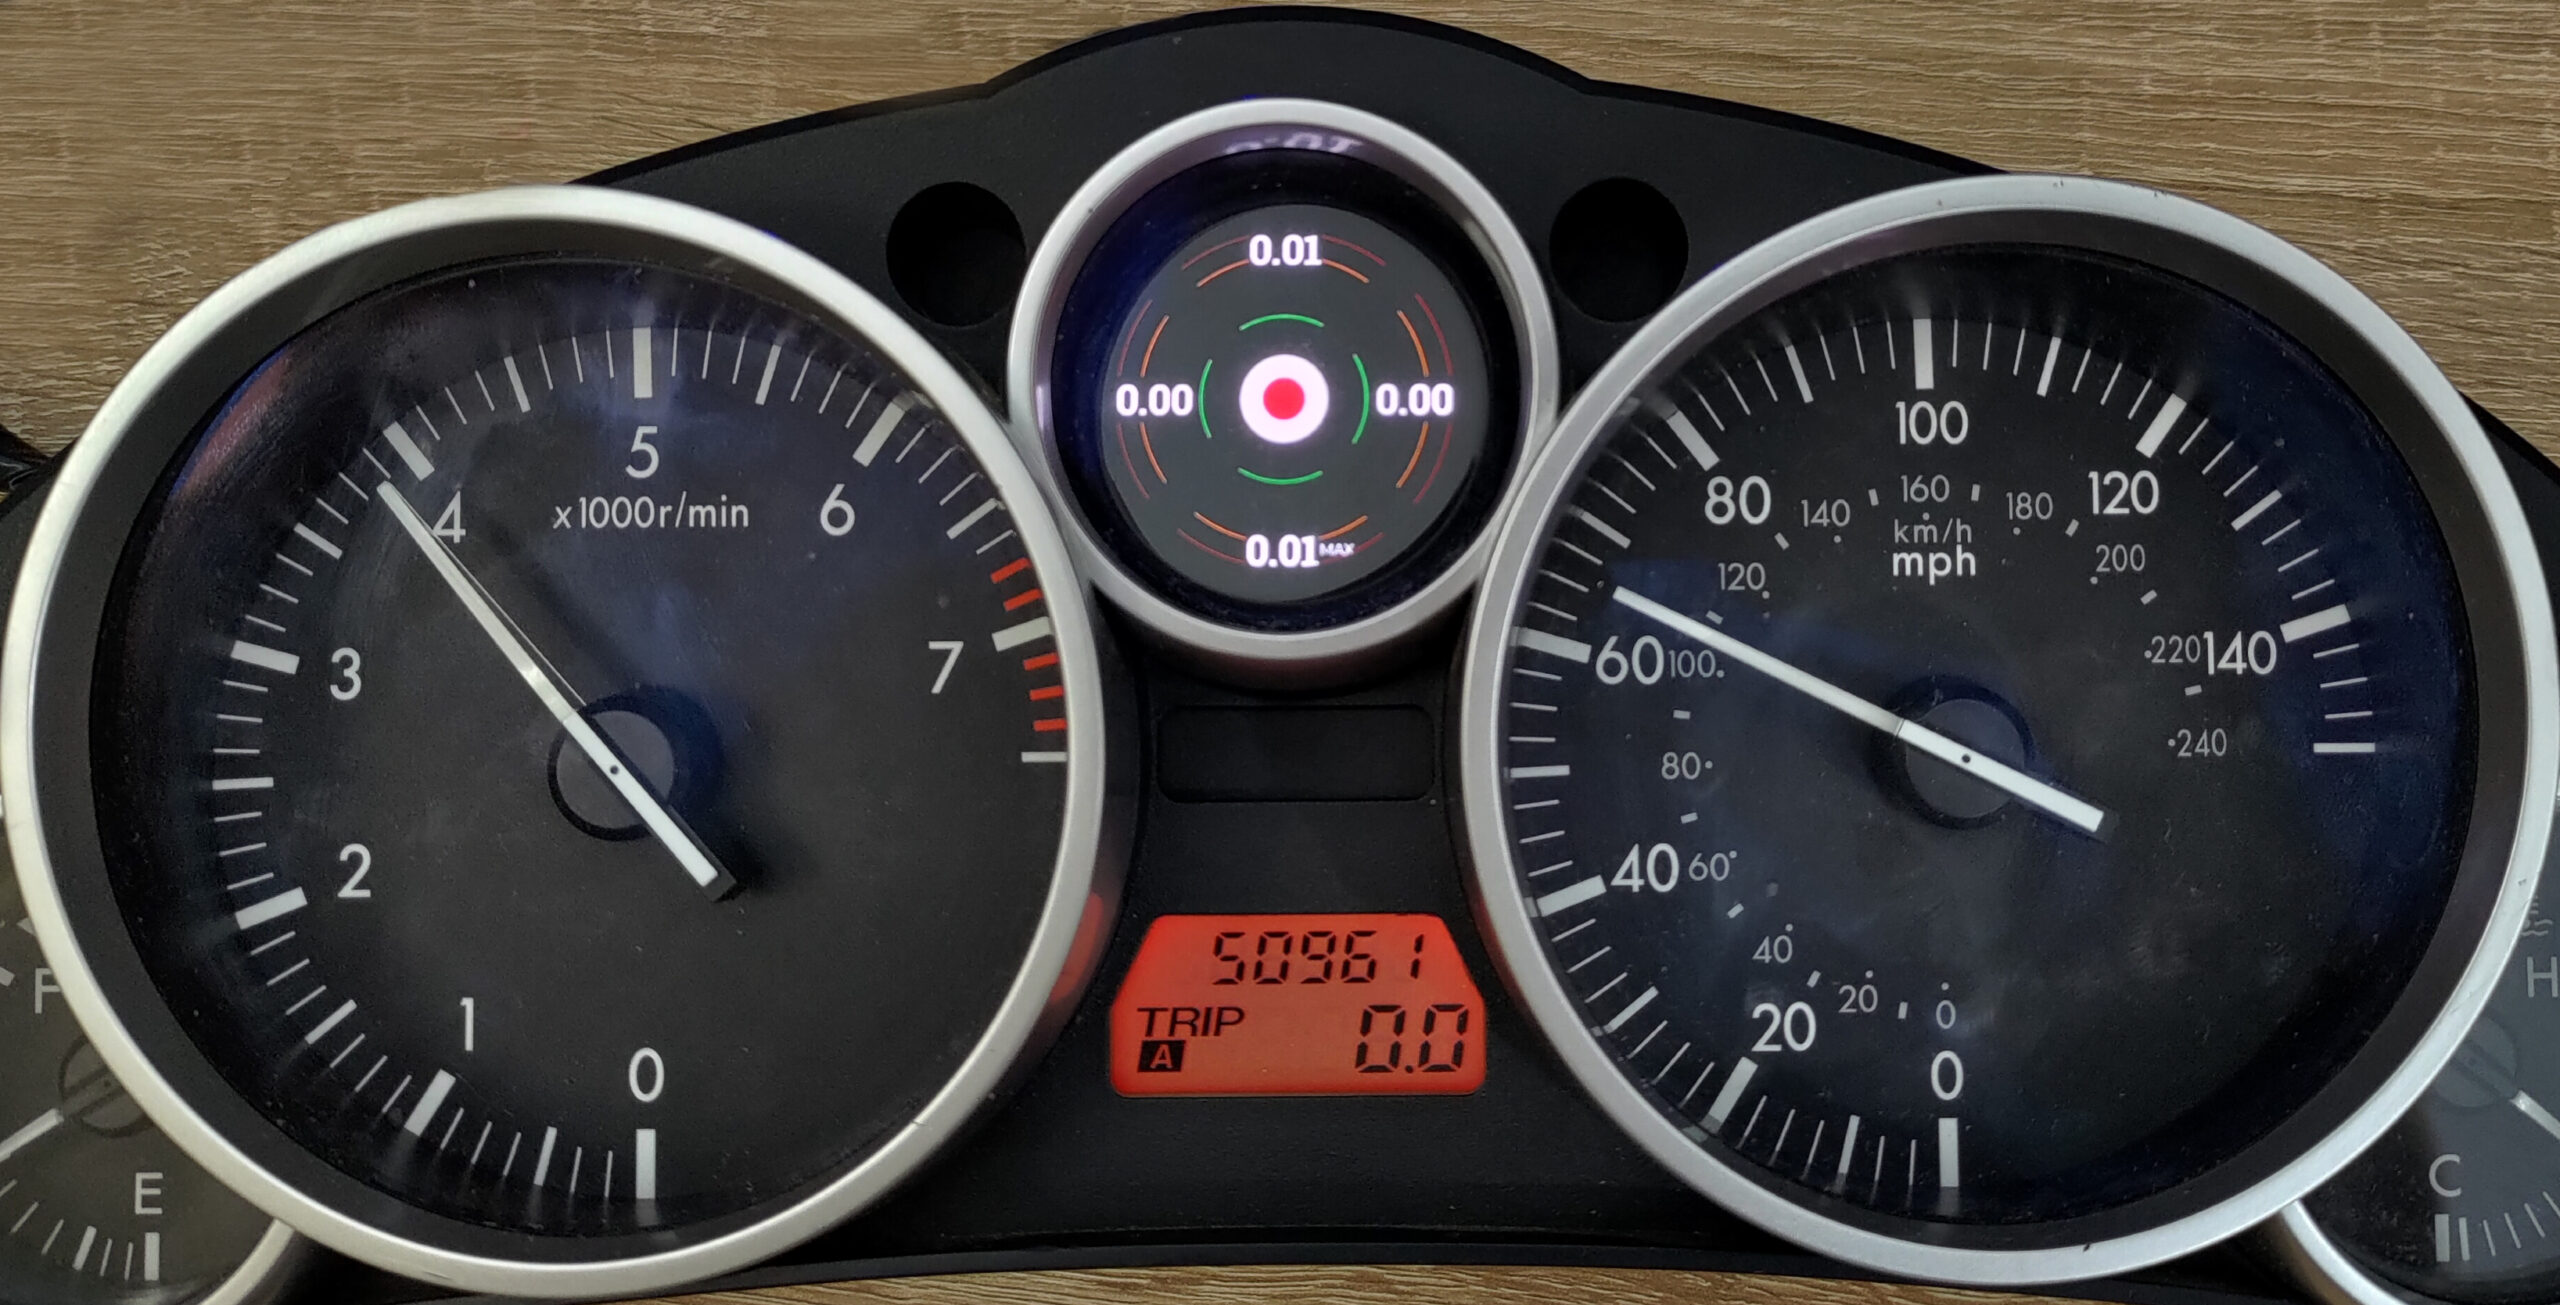
There are numerous LCD styling options; please see the number pasted over the product pictures. More will be available in the future thanks to Wi-Fi software updates!


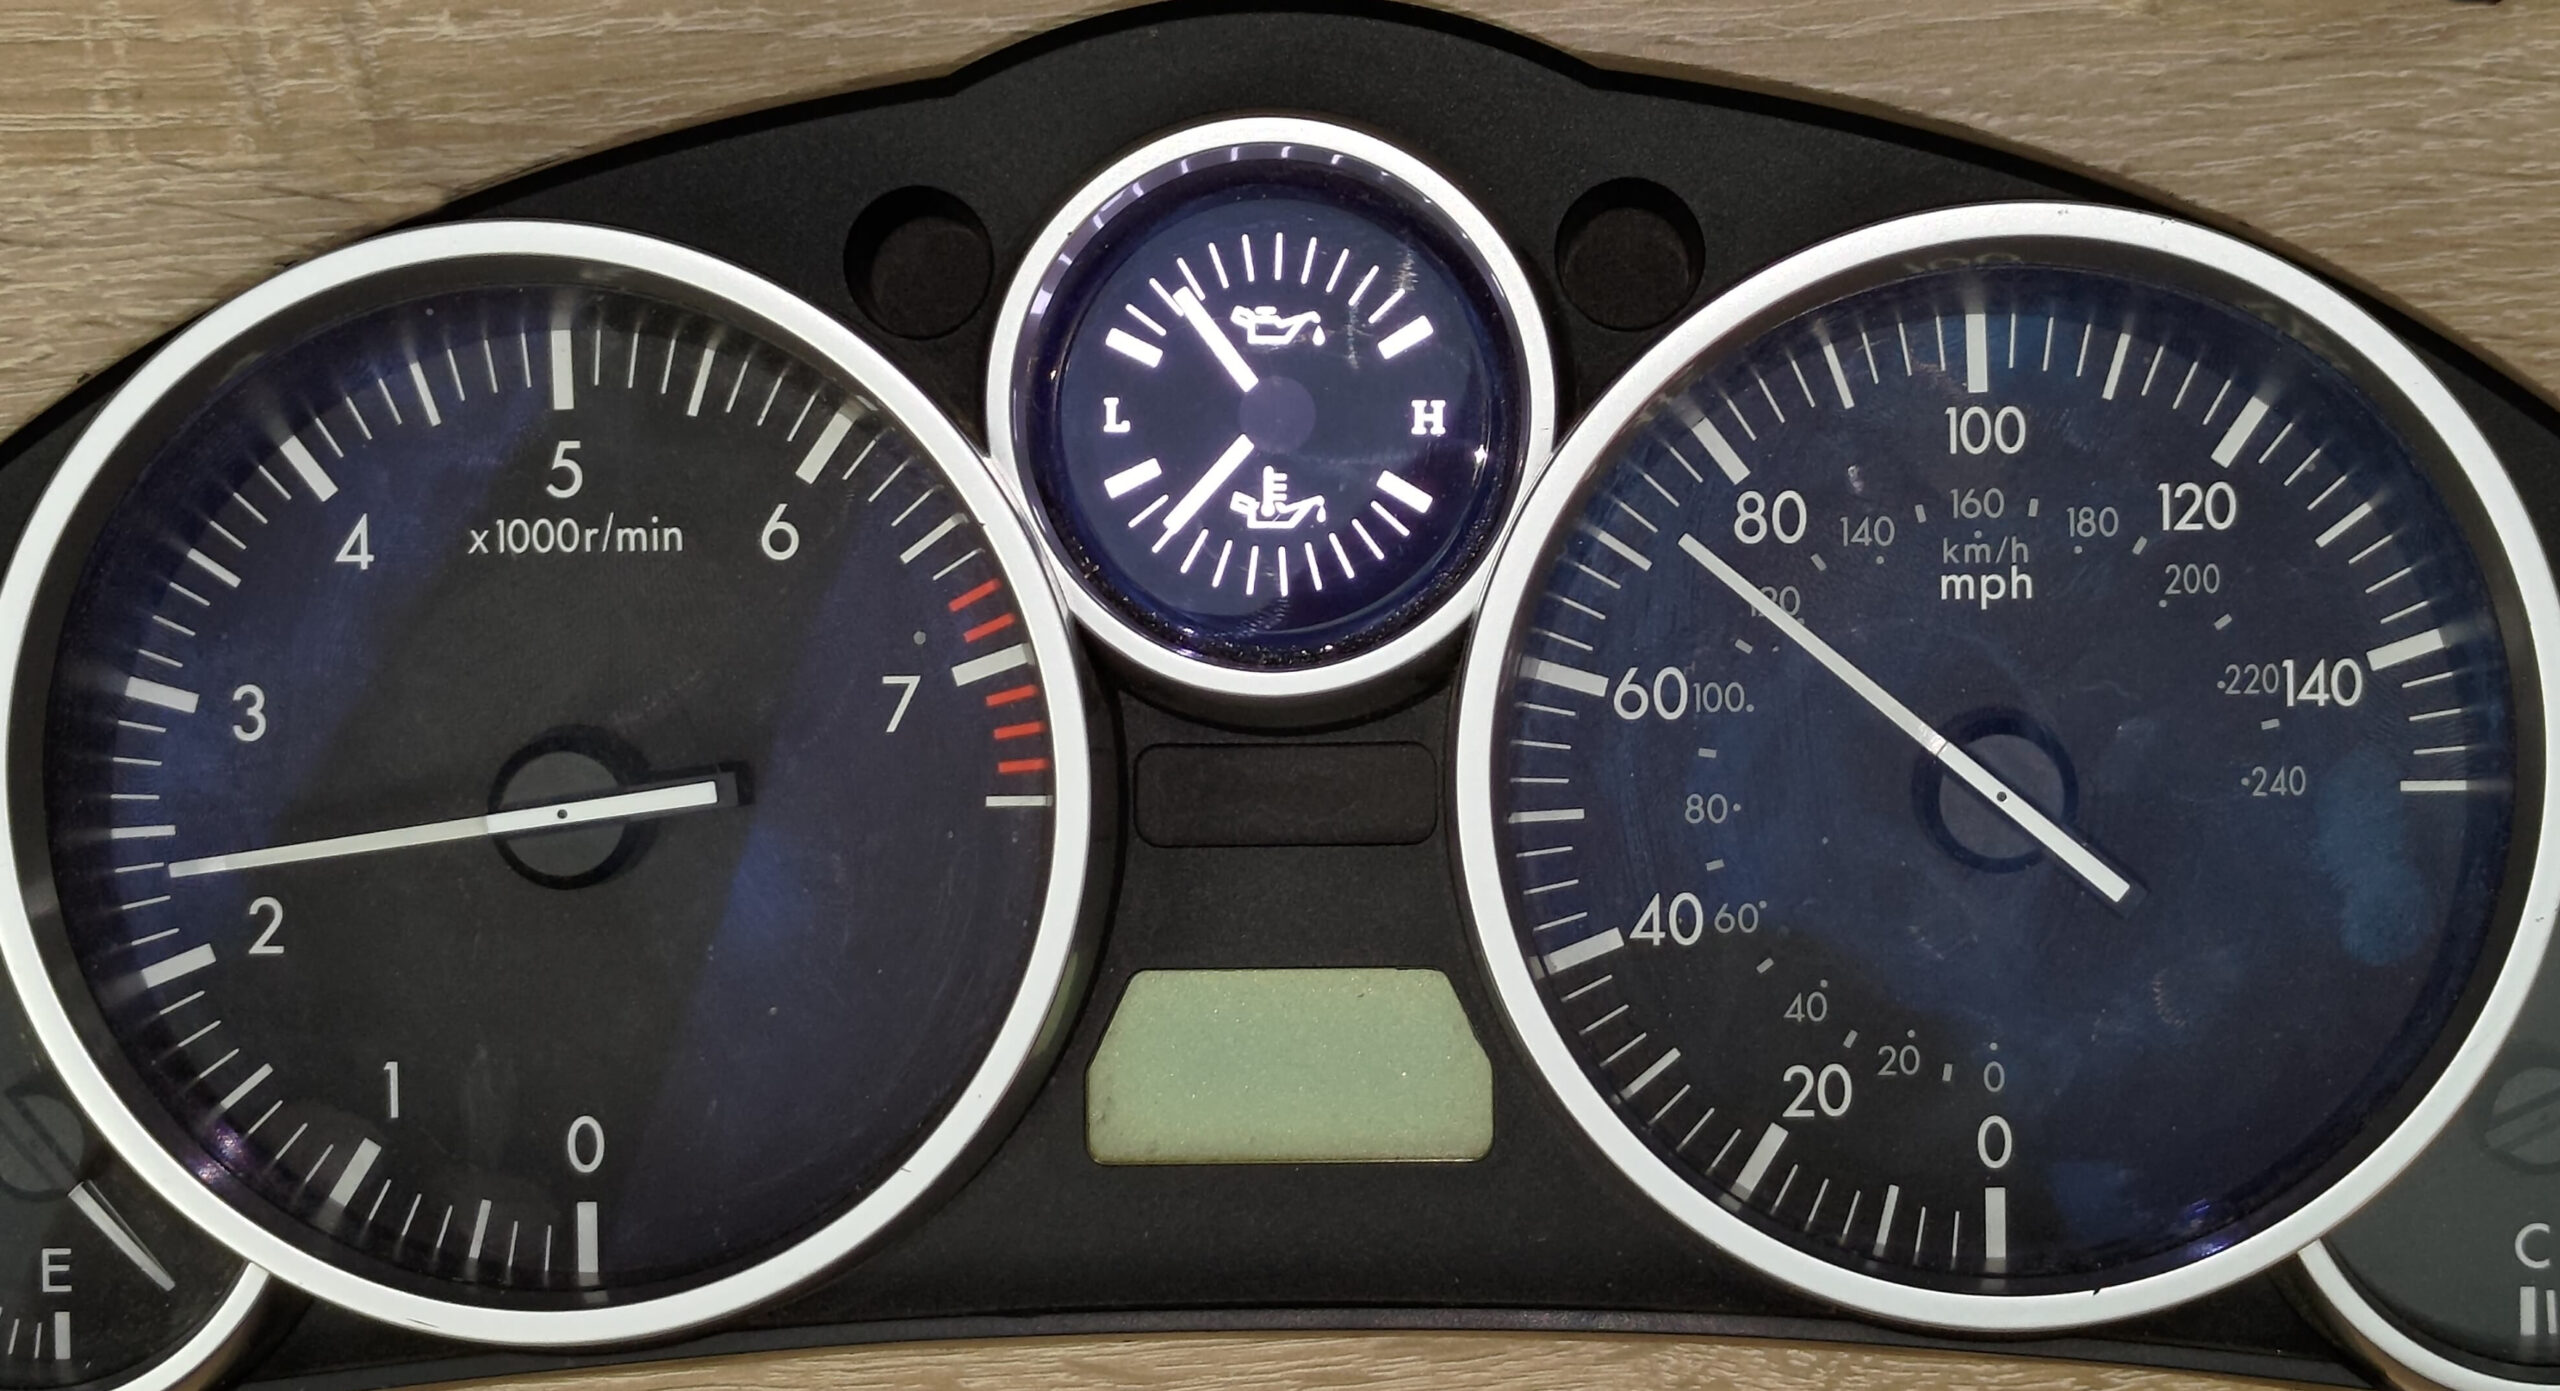
And for the fans of analog gauges, here you go! True analog oil pressure gauge + oil temperature gauge. Unlike the OEM one(s), these indicate real values.
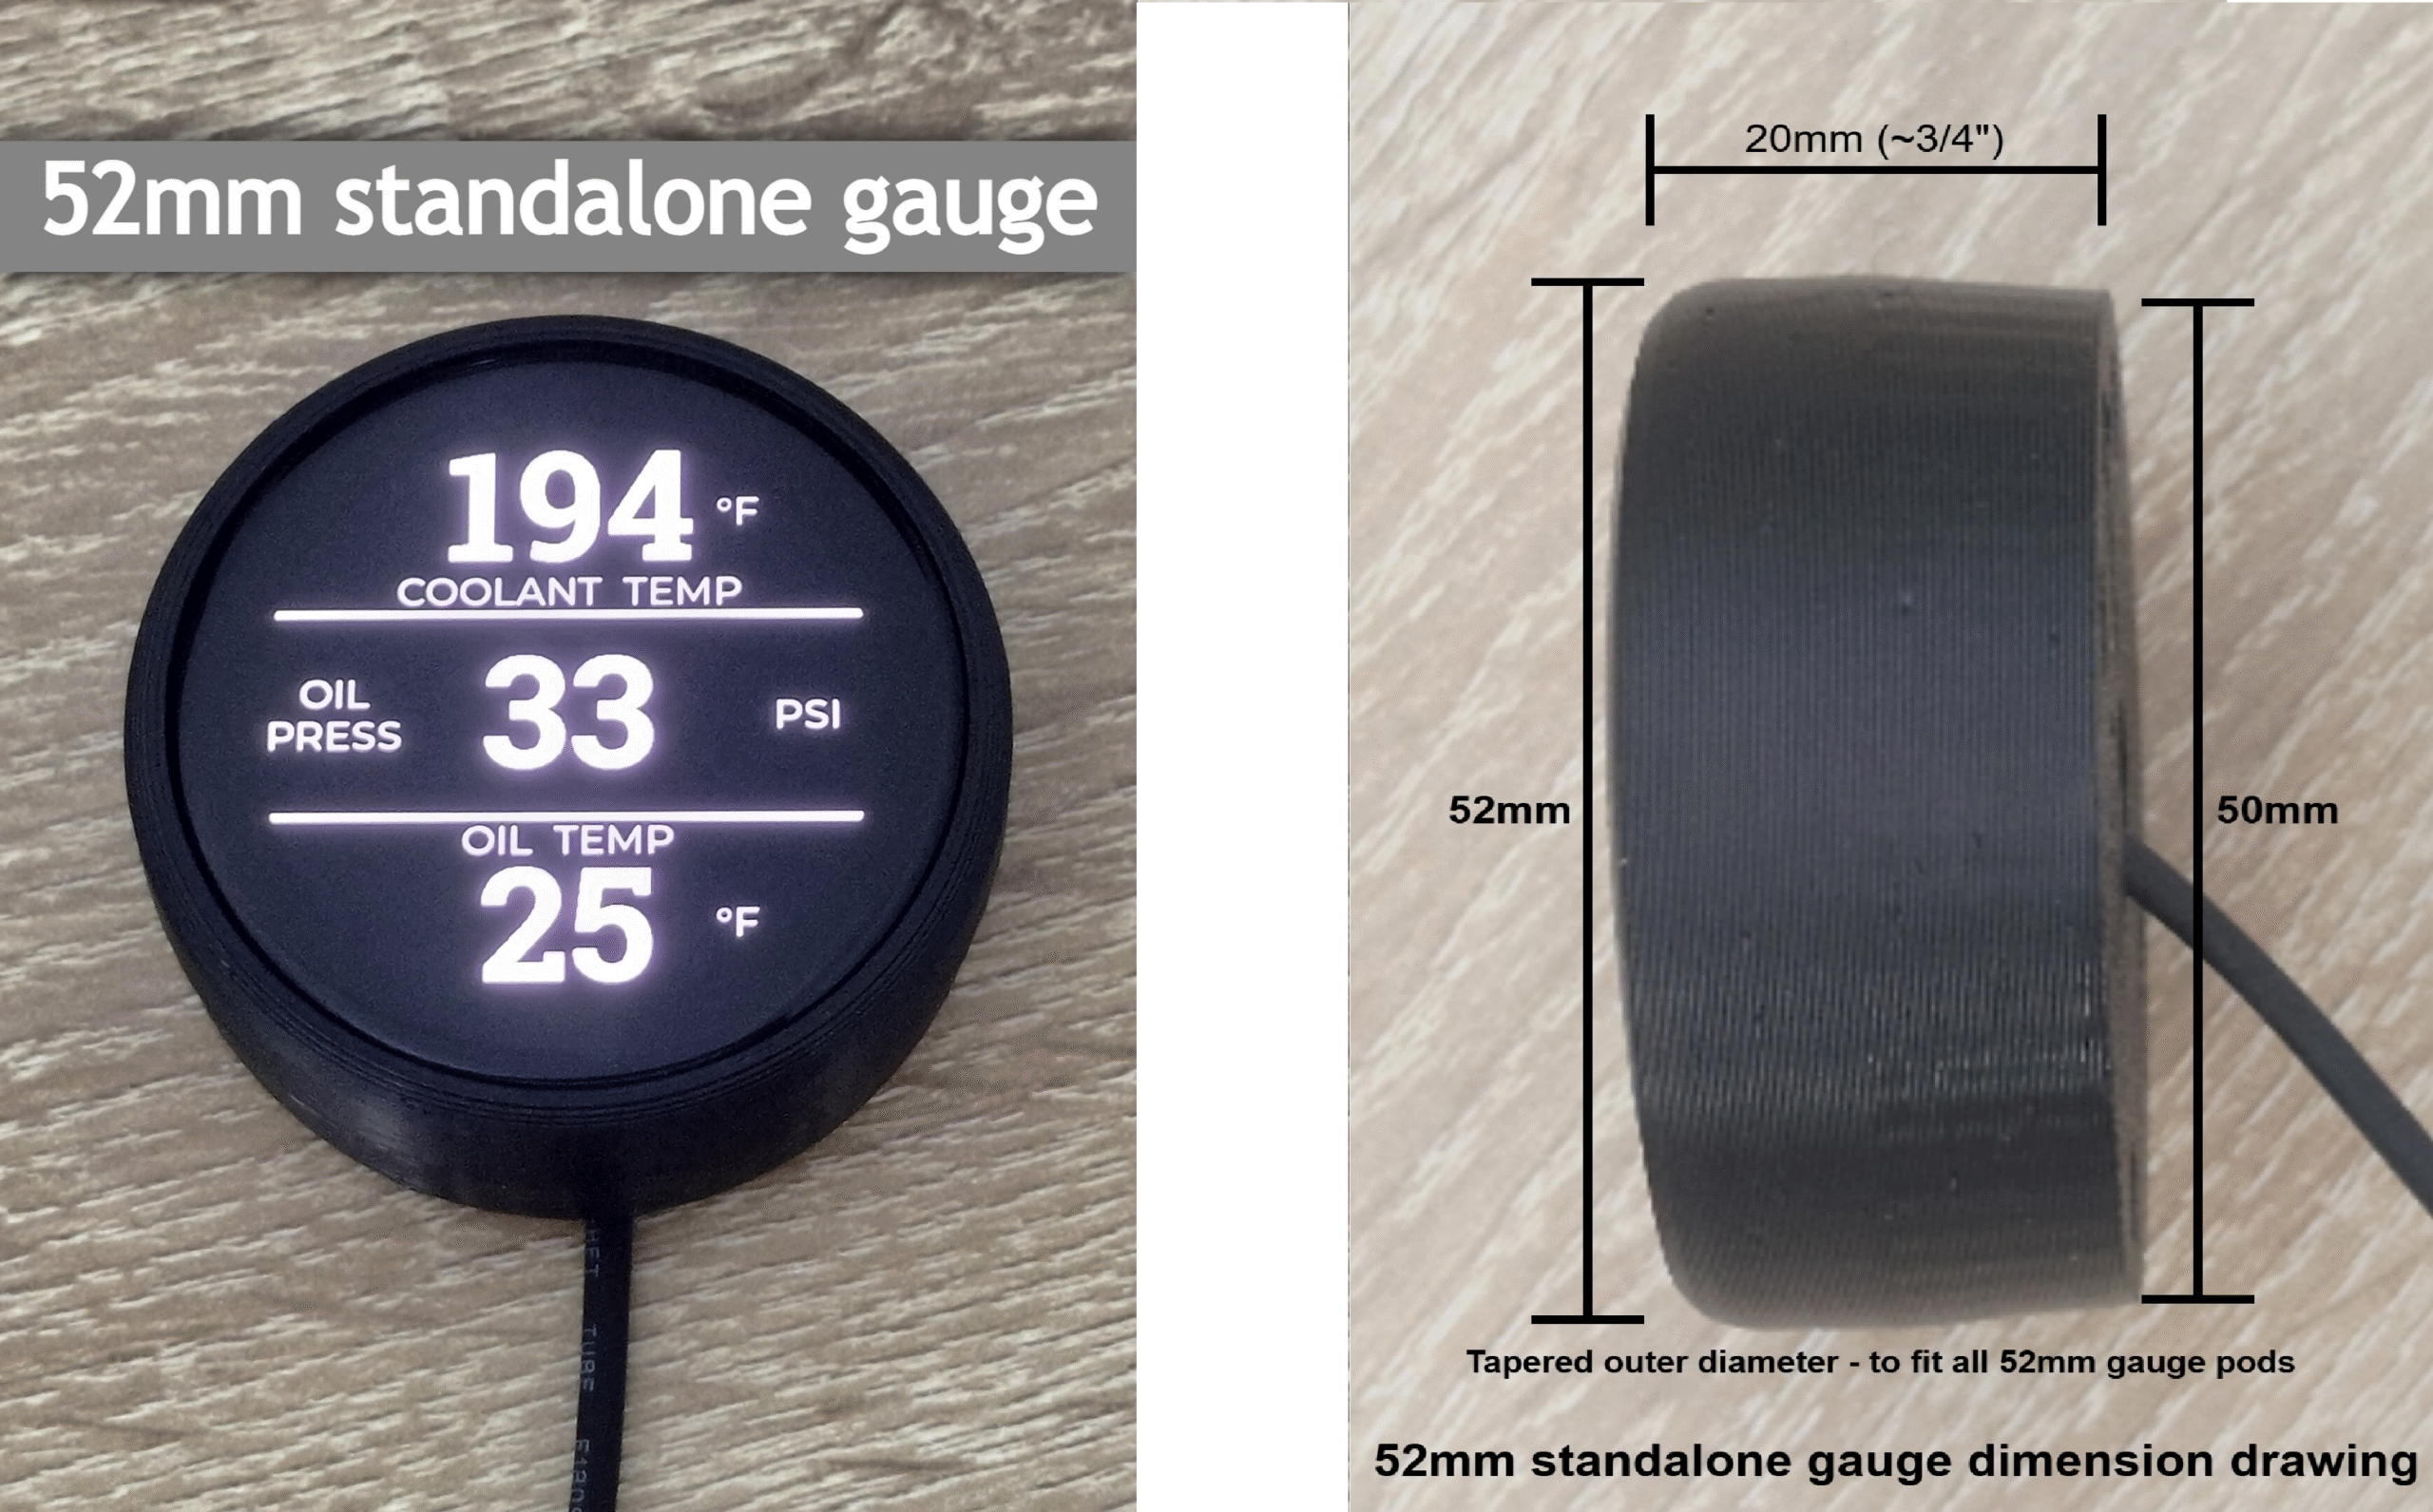
Or, the gauge kit can be a standalone 52mm gauge:
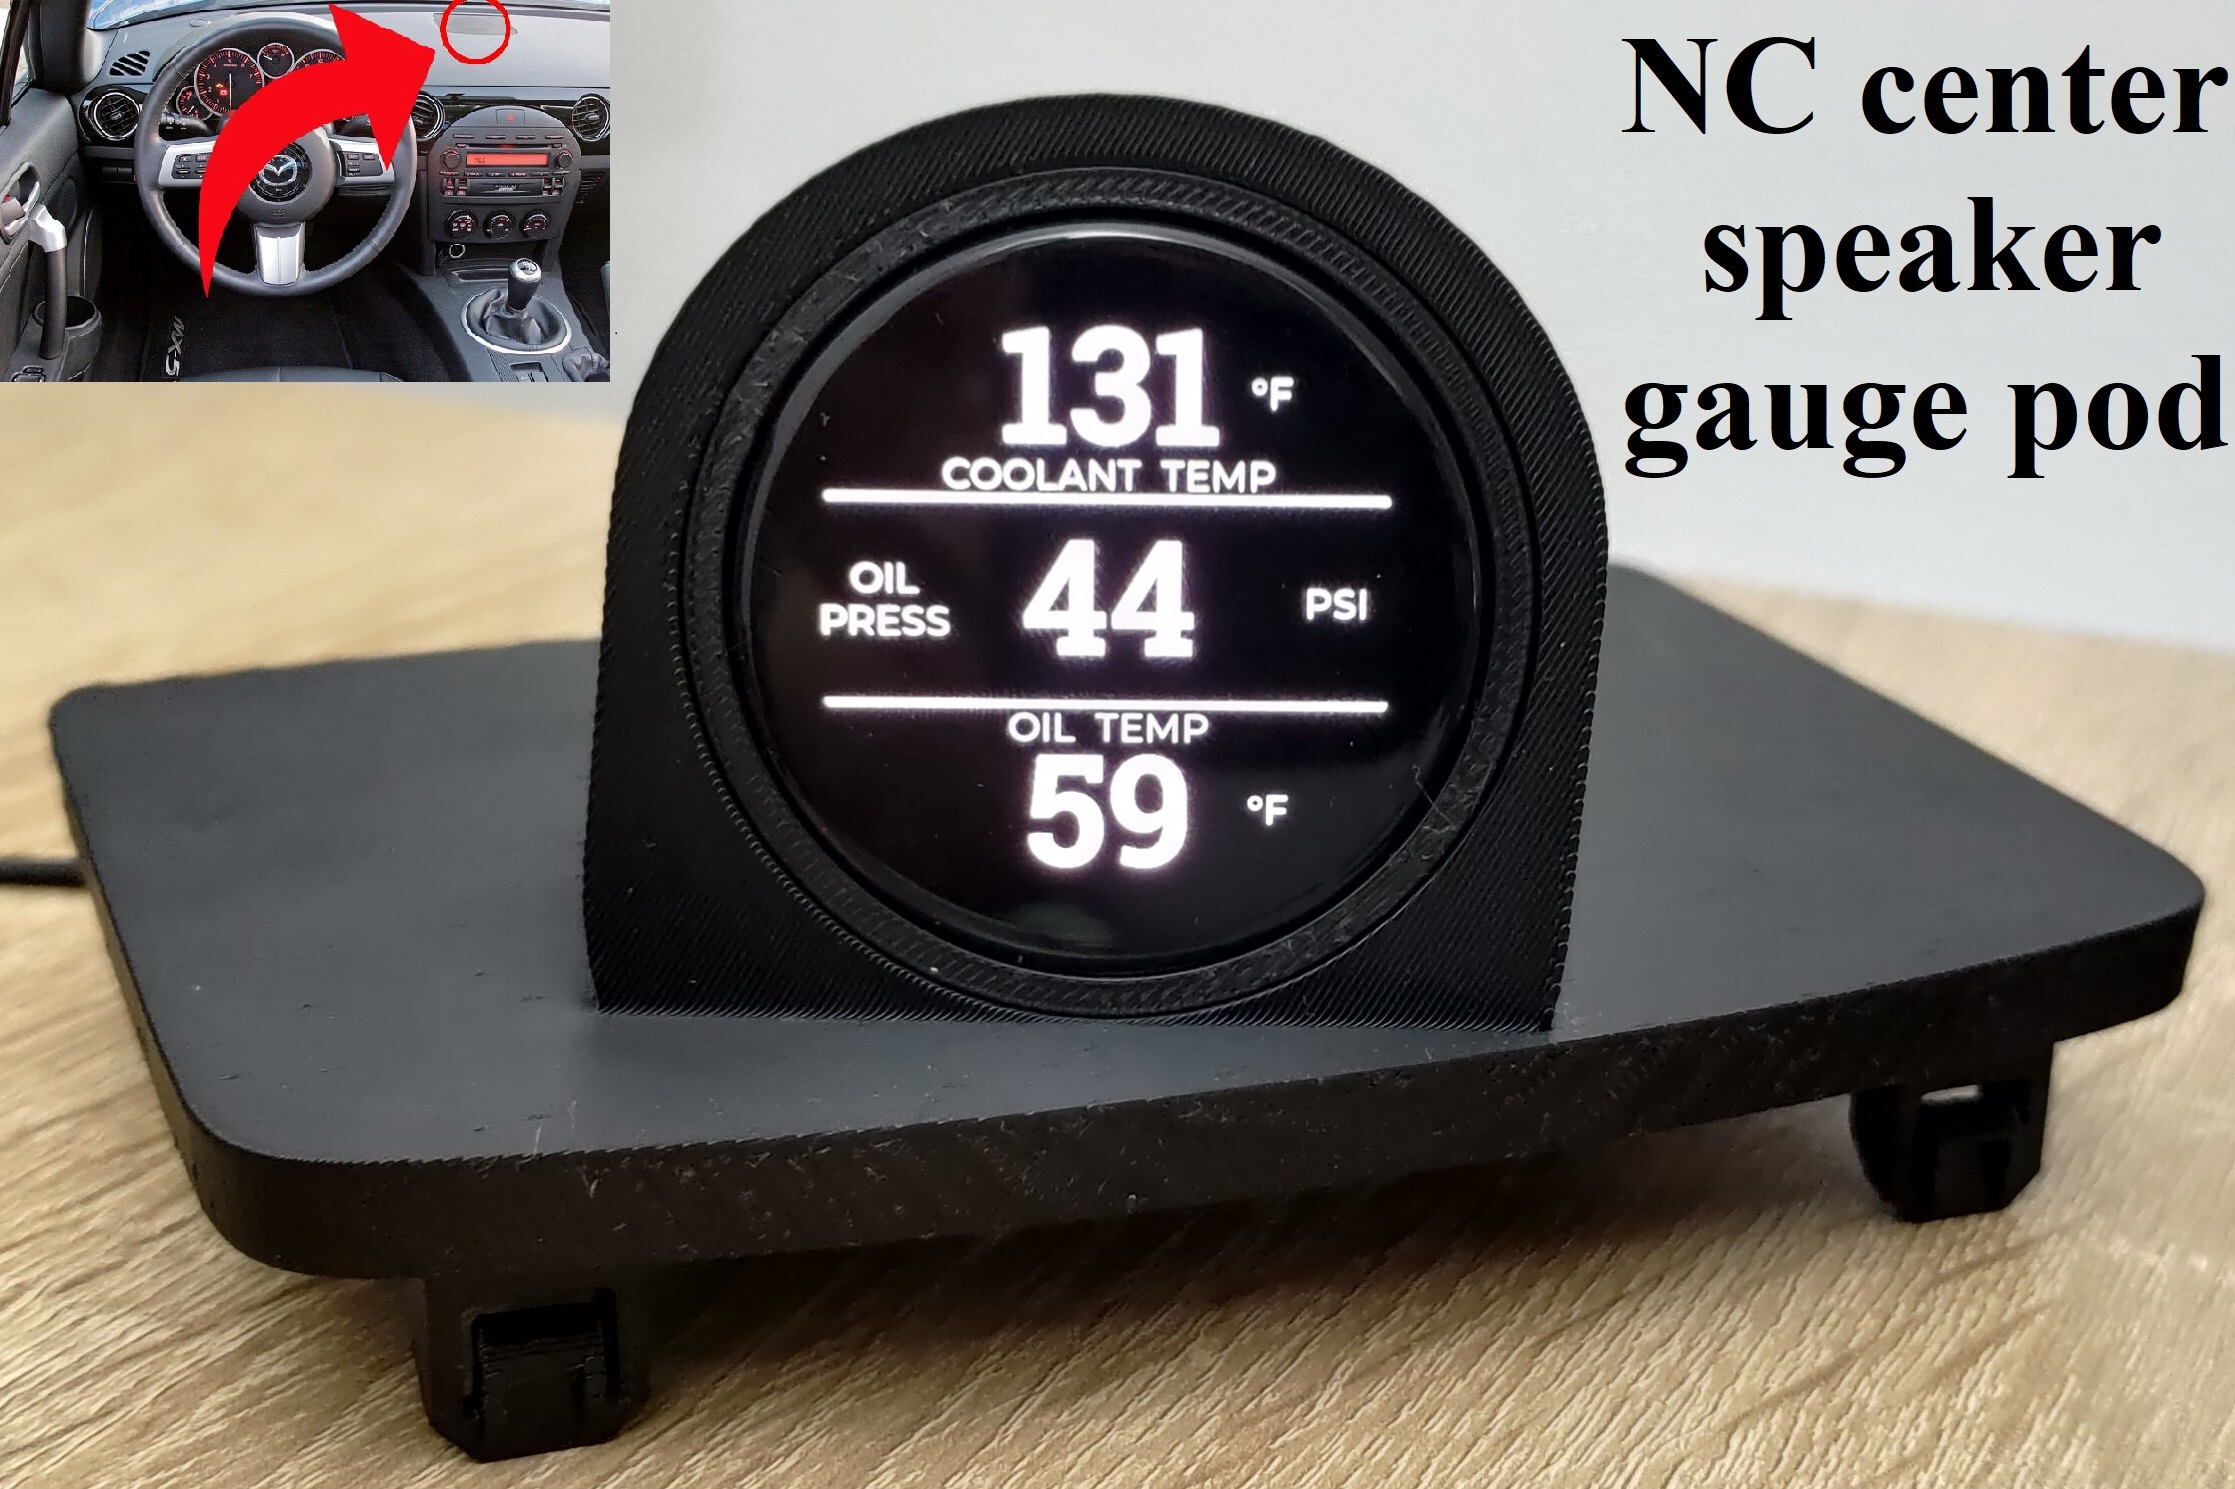
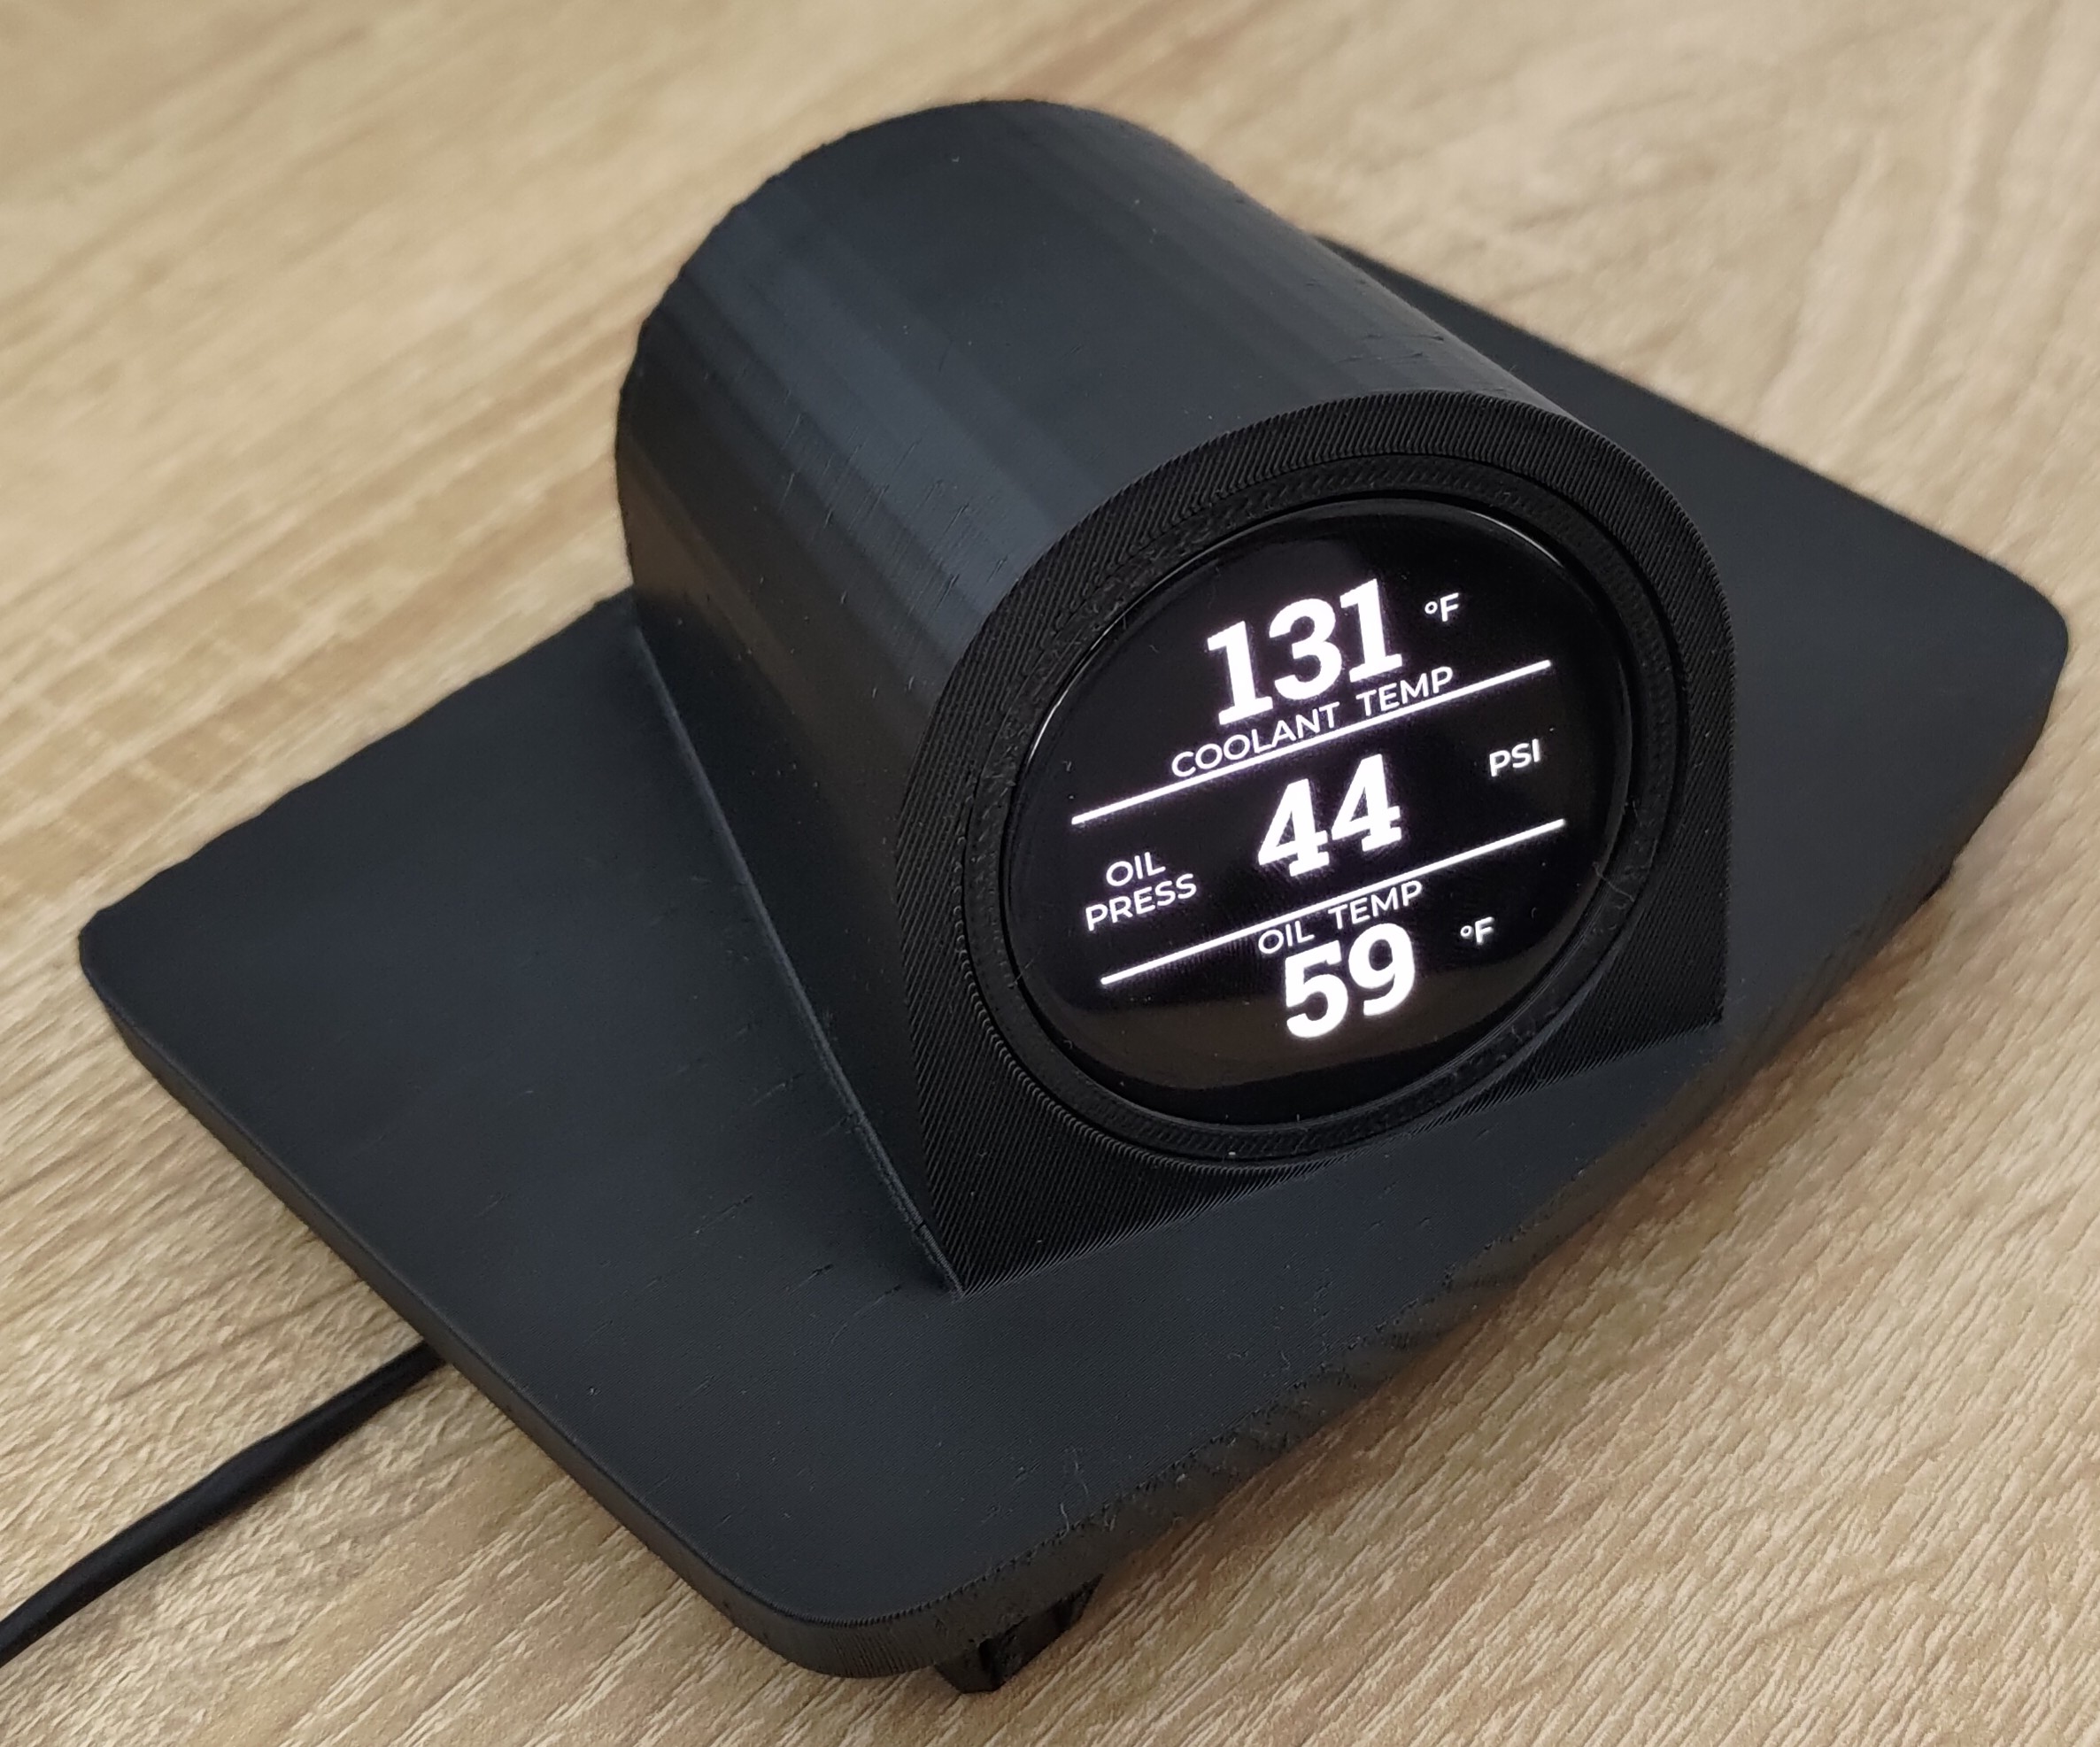
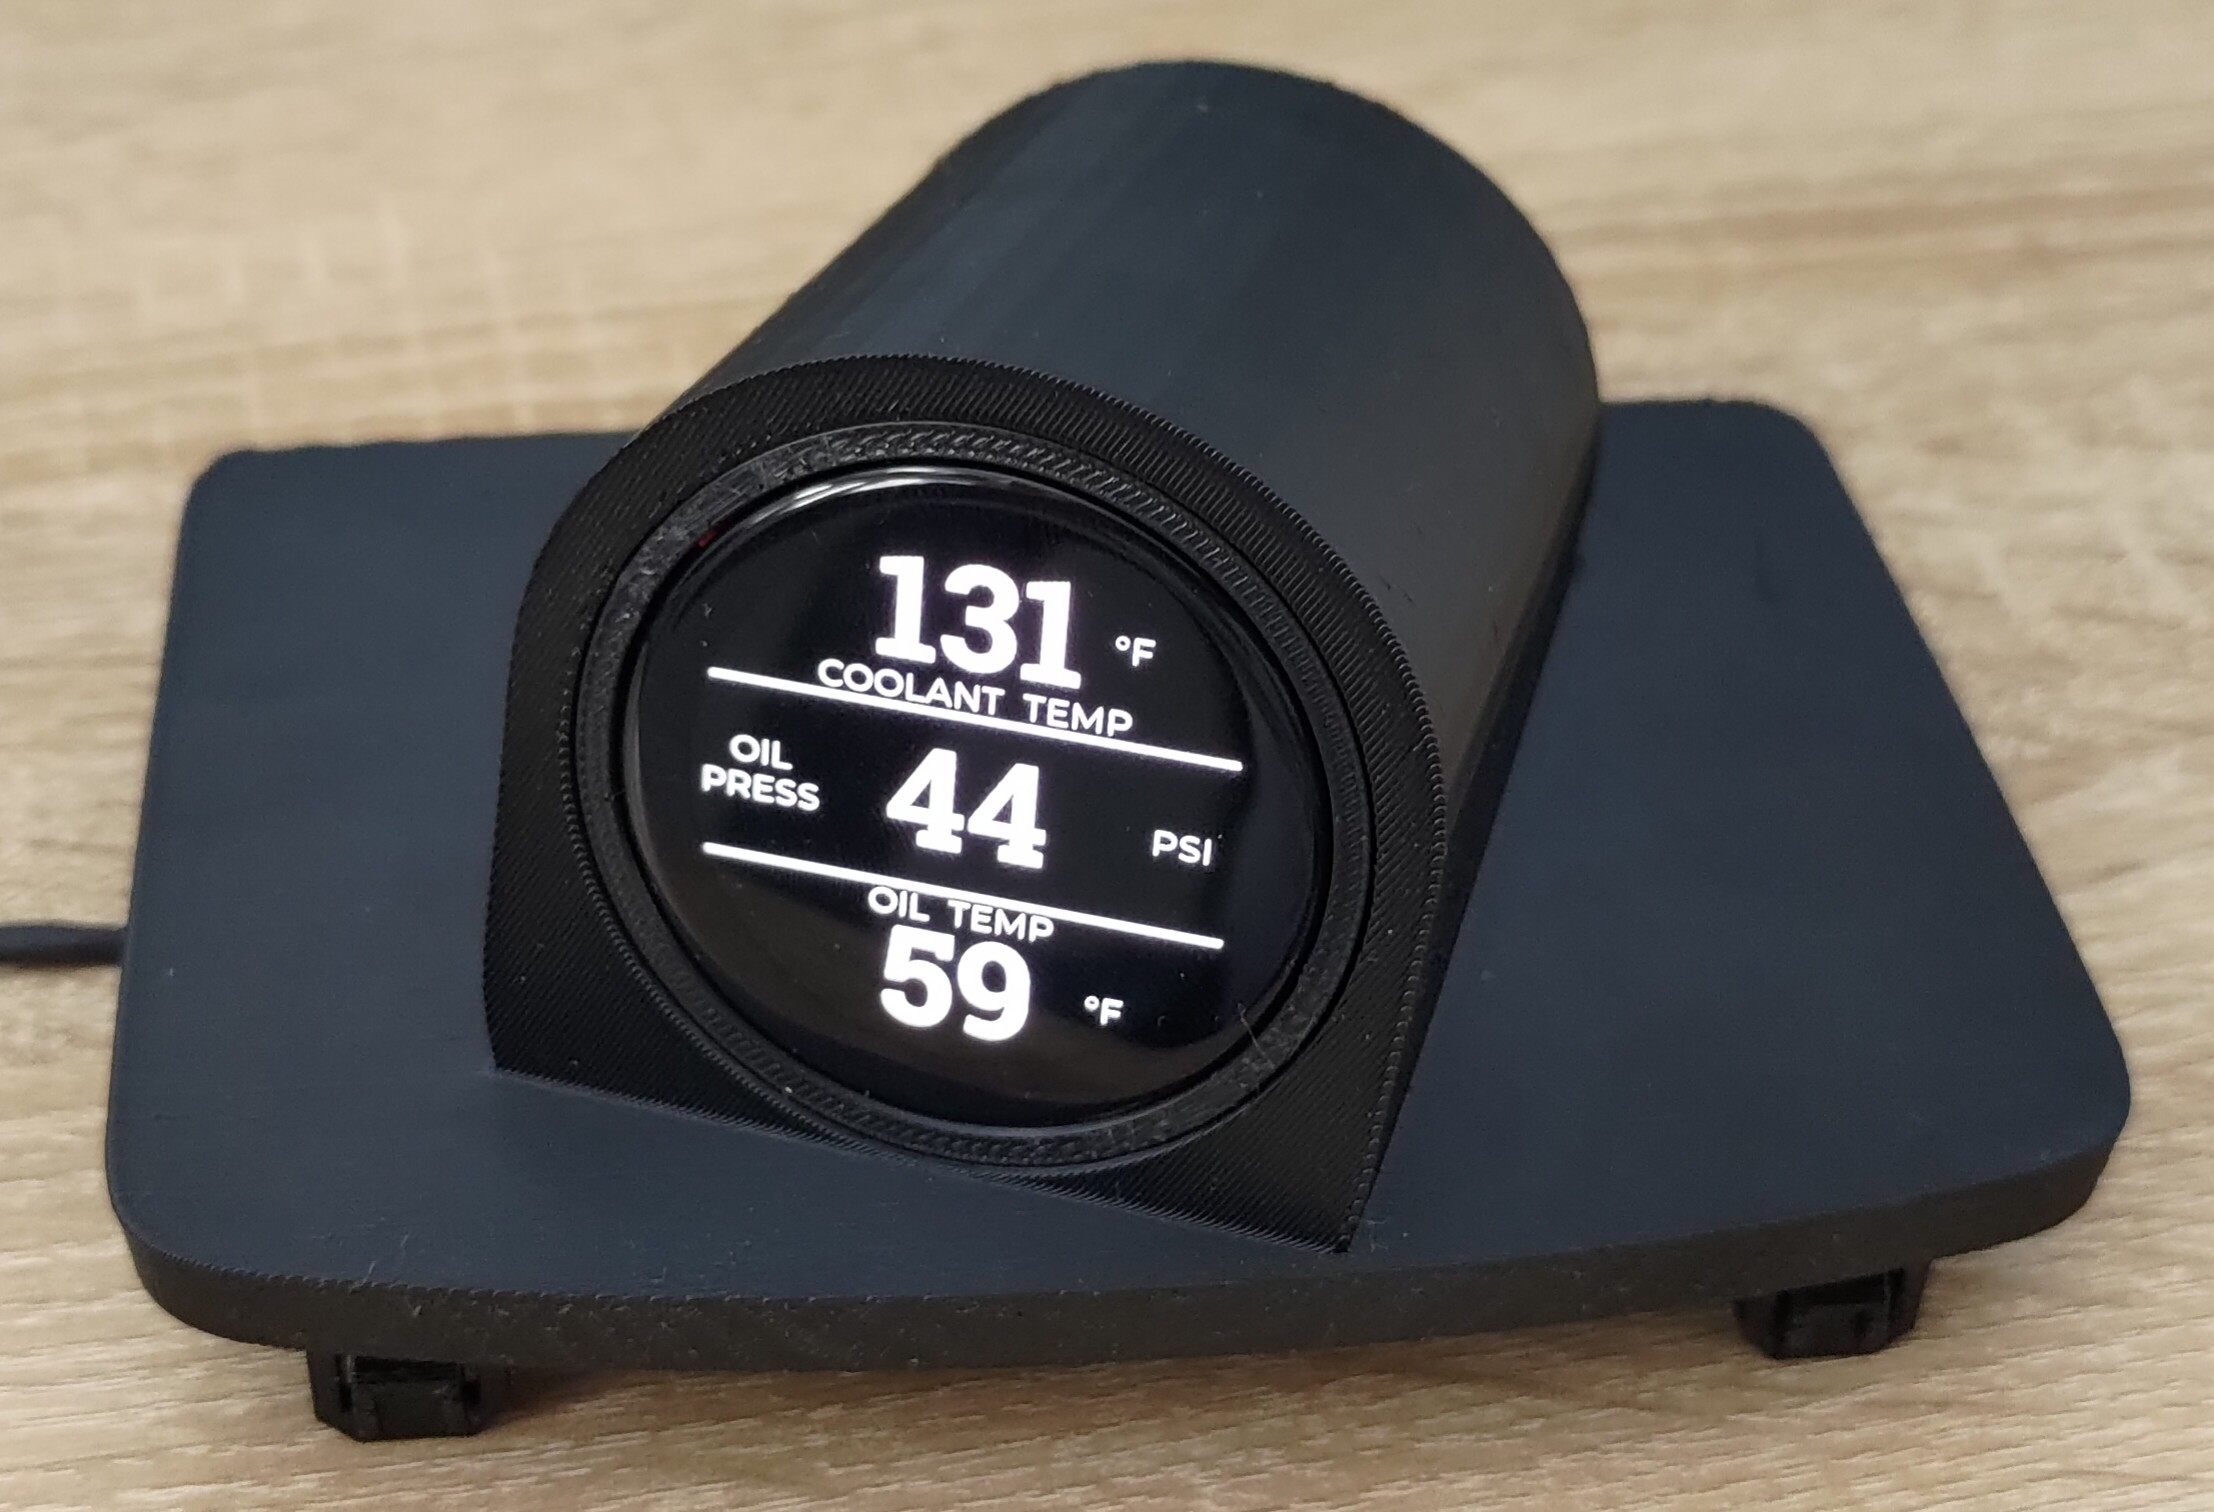
Or, it can go on top of the center speaker:
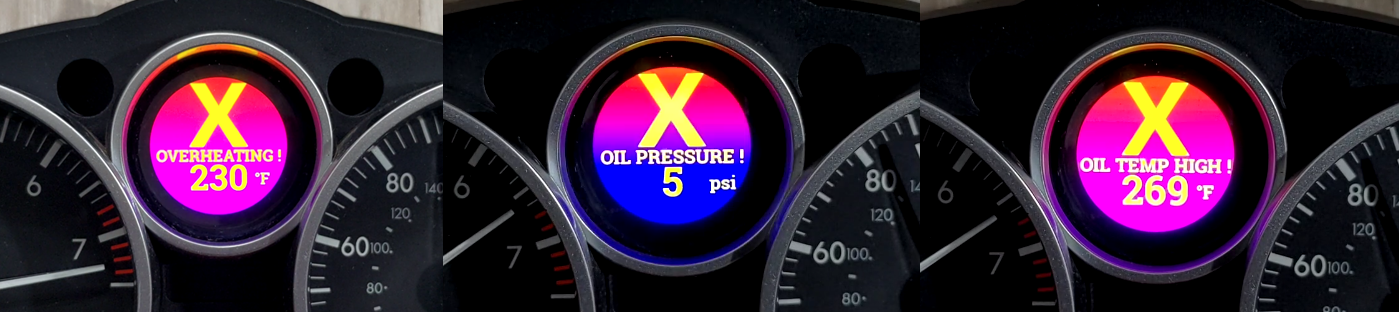
Standard features include alarm screens that go off at 225F for coolant, 230F for oil, and under 10 psi for oil pressure.
They also flash rapidly to further draw attention.
All these numeric thresholds are adjustable if so desired – by the customization keyboard or by Wi-Fi software update.
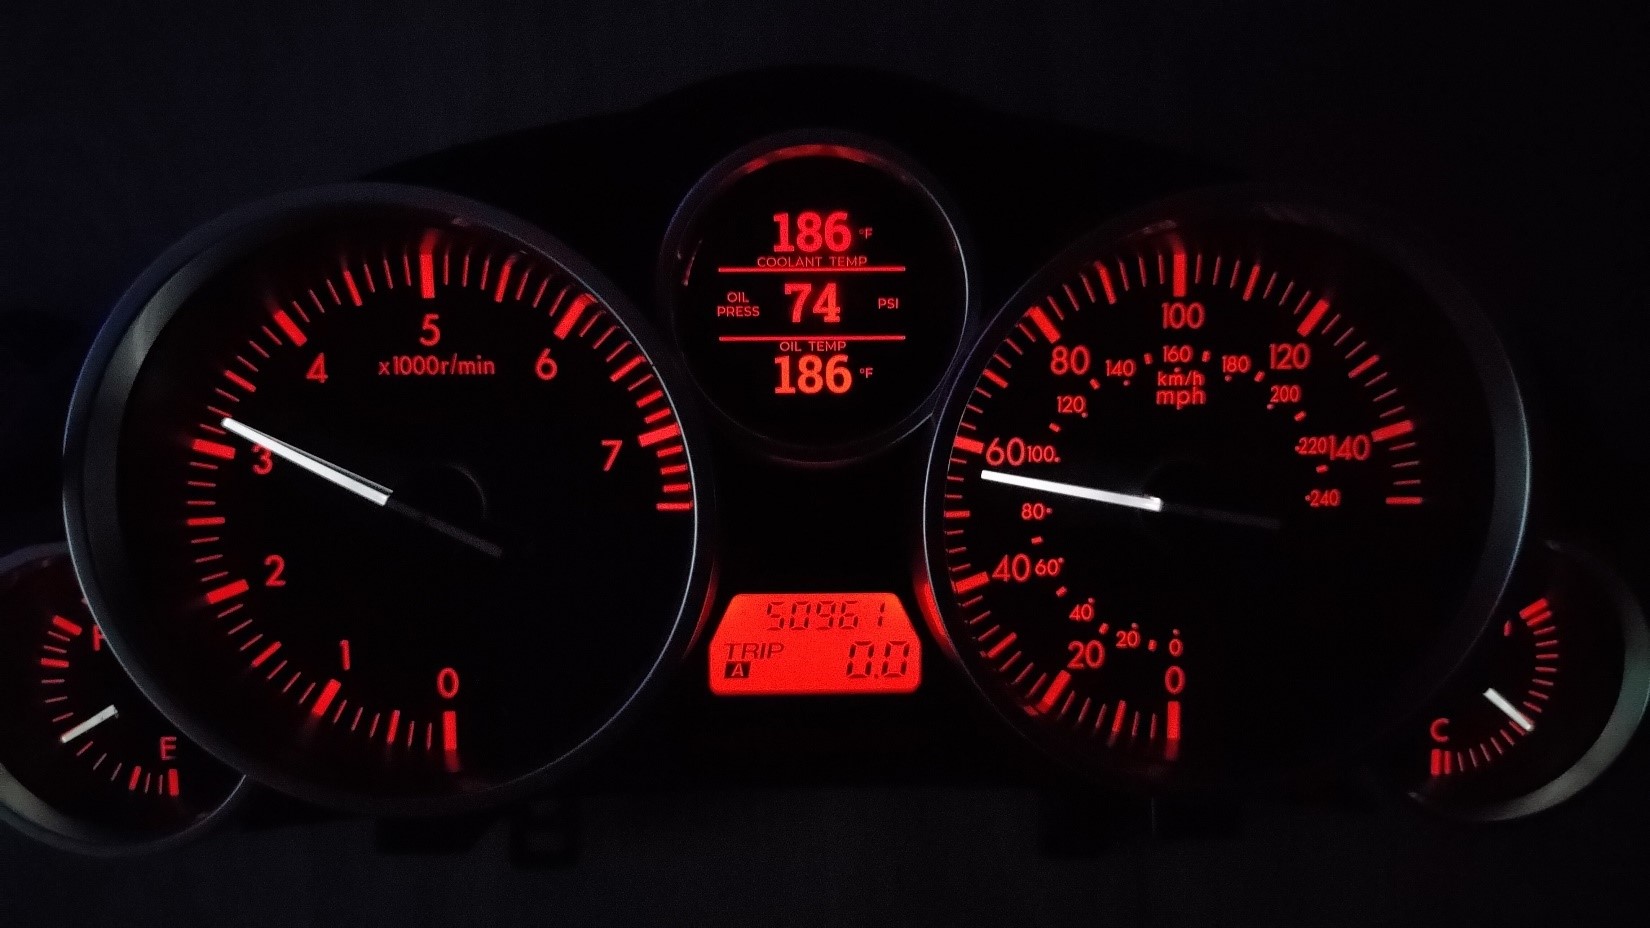
The brightness of the screen is automatically adjusted – by turning on the knob to the left of the cluster Mazda gave you already. You will absolutely love this when driving at night.
Don’t worry about the lights behind the screen – the screen will replicate them. Don’t want them? They can be turned off.
And the cherry on the top: the screen can be configured to automatically change color along with the cluster!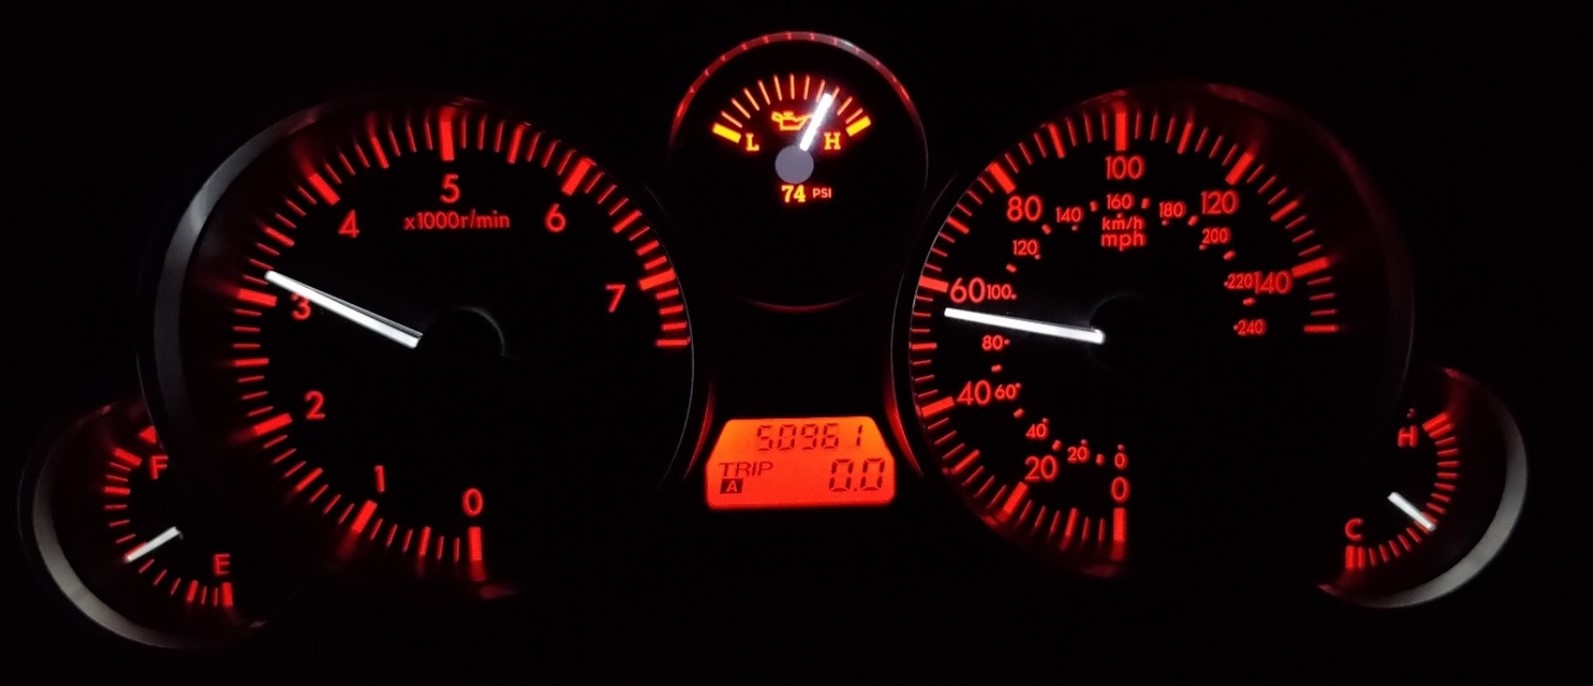
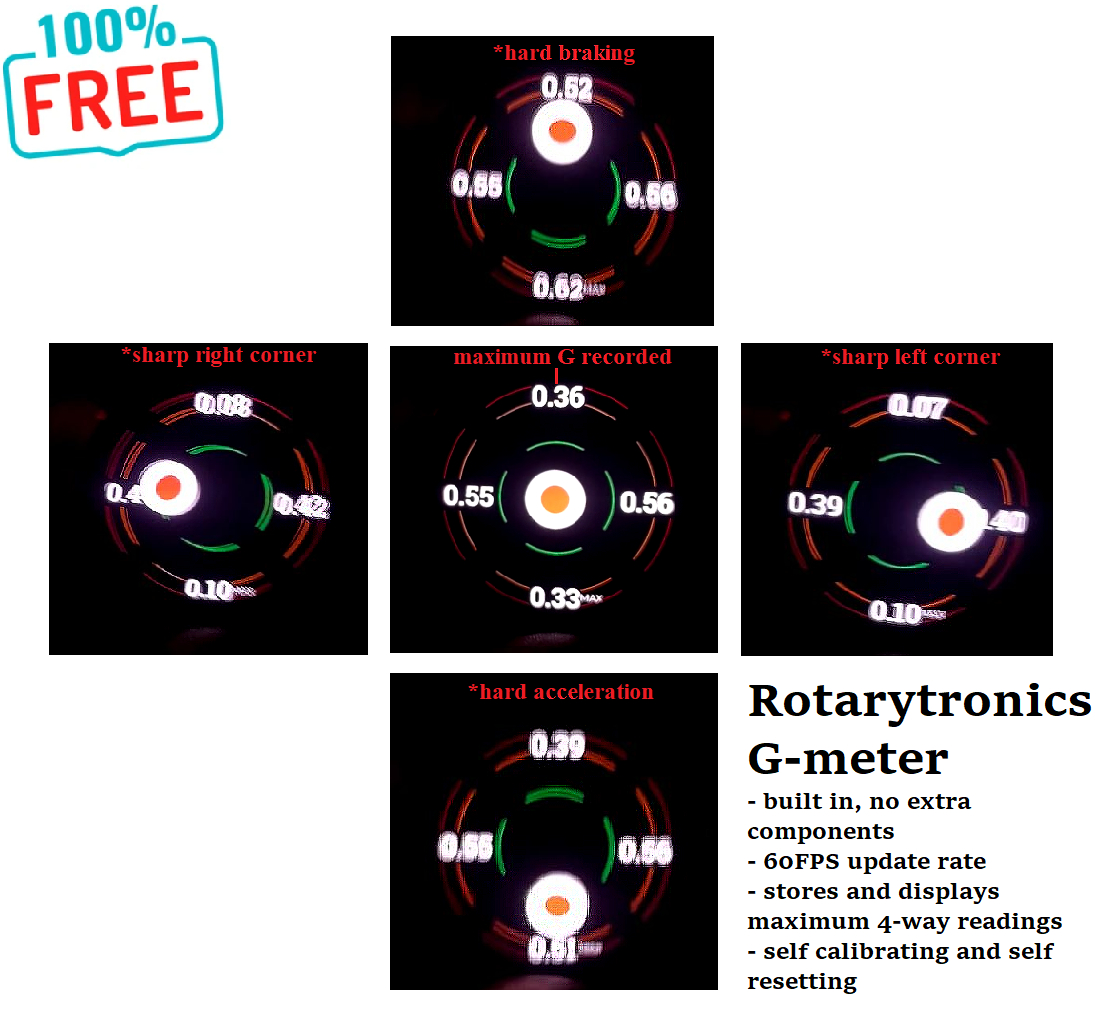
On top of all of those, the kit also features a buil in G-meter, as standard feature accessible via the customization keyboard (sorry – no other easy way of toggling through the screens but with the keyboard).
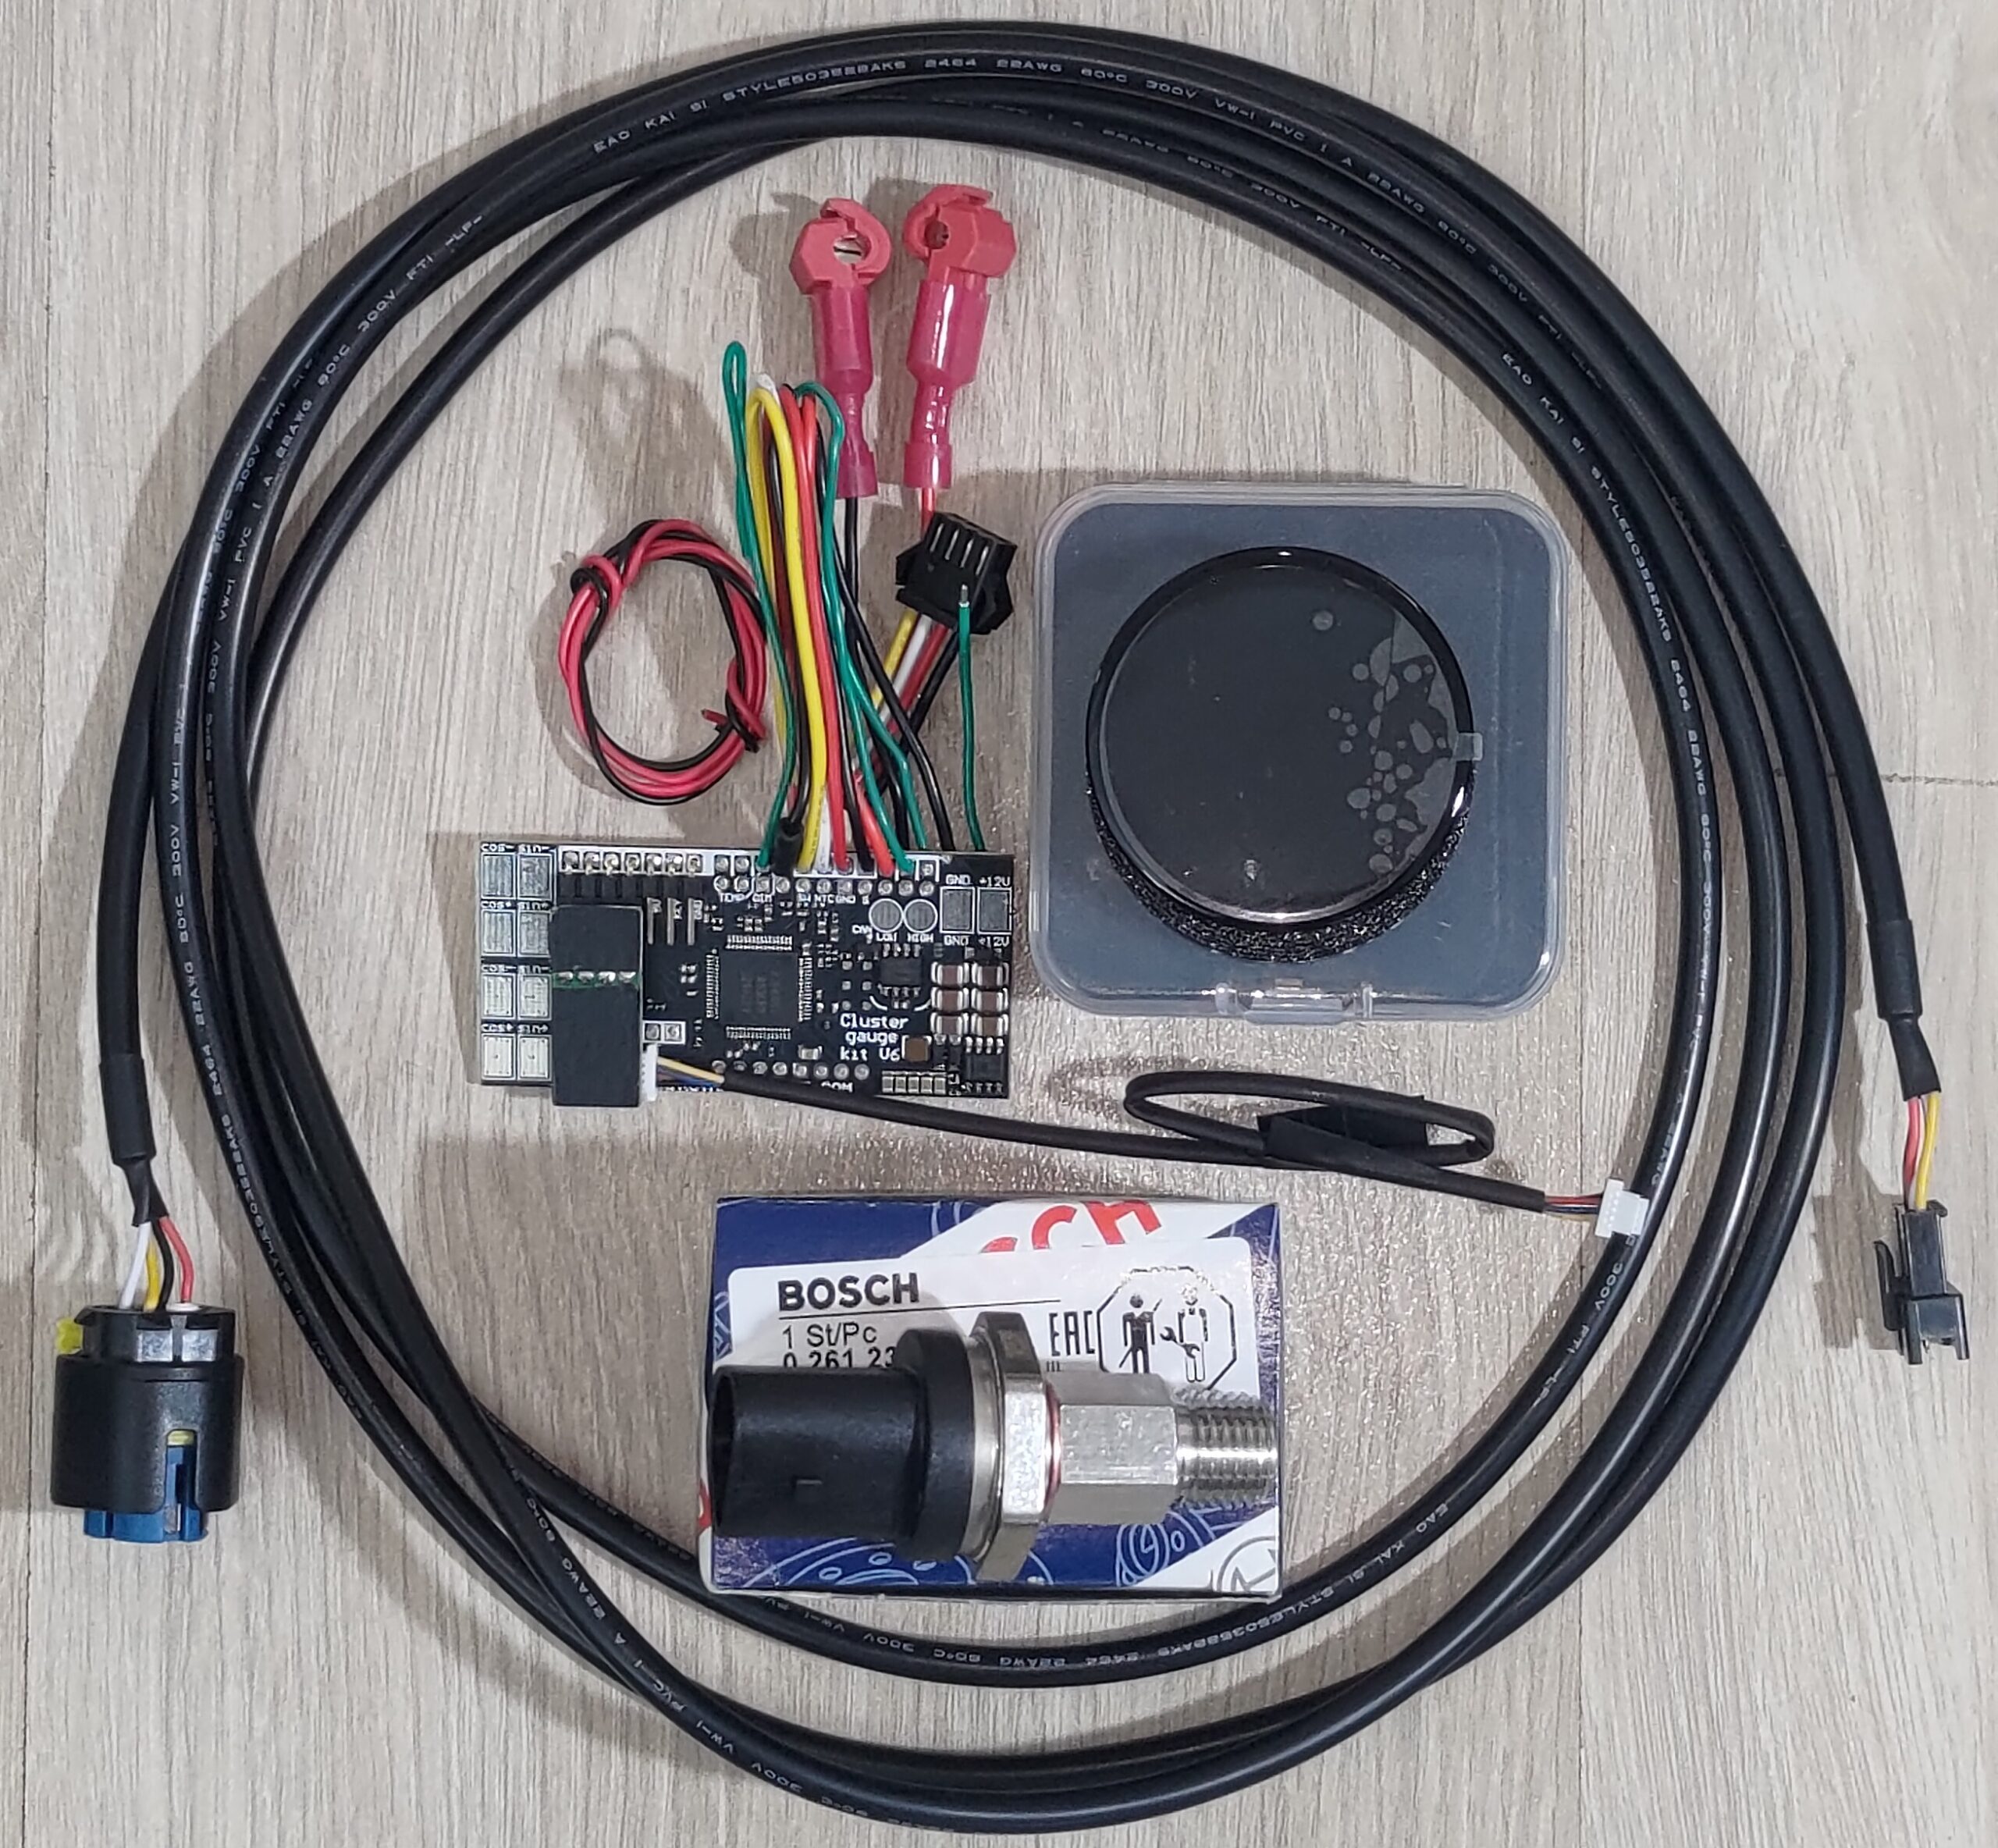
Full hardware is provided, depending of your configuration:
- combined oil pressure and temperature sensor from Bosch + 1/4 NPT adapter
- (optional) separate oil pressure sensor + separate oil temperature sensor
- wiring harnesses as needed
- V2 LCD screen assembly
- (optional) customization keyboard
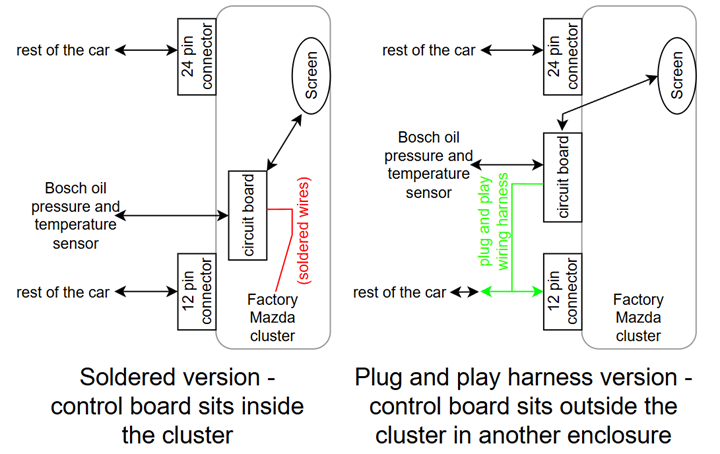
The plug and play wiring harness variant looks like so:

And the soldered-in variant looks like so:
The oil sensor setups are as follows:
- install ONLY an oil pressure sensor(included): the stock pressure switch is taken off and a proper oil pressure sensor is threaded in. This does not offer oil temperature monitoring.
- install separate oil pressure and oil temp sensors(both supplied and of 1/8″ NPT threads); This method is the cheapest however installation is not easy and everytime the filter needs to be changed it will be difficult – in case an oil filter adapter is used. This is most suited for cars on total engine swaps, or custom oil cooler setups, or as you wish.
- Use Bosch 0261230340 combined oil pressure + temp. sensor. Threads into stock OEM pressure switch port using a supplied adapter. Once installed, you’ll be able to change the oil filter as normal and get to measure these vital engine parameters. The sensor itself is expensive but surely the absolute best way about measuring oil pressure and temperature on a MX5. This is the most common setup, with over 99% of the kits sold using it, and the one pictured above.
All pressure sensors read up to ~150 psi / 10 bar / 1000kpa.
All temperature sensors read from -40F to 285F / -40C to 140C.
For MX5 NCs (2005-2015) the kit needs no extra coolant temperature sensor, as that information is taken from the stock sensor. However, the car only came with an on-off oil pressure switch, so here some more hardware is needed.
You can opt for a customization keyboard which allows you to change, at any time:
- alarm levels
- LCD style
- units of measurement
- further calibrate oil temperature readings, in case you need to install the sensor somewhere else
- enable or disable style changing based on cluster brightness
- enable or disable style changing based on headlights being on or off
- select the default gauge page at startup(what gauges the kit will show – coolant temp/oil pressure/oil temp or another set of 3, or the factory-like oil pressure gauge
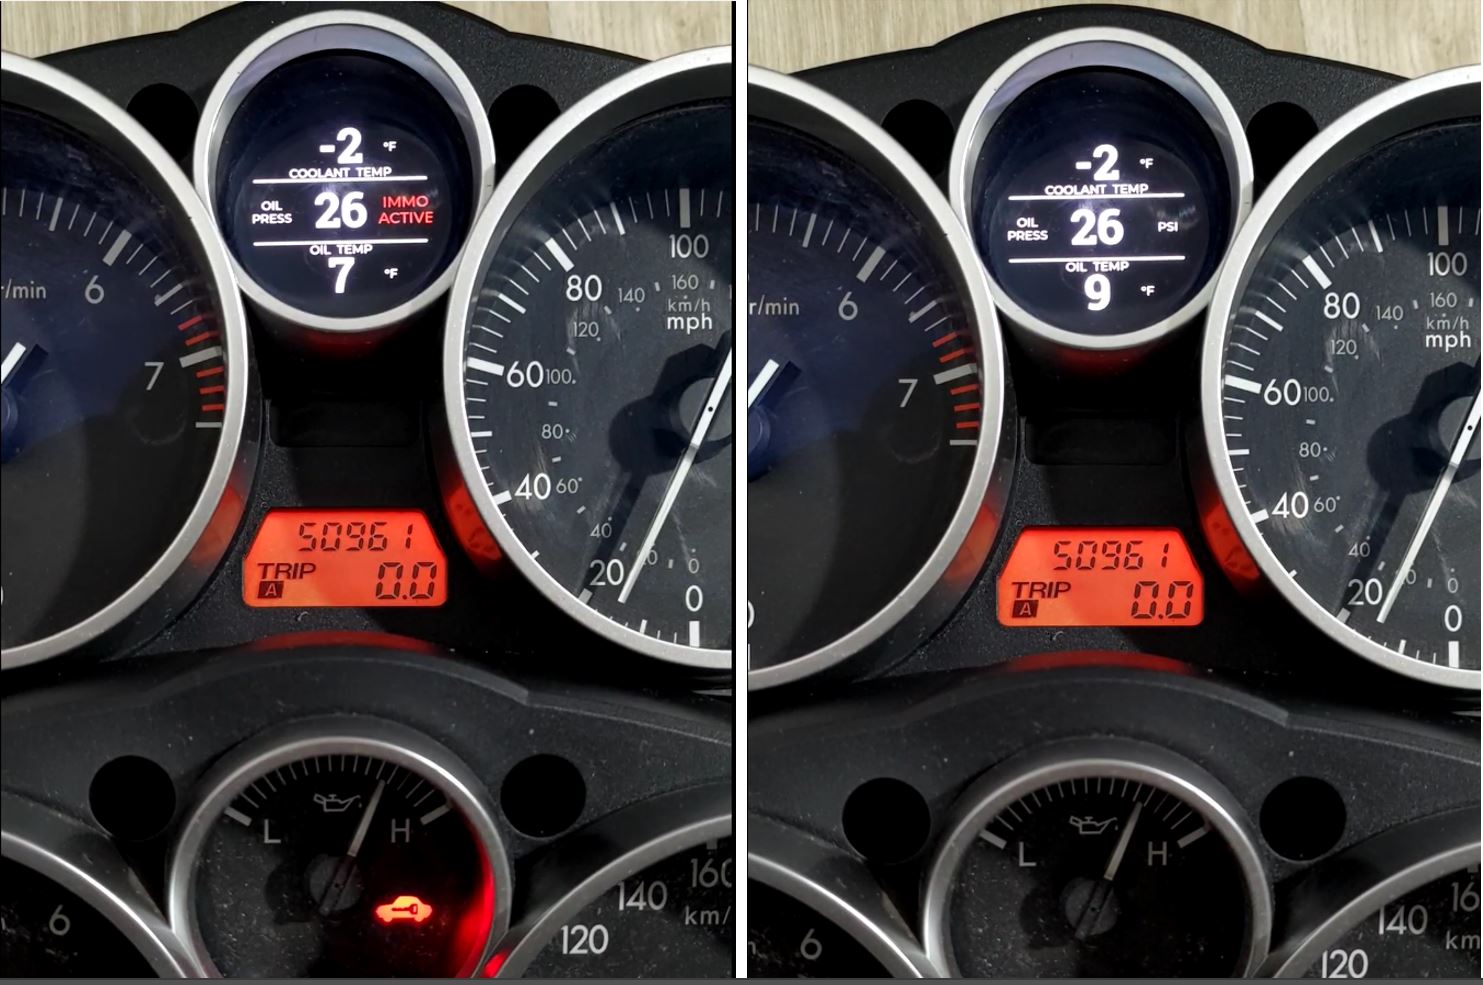
- enable or disable reenactment of the lights behind the screen – advanced keyless entry light, immobilizer activation light, high beams indicator, and for the cars that were retrofitted with cruise control – cruise control status lights.
- accomodate for the stock ECU, a stock but ROMDROP mapped ECU, or a Haltech standalone
- tweaking of shift light related parameters
Another optional feature is streaming of true oil pressure and temperature towards any OBD2 loggers that allows you to define custom sensors (such as Torque Pro).

Another optional feature is a RPM shift light built into the screen itself!
RPM is taken from native CAN messages in between the ECU and the cluster. This feature does NOT interfere with any OBD2 loggers.
Another feature is using multiple screen pages to show various other OBD2 gauges:

These pages can be selected at any time using the provided miniature keyboard, and they can be selected as the default page when booting up.
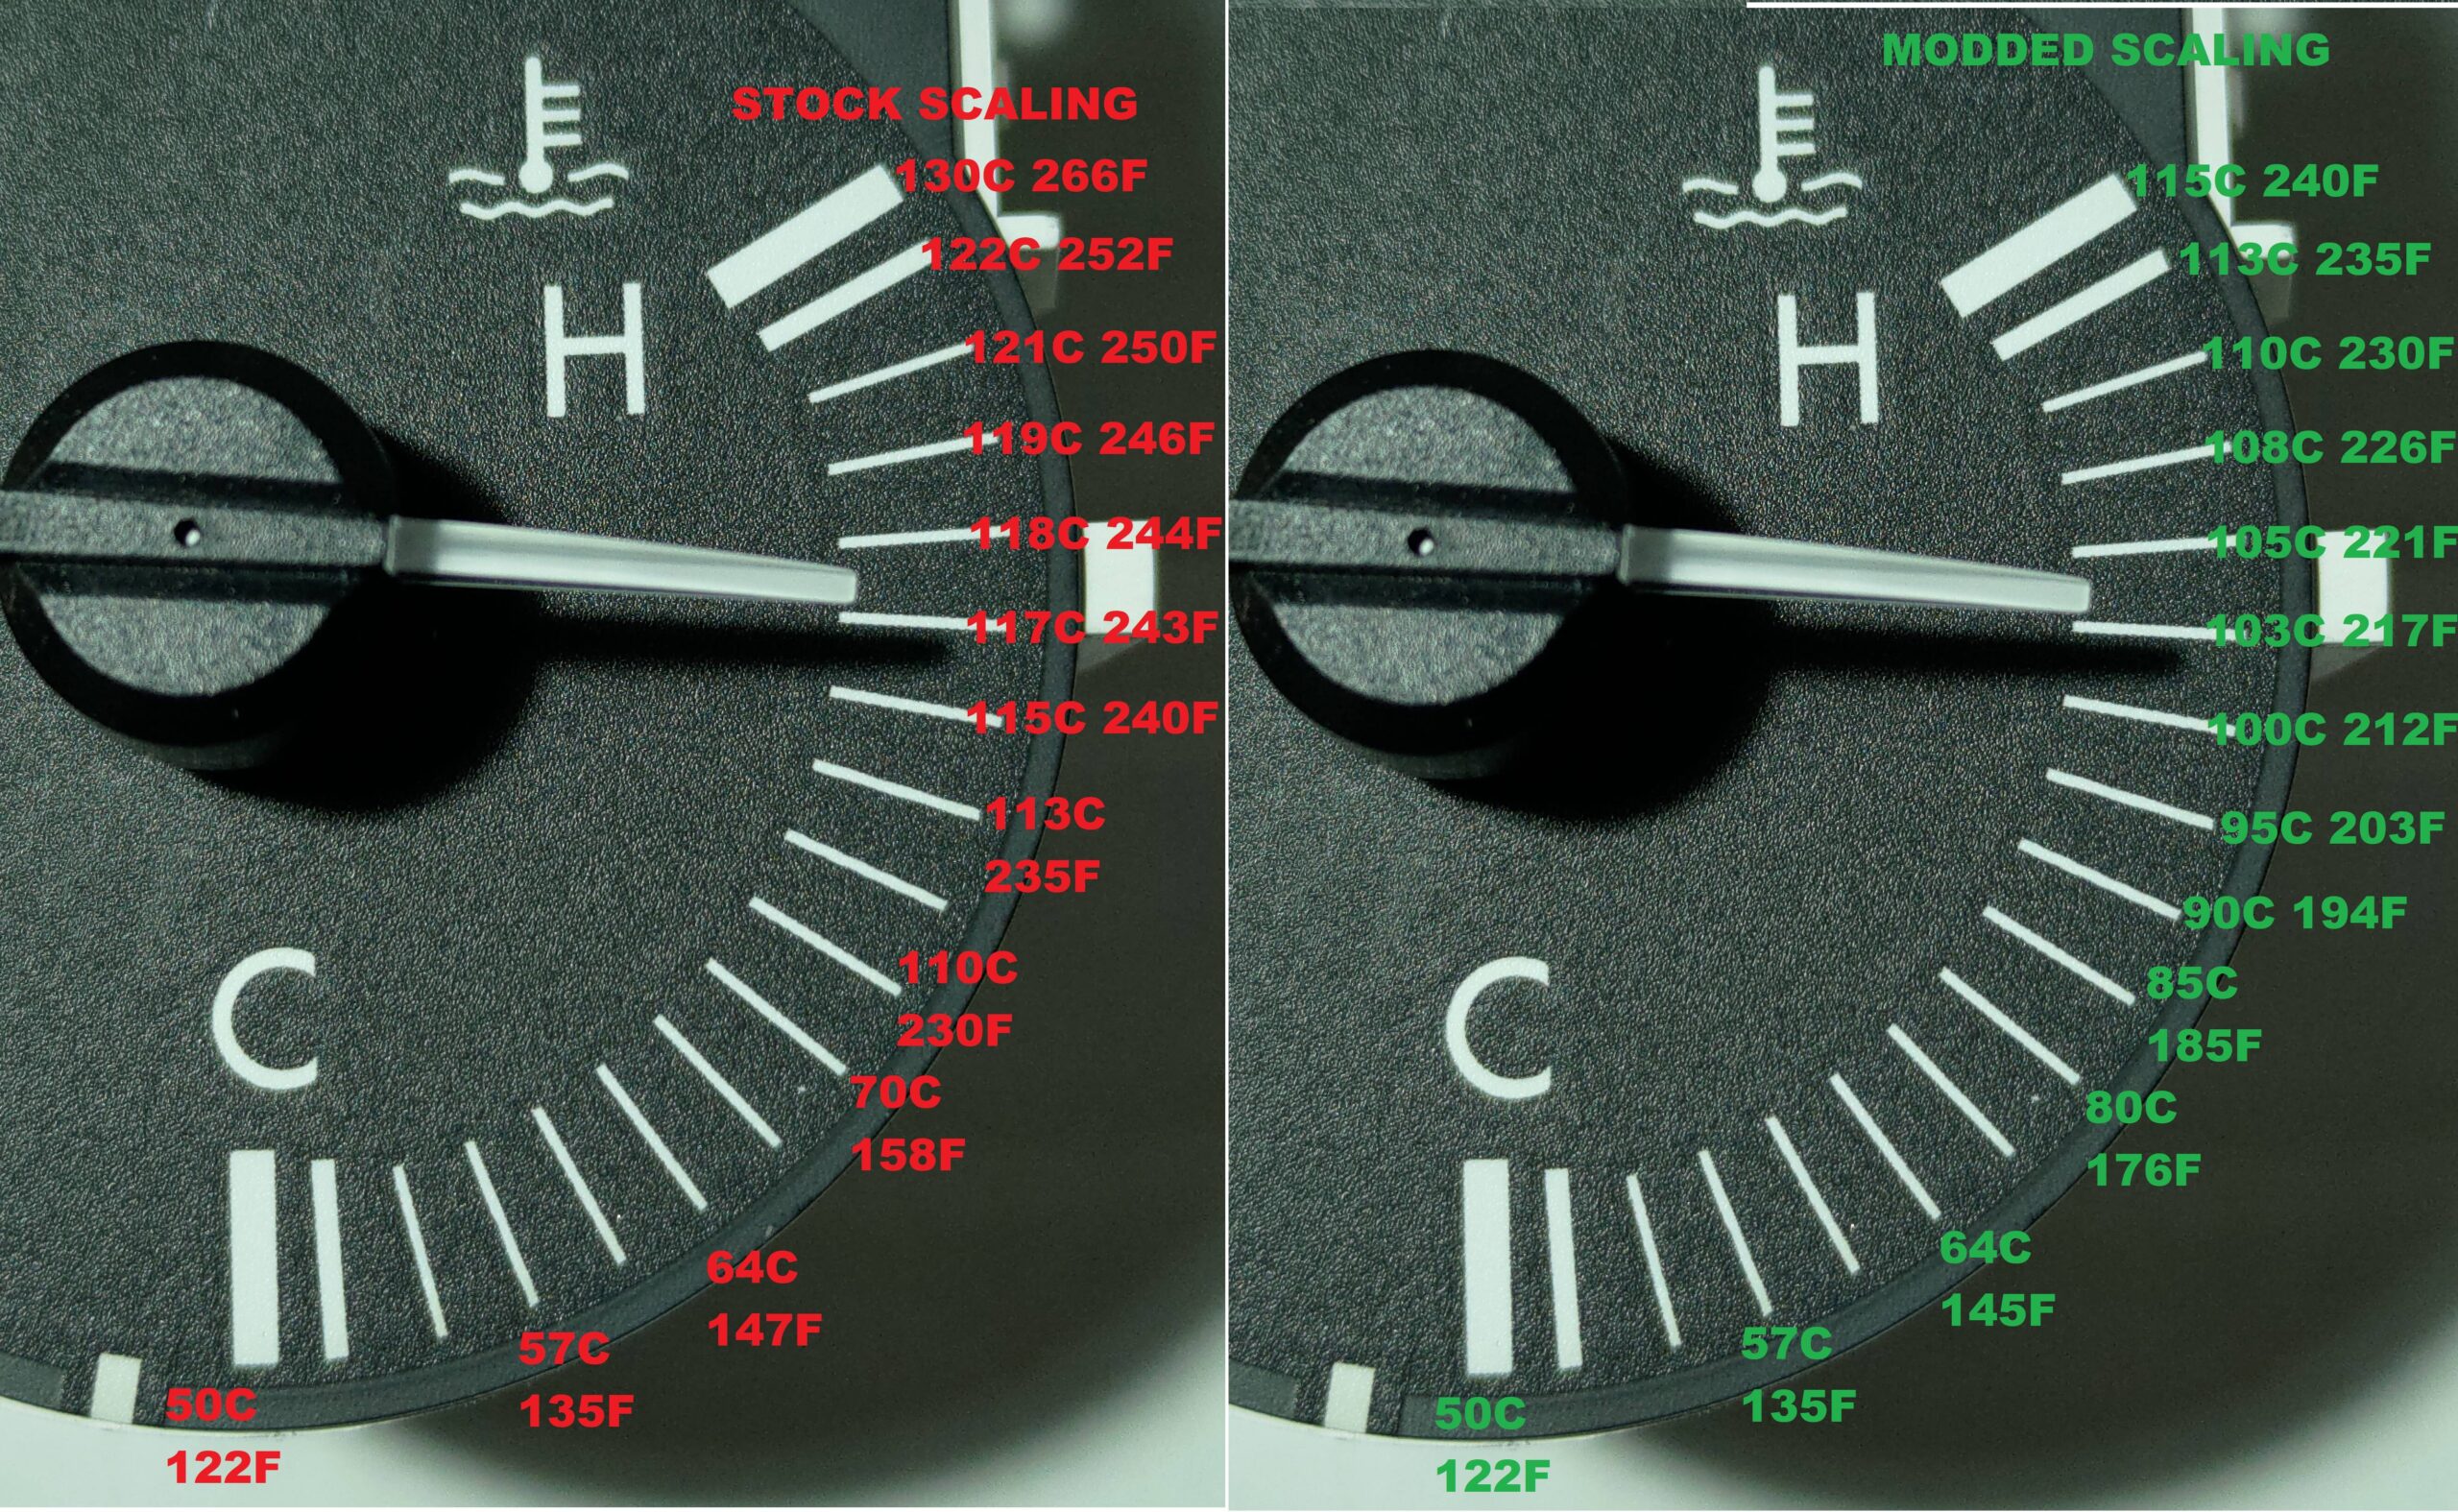
The V2 kit retains the possibility to rescale the factory coolant gauge, however this is not possible to do without soldering(as such, you need to select the soldered-in version when ordering):
Last but not least, the kit is now available in a solder-free variant! This means that no soldering of wires will be required, as the kit can be supplied with matching connectors for those found in the car and the cluster!
To get a complete picture of all the features and what the installation requires, find the install manual HERE – CLICK ME!
Note: the retrofit offer is only available to customers who can provide proof of purchase for a previous V1 kit. This would mean indicating an order number, or name/address and date of the previous purchase.
Additional information
| Weight | 0,4 kg |
|---|---|
| Dimensions | 10 × 10 × 20 cm |


G, Cobain (verified owner) –
Installed the V2 cluster gauge kit last weekend. Installation went well but super important to read the installation guide before starting work. The entire kit is well designed and readout is great for daily drives and track. The only improvement I’d like to see is a way to electronically level the display. While I carefully mounted the screen using the built-in notch as reference, the screen was still off by a degree or so. Nevertheless, an excellent kit.
Garrett McFarland –
Upgraded from the older kit I had since 2023. That one was awesome but this one somehow tops it. 120 bucks well spent.
Jake Thompson –
Just awesome. Screen is sharp and bright, data shown is real time. Integrates perfectly with the rest of the dash. Even had a custom color scheme made for free to match my revlimiter dash faces. Ciprian is a great guy and answered all my questions within minutes. Love the factory look.
Ethan Wilkin –
Awesome piece of kit. Beats anything else I could find and it was dirt cheap without sensors. I run a haltech and it integrates with that. I later found out I needed that 2 in 1 sensor to grab oil pressure and temp as I didn’t like any other method with filter adapters or custom filter stands. Plenty of support from Ciprian on the matter even if he had no reason to explain how to wire that sensor to a haltech ecu.